
You are using an out of date browser. It may not display this or other websites correctly.
You should upgrade or use an alternative browser.
You should upgrade or use an alternative browser.
2015 Build Thread
- Thread starter Maxx Mazda
- Start date
- :
- Completely Stock P5
Those iON springs were in my opinion, the best ever made for the protege. I spent quite a while doing R&D in the design process back in the day as I was sponsored by them before they went under. No reason to go to coilovers.
Bottom of the car looks cleaner then the top. Lol
it's crazy isn't it lol
Those iON springs were in my opinion, the best ever made for the protege. I spent quite a while doing R&D in the design process back in the day as I was sponsored by them before they went under. No reason to go to coilovers.
the older i get, the more i question myself about why i keep spending time tinkering with coilovers just so they sit a little lower when i was perfectly happy with the performance of my lowering springs.
- :
- Completely Stock P5
Not yet. Expect some updates soon. The final pieces are coming together!
MeAndMyPenguin
Member
- :
- 2002.5 Mazdaspeed Protege5
Can't wait for it man!
Sent from my XT1575 using Tapatalk
Sent from my XT1575 using Tapatalk
Jackie chan
Member
- :
- Pro5
Me neither! Im stoked!
Sent from my SM-G900T using Tapatalk
Sent from my SM-G900T using Tapatalk
- :
- Completely Stock P5
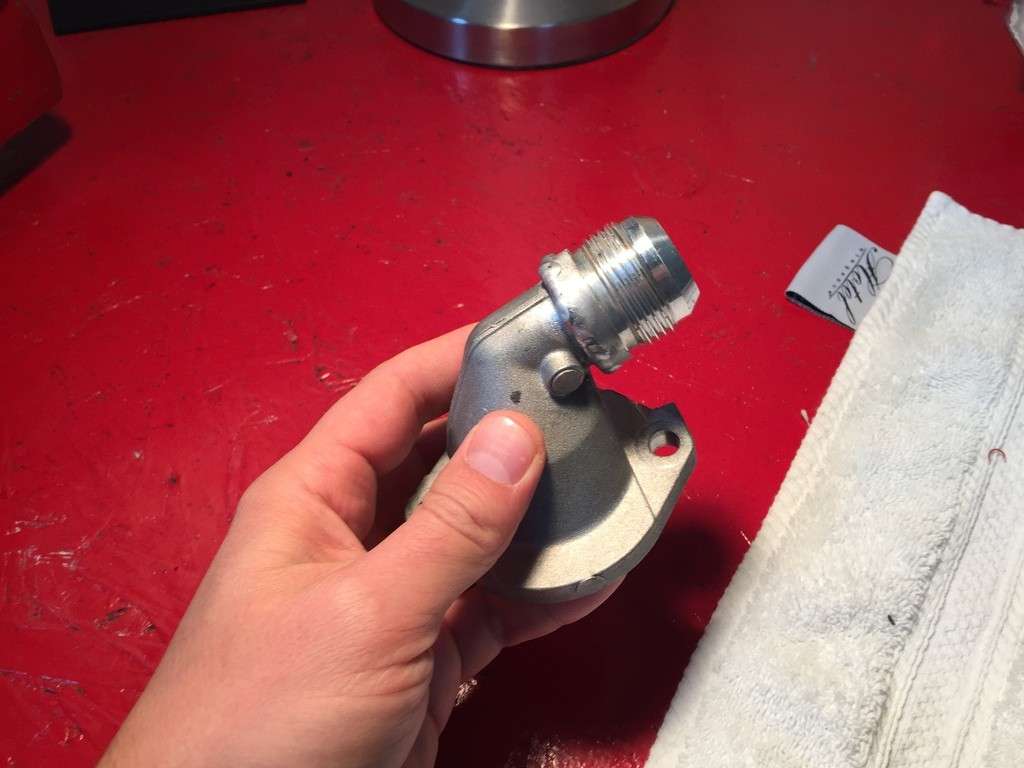
With the exhaust system finished, I could focus my attention on finishing the cooling system. I played around with a number of ideas for weeks before finally deciding on what's pictured. Because I had to flip the thermostat housing upside down to make room for the downpipe, and could no longer use the straight neck thermostat housing that I was running before, my options were limited. Either go up and around by where I have the oil filter mounted, and in front of the downpipe into the radiator, or go THROUGH the downpipe and have a straight shot into the rad. I went with option 2 because after mocking up both, it looks way more sano and inconspicuous, and the hose stays a lot further from the downpipe than it would have in front. At its closest point, there is still 2.5" between the downpipe and the hose, which itself is good for a few hundred degrees. Once the downpipe is ceramic coated, it won't be a problem.
In order to keep the requisite flow for how hot this thing is gonna be running, I had to go with -16AN fittings. Jesus those s**** are NOT cheap! After cutting and planning a spare stock water neck, I had Legendboy use his impeccable skills to weld on a fitting, as well as onto my no longer available PWR radiator. Didn't think twice about trusting him with it, he does amazing work. He even turned down the hex-head on the fitting to a round one for a nicer look!


In order to keep the requisite flow for how hot this thing is gonna be running, I had to go with -16AN fittings. Jesus those s**** are NOT cheap! After cutting and planning a spare stock water neck, I had Legendboy use his impeccable skills to weld on a fitting, as well as onto my no longer available PWR radiator. Didn't think twice about trusting him with it, he does amazing work. He even turned down the hex-head on the fitting to a round one for a nicer look!
- :
- Completely Stock P5
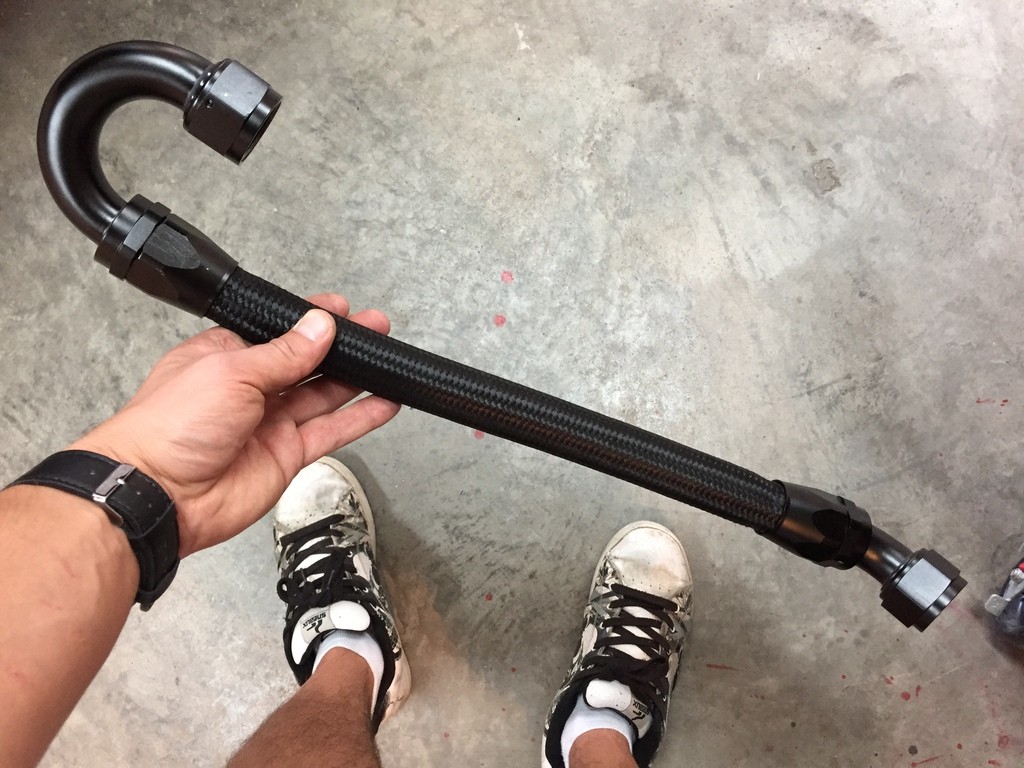
With the fittings welded up, I could focus on building the line. Since it's so damned expensive, I made sure to measure twice and cut once. Pleased with the results. While it doesn't stand out, that's exactly the point. Looks like it's supposed to be there. As you can see, plenty of clearance at it's closest point. Hand is for scale (banana not available.)


- :
- Completely Stock P5
As part of the MP3 parts car I snagged, I had a pewter/black Nardi wheel that looked like s***. I cleaned it up, and decided I'd try my hand at dying the leather back to the stock color. Prep is EVERYTHING. I was able to find leather dye at a local craft shop, and the "pewter" color was a perfect match! The only downside, is that wherever you dye the leather, there's no way to keep the stock pewter color on the stitching on the black leather. While it's not 100%, I figured I had nothing to lose and worst case I'd chuck the wheel out, or give it away. I'll keep it for now until I throw a JDM Nardi on it this winter. I just want to drive this thing before the snow flies.
Start by cleaning the wheel, stripping all the oils and sanding down the rough leather:


Once the wheel is dyed and properly cured, the leather once again looks rich and soft:

Mounted back in the car to showcase the excellent color match. Those are stock colored radio bezels and center cupholders.


Start by cleaning the wheel, stripping all the oils and sanding down the rough leather:
Once the wheel is dyed and properly cured, the leather once again looks rich and soft:
Mounted back in the car to showcase the excellent color match. Those are stock colored radio bezels and center cupholders.
- :
- MSP 1145
love your car, as always. great work.
- :
- Completely Stock P5
Well, after almost 5 years, it’s alive again. I have hundreds of pics to post and lots of work to do in this thread once im
back home.
back home.
- :
- MSP 1145
Cant wait to see them!!!
Similar threads

Latest posts
-
-
2016~2023 CX-9 DIY Cylinder head replacement (workshop/service manual)
- Latest: Silly Wabbit
-