
- :
- MazdaSpeed 6
In order to maximize performance from this kit on your MS6, it should be installed as pictured and described below.
Tools needed:
3/8” Ratchet
3/8” short extension
8mm Short Socket
10mm Short Socket or Ratcheting Wrench
12mm Short Socket or Ratcheting Wrench
6 short wire ties
Step 1: Layout all the wires on the ground or on a Towel and take notice that all of them are different lengths.
Step 2: Unbolt the positive and negative terminals on your battery, keep them seperated
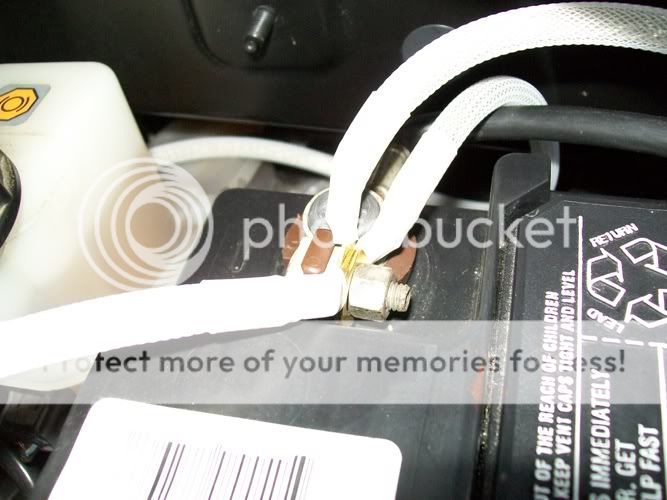
Step 3: Take the Smallest Length Wire and run it from the Battery Tie down Bolt to the Negative Terminal on your battery, I just let the line sit near the Negative Terminal while I routed the other wires.
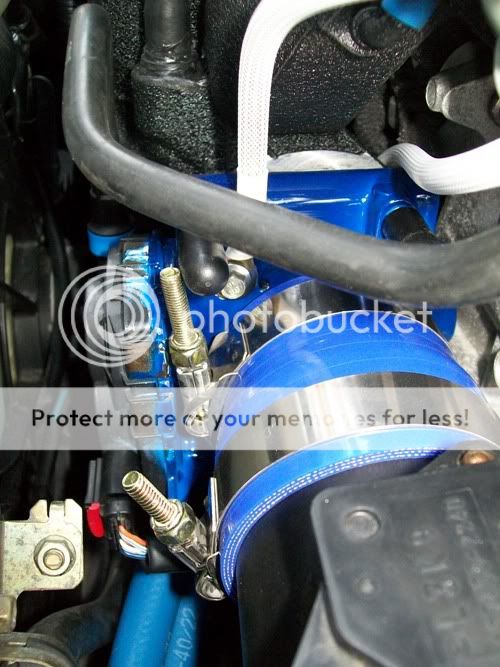
Step 4: Unbolt the Top left TB bolt, it’s an 8mm, and run the Shortest of the 2 Longer Length wires from their to the Negative Terminal, Reinstall the TB Bolt and tighten accordingly. Should look something like this once done
Note: If your running the stock TMIC, it may be easier for you too use your Bottom Left Throttle Body Bolt instead of the Top One
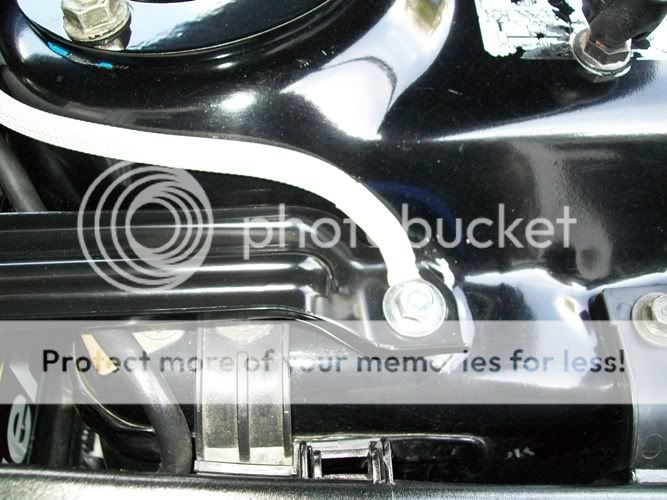
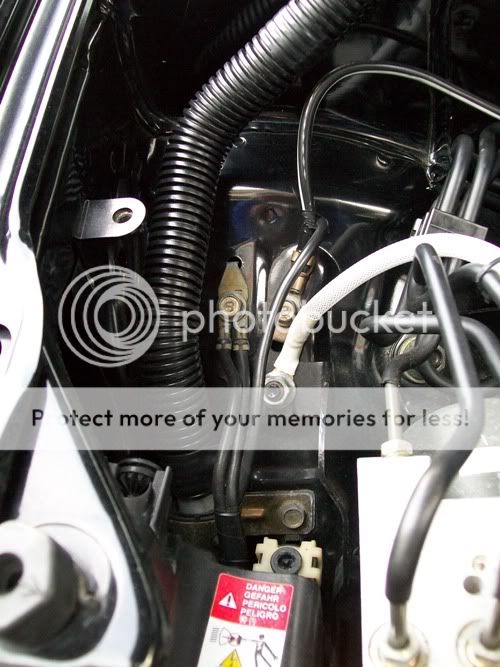
Step 5: Unbolt the Top Right Power Steering Pump Bolt, it’s a 12mm and install the Longest Length Wire here, you can route this wire anyway you want I ran mine under the Intake Manifold but it is not necessary to do that. While you’re doing this take the last wire and Run it from the PS Pump Bolt to the nut pictured On the body. Should look something like this once done


Step 6: Bolt down all 3 grounding wires to your negative terminal on your battery. Should look something like this.
Step7: Reinstall your Positive Terminal on your battery, use the wire ties to clean up the placement of them, ill leave that up to you guys where you want them to be routed and placed,
here's my routing

Step 8: Enjoy!!!
this is pretty straight forward, and can be easily done in under 15 minutes. All newer model cars Live off of grounds, including ours so this kit is an awesome addition to your mod list, and the variety of colors FI provides is awesome as well..
Link to The FI site where you can purchase this kit
http://www.flex-innovations.com/new_page_2.htm
What this kit was designed to do :
- reduces noise in the electrical system. This noise could potentially cause the internal engine sensors to read falsely, and lead to a suboptimal state.
- the car ran smoother with less stumbling with this kit installed
- using a multimeter to test the engine before/after grounding, there was a slight improvement.
- maybe a HP increase of 2-5 HP, but i did not dyno my car before this and after this kit was installed so there is no way to tell, but other platforms have seen slight increases.
- improved ECU signals and throttle response resulting in better performance and reduction in flat spots
- Better lighting performance,often times it helps sustain brighter output, especially under electrical load they dont dim as much, sometimes at all.
Tools needed:
3/8” Ratchet
3/8” short extension
8mm Short Socket
10mm Short Socket or Ratcheting Wrench
12mm Short Socket or Ratcheting Wrench
6 short wire ties
Step 1: Layout all the wires on the ground or on a Towel and take notice that all of them are different lengths.
Step 2: Unbolt the positive and negative terminals on your battery, keep them seperated
Step 3: Take the Smallest Length Wire and run it from the Battery Tie down Bolt to the Negative Terminal on your battery, I just let the line sit near the Negative Terminal while I routed the other wires.
Step 4: Unbolt the Top left TB bolt, it’s an 8mm, and run the Shortest of the 2 Longer Length wires from their to the Negative Terminal, Reinstall the TB Bolt and tighten accordingly. Should look something like this once done
Note: If your running the stock TMIC, it may be easier for you too use your Bottom Left Throttle Body Bolt instead of the Top One
Step 5: Unbolt the Top Right Power Steering Pump Bolt, it’s a 12mm and install the Longest Length Wire here, you can route this wire anyway you want I ran mine under the Intake Manifold but it is not necessary to do that. While you’re doing this take the last wire and Run it from the PS Pump Bolt to the nut pictured On the body. Should look something like this once done
Step 6: Bolt down all 3 grounding wires to your negative terminal on your battery. Should look something like this.
Step7: Reinstall your Positive Terminal on your battery, use the wire ties to clean up the placement of them, ill leave that up to you guys where you want them to be routed and placed,
here's my routing
Step 8: Enjoy!!!
this is pretty straight forward, and can be easily done in under 15 minutes. All newer model cars Live off of grounds, including ours so this kit is an awesome addition to your mod list, and the variety of colors FI provides is awesome as well..
Link to The FI site where you can purchase this kit
http://www.flex-innovations.com/new_page_2.htm
What this kit was designed to do :
- reduces noise in the electrical system. This noise could potentially cause the internal engine sensors to read falsely, and lead to a suboptimal state.
- the car ran smoother with less stumbling with this kit installed
- using a multimeter to test the engine before/after grounding, there was a slight improvement.
- maybe a HP increase of 2-5 HP, but i did not dyno my car before this and after this kit was installed so there is no way to tell, but other platforms have seen slight increases.
- improved ECU signals and throttle response resulting in better performance and reduction in flat spots
- Better lighting performance,often times it helps sustain brighter output, especially under electrical load they dont dim as much, sometimes at all.
Last edited:


