Gauge Install

Jmterminator

Member
:
2006 Mazdaspeed 6
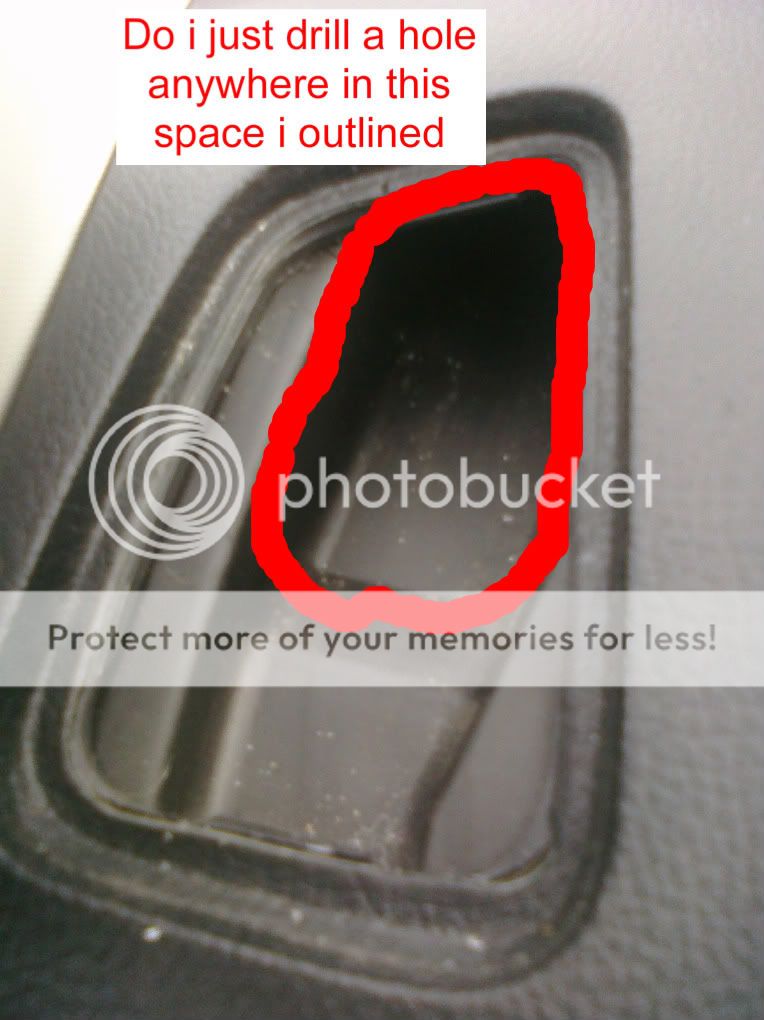
Ok sorry for creating a new thread for this but i couldn't find any info on installing a Boost Gauge in a Speed6. So im installing a boost gauge with the defrost vent pod made by block8head. The questions i have is first where do i drill a hole for the wires to go through i know its in the ducting for the defrost vent but where exactly. Here is a picture explaining what i mean:
CIMG0074-1.jpg


Also did you guys just use the interior fuse box for your power, and if so did you use fuse taps?

And last im using a prosport 60mm electrical boost gauge, i read somewhere that someone said mount the sender inside the car and run the vacuum line into the interior of the car to the sender. Rather then keeping the sender under the hood, this way the sender wont get wet and burn up. Is this the best way to do it?

Any info is much appreciated
 
I have the same gauge mounted in the same location. I drilled my hole to the left side of your outlined area. The area beneath that spot seemed to be the most open to me. You do have to be careful as it is easy to mar the surface of the dash with your drill motor (it is helpful if you have a long bit).

I used a fuse tap on the internal fuse box, just be sure to mount it to the power side of the slot you use (my mistake initally, the gauge wouldn't work until I flipped the tap around).

Finally, I have seen several different ways of mounting the sender. One guy mounted his inside the engine compartment fuse box running the connection for the vacuum hose out the top. I mounted mine hard against the firewall in the engine compartment taking care to shield it as much as possible from the elements. It hasn't given me any problems yet.

BTW the pod from block8head is wonderful. It angles the gauge just right to see when you are scanning your instruments.
 
Thanks for the info its really helpful, one other question. I read somewhere on the net that when you tap into a fuse you should up the fuse, so if it was a 10 you would go to a 15 and so on and so forth. Do i need to do this or can i just use the fuse that's already there?

Also i found a fuse in the fuse box that has a constant 12v power, and i found one that has power when the ignition is turned on. But where do i hook the wire for when the headlights are on so it changes color?

Thanks
 
Last edited:
What I did was use an add-on fuse tap and connected it to an open slot in the fuse box. You can find those at an auto parts store in their electrical section.

I hooked mine up so it is always the same color so I can't answer your other question. I tried getting it to work off the dimmer switch but didn't have any luck with doing that, so I live with the constant level of brightness. BTW, you will want to use the hood that came with your Prosport when you install it in the pod, otherwise you will get a lot of reflection off the windshield at night (still get some even with the hood).
 
Well good news i got the gauge all installed and done yesterday. Im loving it, i had my brother help me out with the electrical and we were able to get it so the gauge is white during the day and red at night. So it all worked out well.
 
How long did it take you to get the stench of burning plastic out of the interior?
 
I left my sender in the engine bay mounted to the firewall. I wanted my signal as close to the source as possible.
 
Sender units are for electrical gauges only. You will just have a vacuum tube ran from the gauge through the cabin into the firewall and then T'd into the vacuum line on the bpv.
 
A boost gauge measures and indicates the air pressure in the manifold of a turbocharged internal combustion engine. Boost gauges are typically mounted on the dashboard, the driver's side pillar or the driver's side air vent of a vehicle. In a Mazda, a boost gauge plays an important role in ensuring that the truck's turbocharged engine is not generating excessive pressure, which could significantly damage the engine manifold. Mazda pickup trucks are not built with turbocharged engines; instead, OEM Mazda are built with heavy-duty engines that are designed to withstand the strenuous workloads for which pickup trucks are designed. Consequently, it is essential that you properly install a boost gauge if you make aftermarket modifications to turbocharge your Mazda engine.

The easiest place to install a boost gauge on a Mazda is in the driver's side air vent. The first step is to open the truck's hood and identify the engine's air vacuum tube. The vacuum tube runs from the engine's manifold to the bypass valve. Cut the vacuum tube and insert a T-connector into each end. Attach the third end of the T-connector to the tube that came with the boost gauge, and seal the attachments using zip ties. The boost gauge's air tube delivers air from the engine's manifold to the gauge, allowing the gauge to determine the air pressure in the manifold. Snake the free end of the boost gauge's tube around the engine and into the car's air intake pipe. Thread the tube up through the air intake pipe towards the vent where the gauge will be installed. The best way to do this is to unwind a wire hangar and attach some tape to the end of it. Stick the hangar down through the air vent until it reaches the end of the tube, and use the hangar to pull the tube up to the vent. You will need to remove the vent grate by prying it loose with a flathead screwdriver or a similar device.

A typical boost gauge has two wires, one to provide the boost gauge with power and one to ground the boost gauge. You can attach the ground wire to any good ground, including a metal structure or another ground wire in the Bravo's electrical system. The power wire can be attached to the wiring for other aftermarket gauges (such as a transmission temperature gauge) or to the wiring for the truck's break lights. Follow the break light wire to the switch. In a Mazda, the break light switch is located in the fuse panel behind the glove compartment. Twist the ends of the boost gauge power wire around the switch, and clamp the wire ends in place using a pair of wire crimpers.

The final step in installing the boost gauge is to mount the gauge on the car's air vent. Coat the bottom end of the gauge with a thin layer of superglue, and affix it firmly to the edges of the air vent. If the gauge fits inside the air vent, you can coat the outside of the gauge with superglue and slide it directly into the vent. Hold the gauge in place for a few minutes to ensure that it is stable. Test that the gauge is functioning properly by revving the car's engine a few times to see how the gauge responds.
 
I still vote that the sender should be put inside the passenger compartment. Perhaps I was unlucky, but mine fried after a few months on the other side of the firewall. I ordered a new one, reinstalled it in the passenger compartment, and have been malfunction-free ever since.

-Jay
 
use a butter knife wrapped in a towel, stick it under the front lip and pry up gently.
 
You should be able to put your fingers on the vents themselves and squeeze and pull up the front. Or use a knife of flathead.
 
Back