
OJ Bartley
Member
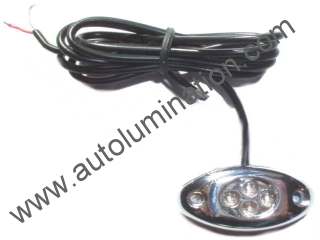
As I’m sure most of you know, our stock trunk lighting isn’t the brightest. I tried a single high power LED bulb swap, and it was whiter, but not as bright, so I thought I’d eventually figure out an alternate solution, which I now have. I found these Mini Utility LEDs at autolumination.com (under light fixtures for the home & RV), and thought they’d be great as supplemental lighting.
** EDIT: I would recommend using 3 of the Mini Utility LEDs for this project. 2 put out a good amount of light, but 3 would be even better, and not much more work. **
I had read a sticky on how to remove the rear deck, and followed that, although it did leave out a step. Once you get the seats down, there are little switches you have to push to release the side bolsters. Otherwise it wasn’t too bad once you locate all the little push fasteners, and realize that you really do have to give the deck a few good tugs to get it loose. Here’s the exposed rear deck, with the existing trunk bulb circled, and a shot of the deck upside down in the back seat.


Once you get the deck off, have a look from inside the trunk to figure out your positioning for the lights, so you can decide which holes to use. As far as I know, any of them will work fine, and I picked one on each side and marked a small X where I thought I’d stick the lights. I ended up using different placement in the end though.


Since there were a few wires involved, and I wanted to clean everything up with heat shrink instead of taping, I decided to cut the existing wire to tap in, rather than just stripping a section. Disconnect your battery before getting into the wiring!! I brought the connections over to the passenger side (there was more than enough wire on the LED fixtures), slid the heat shrink on, and twisted everything up for a test. All worked fine, and I was good to go, until I touched the wires together and blew a fuse. That’s why you should disconnect, I ended up having to reprogram the stereo presets anyway, and this way you and your car are much safer. After disconnecting, I got back at it.


It rained while I was in between these steps, so apparently my Blackberry camera had a hard time with the focus and all the drop shadows, but you can see the small heat shrink tubes on the two connections on the right, and the bigger tube on the left that I put over them to hold it all together nice and tight.

Also, I forgot to take a picture of the final double-shrunk wire, but I was happy with the way it turned out. I put everything back together, and left the fixtures dangling by their wires for a little while, until I had time at night to investigate where the best location to mount them would be, and I found that closer to the rear of the car was better for overall light exposure. Here’s the passenger side…


and the driver side, after tucking the wires up inside the holes.


I tried to pick locations that would spread the most light, but also had some protection from the existing overhang, so they would be less likely to be scraped or damaged by any large objects.
And here’s the much brighter trunk at night, seriously it was a huge improvement, and for a couple of tiny $4.99 fixtures, and an hour or so worth of work, I’m very happy with the result. Tough to tell in the pictures, but I tried to adjust them a bit to show closer to how it really looks. The dark carpet doesn’t show up well, but it is way better. I’m not so impressed with the Mazda cargo net, which is totally in the way of anything else you try to put in the trunk, but it is what it is.


On a side note, I noticed this little black plastic thing between the back seat and trunk, mounted underneath the deck, against the seat backs. Does anyone know what it is/does?

Difficulty = (3)
Tools = (wire strippers, tape/heat shrink, tiny flathead screwdriver)
Cost = (under $20.00)
“O” Factor = (5 - much better lighting)
** EDIT: I would recommend using 3 of the Mini Utility LEDs for this project. 2 put out a good amount of light, but 3 would be even better, and not much more work. **
I had read a sticky on how to remove the rear deck, and followed that, although it did leave out a step. Once you get the seats down, there are little switches you have to push to release the side bolsters. Otherwise it wasn’t too bad once you locate all the little push fasteners, and realize that you really do have to give the deck a few good tugs to get it loose. Here’s the exposed rear deck, with the existing trunk bulb circled, and a shot of the deck upside down in the back seat.
Once you get the deck off, have a look from inside the trunk to figure out your positioning for the lights, so you can decide which holes to use. As far as I know, any of them will work fine, and I picked one on each side and marked a small X where I thought I’d stick the lights. I ended up using different placement in the end though.
Since there were a few wires involved, and I wanted to clean everything up with heat shrink instead of taping, I decided to cut the existing wire to tap in, rather than just stripping a section. Disconnect your battery before getting into the wiring!! I brought the connections over to the passenger side (there was more than enough wire on the LED fixtures), slid the heat shrink on, and twisted everything up for a test. All worked fine, and I was good to go, until I touched the wires together and blew a fuse. That’s why you should disconnect, I ended up having to reprogram the stereo presets anyway, and this way you and your car are much safer. After disconnecting, I got back at it.
It rained while I was in between these steps, so apparently my Blackberry camera had a hard time with the focus and all the drop shadows, but you can see the small heat shrink tubes on the two connections on the right, and the bigger tube on the left that I put over them to hold it all together nice and tight.
Also, I forgot to take a picture of the final double-shrunk wire, but I was happy with the way it turned out. I put everything back together, and left the fixtures dangling by their wires for a little while, until I had time at night to investigate where the best location to mount them would be, and I found that closer to the rear of the car was better for overall light exposure. Here’s the passenger side…
and the driver side, after tucking the wires up inside the holes.
I tried to pick locations that would spread the most light, but also had some protection from the existing overhang, so they would be less likely to be scraped or damaged by any large objects.
And here’s the much brighter trunk at night, seriously it was a huge improvement, and for a couple of tiny $4.99 fixtures, and an hour or so worth of work, I’m very happy with the result. Tough to tell in the pictures, but I tried to adjust them a bit to show closer to how it really looks. The dark carpet doesn’t show up well, but it is way better. I’m not so impressed with the Mazda cargo net, which is totally in the way of anything else you try to put in the trunk, but it is what it is.
On a side note, I noticed this little black plastic thing between the back seat and trunk, mounted underneath the deck, against the seat backs. Does anyone know what it is/does?
Difficulty = (3)
Tools = (wire strippers, tape/heat shrink, tiny flathead screwdriver)
Cost = (under $20.00)
“O” Factor = (5 - much better lighting)
Last edited:
")