Disclaimer: By reading this, the reader accepts full responsibility in performing the following work at his or her own risk. I cannot assume responsibility for any damage, injury as a result of you the reader, following my instructions. Im still new to the painting of car accessories, so please correct me if you notice something wrong
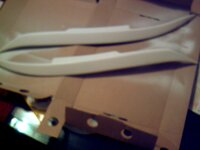
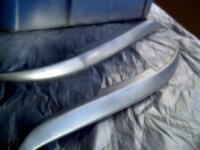
So, to start off, I bought my eyelids off of eBay for $19.99. they did not come pre- primed. They are made of ABS plastic. Here's all the items needed.
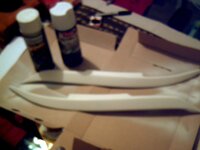
Parts & Paint
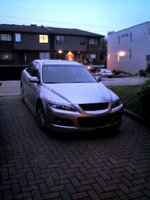
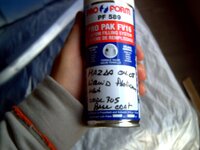
-Color Paint code for your car (I have the Liquid Platinum MS6, the code is 30S)
-OEM Spray paint for base coat.
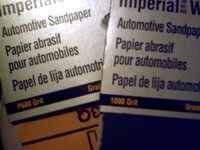
-600, 1000, 1500, and 2000 grit sandpaper
-Flexible primer paint for plastic
-Towels or newspaper for covering area
Procedure:
-First, clean the entire painting surface with a 600 grit paper. Rough the surface up enough so the primer will cover well. Then, after about 2-3 coats of primer (lightly sanding in between with 1500 grit), use a damp cloth to remove all small dust particles from the surface. It may get a bit messy, so try to do it outside or a well ventilated area, I did it on my deck.
-Then, once you have a nicely covered surface, front and edges, use the base coat paint that you got from your dealer. Use paint in a slow-swift movement across the surface of the eyelids. **The thinner, swift coats, the better the finish**
-Once you have covered the surface of the eyelid with one good coat, let it dry completely for roughly an hour. Once dry, use a 1000 grit paper with water finishing with a 1500 to remove any little particles between coats, still wet sanding, not dry sanding. Repeat until you have roughly 3 coats of base on the surface.
-When all base coats have dried, use the 2000 grit paper in a very slight manner with water. Remove particles with water and a light rag. Dry off completely and let sit for 10 minutes.
-Once dry, finish with at least 3-4 coats of clear coat, allowing 1-1.5 hours between coats (depending on temp). Use the 2000 grit paper between coats with water. Allow to dry.
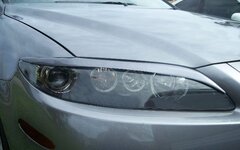
prep area for install; I washed the are with a wet rag and dish washing soap, to get rid of the oils and debris. I heated the inside of the eyelids on the double side tape to make it extra sticky when attaching it to the light.
Note: everything I did were under specific instructions from my buddy at the local garage
Hope you guys have as much fun doing this as I did.
Good luck, SNOOKY!
So, to start off, I bought my eyelids off of eBay for $19.99. they did not come pre- primed. They are made of ABS plastic. Here's all the items needed.
Parts & Paint
-Color Paint code for your car (I have the Liquid Platinum MS6, the code is 30S)
-OEM Spray paint for base coat.
-600, 1000, 1500, and 2000 grit sandpaper
-Flexible primer paint for plastic
-Towels or newspaper for covering area
Procedure:
-First, clean the entire painting surface with a 600 grit paper. Rough the surface up enough so the primer will cover well. Then, after about 2-3 coats of primer (lightly sanding in between with 1500 grit), use a damp cloth to remove all small dust particles from the surface. It may get a bit messy, so try to do it outside or a well ventilated area, I did it on my deck.
-Then, once you have a nicely covered surface, front and edges, use the base coat paint that you got from your dealer. Use paint in a slow-swift movement across the surface of the eyelids. **The thinner, swift coats, the better the finish**
-Once you have covered the surface of the eyelid with one good coat, let it dry completely for roughly an hour. Once dry, use a 1000 grit paper with water finishing with a 1500 to remove any little particles between coats, still wet sanding, not dry sanding. Repeat until you have roughly 3 coats of base on the surface.
-When all base coats have dried, use the 2000 grit paper in a very slight manner with water. Remove particles with water and a light rag. Dry off completely and let sit for 10 minutes.
-Once dry, finish with at least 3-4 coats of clear coat, allowing 1-1.5 hours between coats (depending on temp). Use the 2000 grit paper between coats with water. Allow to dry.
prep area for install; I washed the are with a wet rag and dish washing soap, to get rid of the oils and debris. I heated the inside of the eyelids on the double side tape to make it extra sticky when attaching it to the light.
Note: everything I did were under specific instructions from my buddy at the local garage
Hope you guys have as much fun doing this as I did.
Good luck, SNOOKY!
Attachments
Last edited: