Rear speakers installed

Partsguy

Member
:
Mazda 5
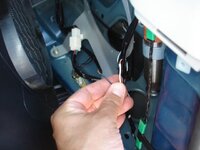
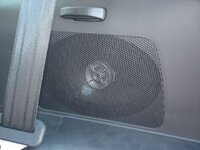
This weekend I installed 2 rear speakers on my 5. The job was pretty straight forward and did not require the removal of the rear seats as someone posted earlier.

You do need to remove the bolt securing the seatbelt for the middle seats. Work from the rear of the vehicle and just pull the plastic cowling out from the sides.

The sound is much better now.
 
HotRodSaint said:
What brand, what model, what size??

I didn't take any pictures when I installed the speakers. Nothing stood out as unusual. Here are the steps as best I remember them.

1) Working from the back of the 5, take out the centre piece of plastic trim surrounding the latch. There were two pop-snaps, one on either side.

2) Remove the philips screw near the top of the rear hatch door frame.

3) Pop out the two 'squarish' indents just below the rear window. Only one the cavitites has a bolt. Remove the bolt.

4) Move to the side of the car, remove the plastic cover directly inside the sliding door on the floor. This will expose the screw anchoring the seatbelt to the bottom of the 5. Remove the bolt but leave it attached to the seatbelt anchor. You won't loose it this way.

5)Move to the back of the 5. Starting at the bottom of plastic piece, start pulling the plastic away from the car. Start from the back and work your way around the huge plastic piece until you get to the other side.

The plastic piece is fastened on the back section by plastic plugs. Nothing to break here. The top section of the plastic piece is secured with simple clips that grasp under the upper plastic piece surrounding the window. If you can angle the upper edge away from the plastic, you will not break any of th fasteners. As for the edging at the sliding door side, there are a few plastic plugs securing this side along with some plastic clasps (90 degree) that don't really sucure anything but rather 'clip' under the rubber edging.

In total, it took about 15 per side to get everything off, and another 10 minutes to install the speakers. I don't remember the exact size but this information was posted earlier.

I installed some Infinity speakers I pulled from my last car. I matched them up with a set of Alpine S speakers ( not sure of the model). I like the Alpine speakers better.

John
 
I'm from the school of thought that the rears are best left as fillers and not wasted time on. Glad you like it though, might help if you don't add a sub or amp.
 
Rear Speakers

I started last weekend. Just one "correction" (I have an 07 Touring 5 speed). There was no need to mess with the seat belt. Also, the power outlet on the left and the light on the right were a pain to remove. I hope to finish this weekend and will try and give more detail.
 
Finally got around to doing this, breaking things and taking pictures along the way.

First, fold the 2nd and 3rd row seats down, and remove the parcel tray behind the 3rd row as well as the covers for the two side compartments.

1) Working from the back of the 5, take out the centre piece of plastic trim surrounding the latch. There were two pop-snaps, one on either side.

DSC03667.jpgDSC03668.jpg
Don't pull too hard, or they'll break :(

2) Remove the philips screw near the top of the rear hatch door frame.

DSC03669.jpg

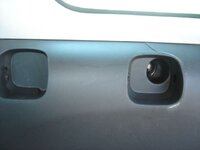
3) Pop out the two 'squarish' indents just below the rear window. Only one the cavitites has a bolt. Remove the bolt.

DSC03672.jpg
Flathead screwdriver into the slot on the bottom of each cap, note that they're not identical and labeled "F" and "R". The bolt is 7/16", very deep, tough to get back, and isn't ferromagnetic. If you don't remove the bolt and do what I did, you'll rip the plastic cover (see pics) :(

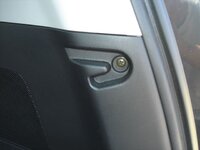
4) Move to the side of the car, remove the plastic cover directly inside the sliding door on the floor. This will expose the screw anchoring the seatbelt to the bottom of the 5. Remove the bolt but leave it attached to the seatbelt anchor. You won't loose it this way.

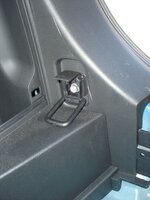
I left the seatbelt in place. However, this other bolt that secures the tie-down loop also needs to be removed, flip the cap upwards to expose the bolt head, also 7/16". This screw is shorter than the other one. There's another pop-snap which was covered up by the center trim piece, already removed in this picture:

DSC03671.jpg
 
Last edited:
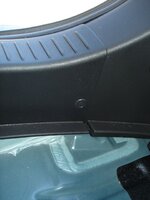
5)Move to the back of the 5. Starting at the bottom of plastic piece, start pulling the plastic away from the car. Start from the back and work your way around the huge plastic piece until you get to the other side.

The plastic piece is fastened on the back section by plastic plugs. Nothing to break here. The top section of the plastic piece is secured with simple clips that grasp under the upper plastic piece surrounding the window. If you can angle the upper edge away from the plastic, you will not break any of th fasteners. As for the edging at the sliding door side, there are a few plastic plugs securing this side along with some plastic clasps (90 degree) that don't really secure anything but rather 'clip' under the rubber edging.

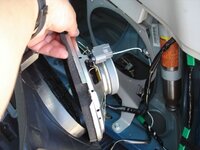
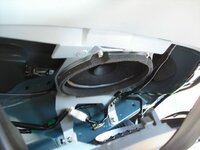
DSC03677.jpgDSC03673.jpg

5x7/6x8 factory speaker exposed after pulling the cover back

In total, it took about 15 per side to get everything off, and another 10 minutes to install the speakers.

Sounds about right. I didn't have everything in one place and ended up taking almost twice as much time.

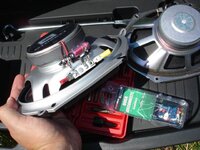
DSC03680.jpgDSC03681.jpg

I got a pair of JBL GTO8627's off eBay some time ago. The factory speakers connectors were cut off, wires stripped, and flat connectors crimped. There's a more civilized way to do this, but the adapters cost extra bucks. 5/16" bolts hold the speakers in place.

DSC03682.jpg

Finished install.
 
Last edited:
The rear speakers do sound much nicer than factory. They're more for fill-in, as Kid Red mentioned, and to give the kids better sound when they're riding in the back. The component front door speakers installed last year are what you hear when sitting in the driver's seat. They could use a little more kick - sometime in the next month, I'll install the amplifier and plug in the sub, and see how things sound with and without it. The sub enclosure takes up 1/3 of the room behind the 3rd row, and might get replaced by something smaller if it's too inconvenient.
 
Back