
im going to break it down as simple as possible im may seem kinda over explaining but im going to describe every part of the install in detail....
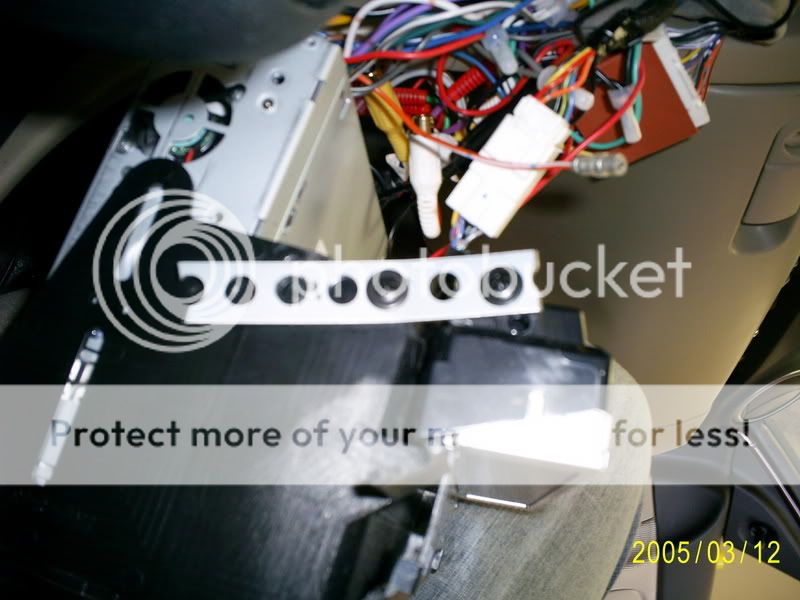
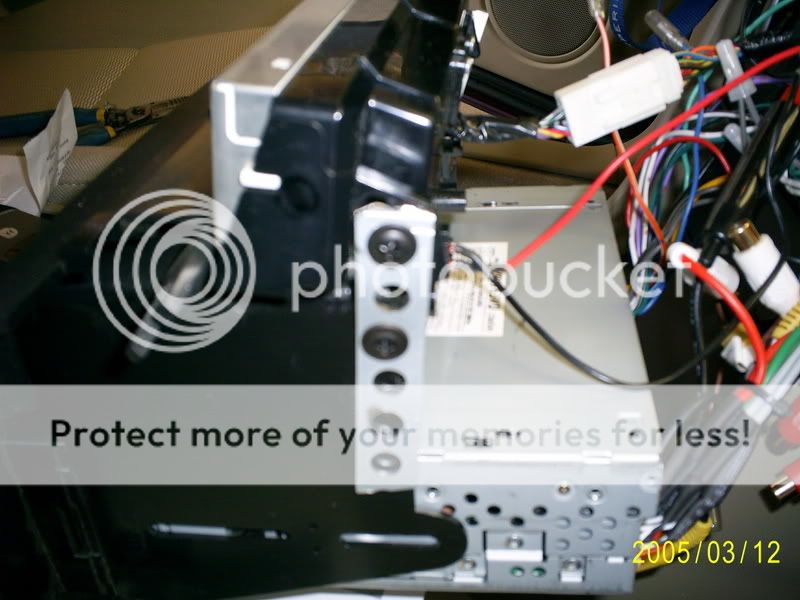
ok you start off by always unhooking the negative battery terminal before doing anything with the vehicle electronics(disclaimer) lol but anyways you first remove the trim piece that is covering the display screen above the radio, start on the left side(driver side), this piese is only held by clips so apply moderate even pulling pressure and it will come out...than you remove the 2 screws holding the top of the radio in. after the screws are both out pull the radio strait out untill the bottom clips release than you will need to pull the bottom of the radio up and out to keep the screen at the top from getting damaged or broke. once the radio is out unplug it and, the screen, and also the screen is attached to the radio via a small clip underneath the screen taka a small flathead and stick into it pushing it off without breaking it and there will also be 2 screws on either side...keep the radio near by, your next step should be to take the aftermarket dash piece and you will neet to take a hot knife or razor knife and cut off the black piece that blocks the hole where the screen goes. once that has been removed there are 2 tabs one on either side of the bottom of the screen cut them off as well.. now you need a piece of backstrap and the following pics will show how you need to put them on
this one is on the left side:
right side:
fully mounted:
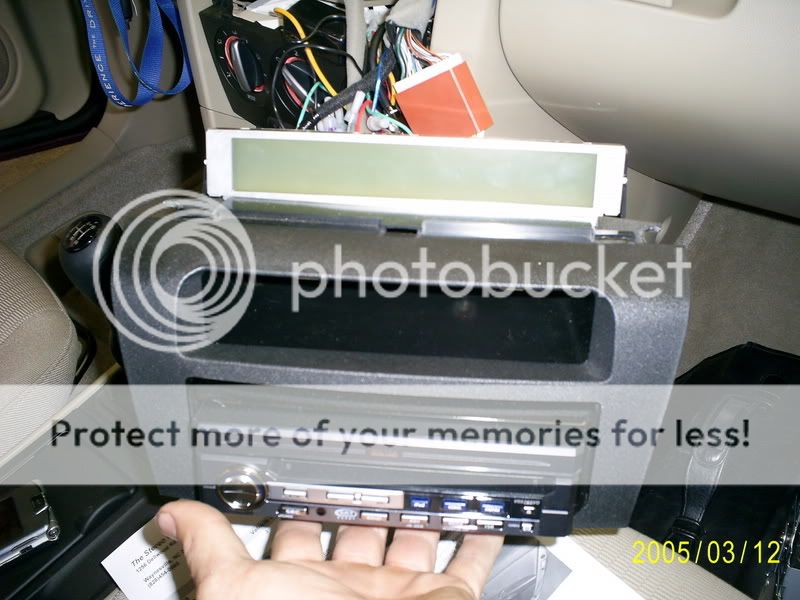
installed:
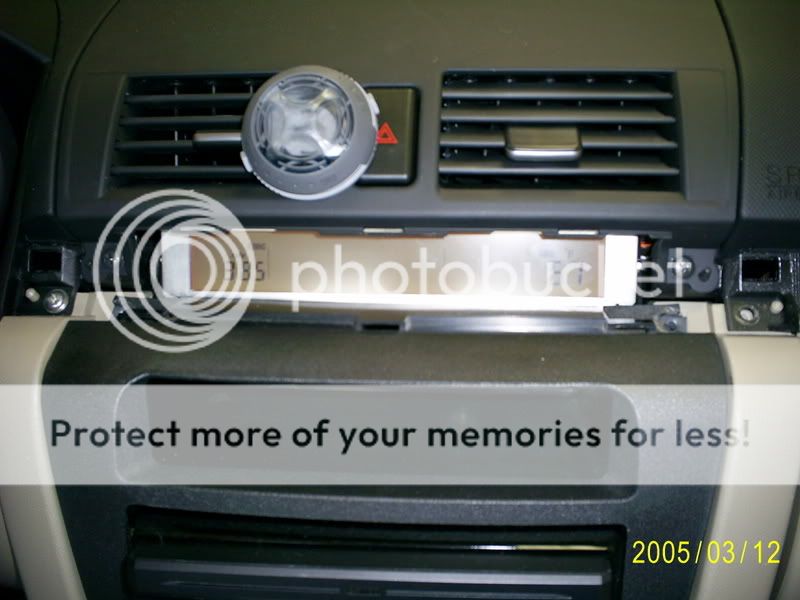
once youu get this dont its time to reassemble but first you need to take the factory radio and hook it back up turn it on and set the screen on what option you want(avg. mpg, curr. mpg, clock ect....) it on cause you wont be able to change it without pluging in the factory radio again... but do not un plug battery after you set the screen cause it will reset it. just turn the radio power off and unhook it.. now to reassemble slide radio back in put screws back in and place trim panel back over the display and the finished product should look like this
finished look:

hope this was helpful...sorry this is a runon but that is how i write..if you have any ?s let me know
ok you start off by always unhooking the negative battery terminal before doing anything with the vehicle electronics(disclaimer) lol but anyways you first remove the trim piece that is covering the display screen above the radio, start on the left side(driver side), this piese is only held by clips so apply moderate even pulling pressure and it will come out...than you remove the 2 screws holding the top of the radio in. after the screws are both out pull the radio strait out untill the bottom clips release than you will need to pull the bottom of the radio up and out to keep the screen at the top from getting damaged or broke. once the radio is out unplug it and, the screen, and also the screen is attached to the radio via a small clip underneath the screen taka a small flathead and stick into it pushing it off without breaking it and there will also be 2 screws on either side...keep the radio near by, your next step should be to take the aftermarket dash piece and you will neet to take a hot knife or razor knife and cut off the black piece that blocks the hole where the screen goes. once that has been removed there are 2 tabs one on either side of the bottom of the screen cut them off as well.. now you need a piece of backstrap and the following pics will show how you need to put them on
this one is on the left side:
right side:
fully mounted:
installed:
once youu get this dont its time to reassemble but first you need to take the factory radio and hook it back up turn it on and set the screen on what option you want(avg. mpg, curr. mpg, clock ect....) it on cause you wont be able to change it without pluging in the factory radio again... but do not un plug battery after you set the screen cause it will reset it. just turn the radio power off and unhook it.. now to reassemble slide radio back in put screws back in and place trim panel back over the display and the finished product should look like this
finished look:
hope this was helpful...sorry this is a runon but that is how i write..if you have any ?s let me know
