
Ok, so I stole this from another forum, but since I've already done this mod, and forgot to do a write-up, I figured I'd post this one here.
Step 1:
Remove all trunk/deck components. The forward-most plastic tray is held in with 2 screws on either side.

--------------------------------------------------------------------------------------------------------
Step 2: The rear seat back rests are bolted in with six (6) 14mm bolts. There is no loctite on any bolts. Getting these things started takes some muscle. Take care when sliding the assembly through the doorspace.
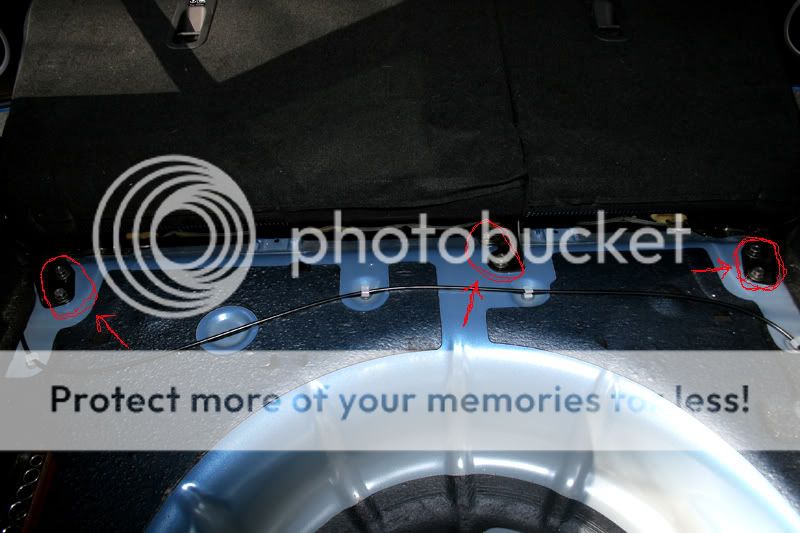
Here's what we're looking at now.

--------------------------------------------------------------------------------------------------------
Step 3: The back seat ass-pad is secured via two (2) plastic rivet-like slots. From either back door, grab the front portion of the seat and simply lift up. Both sides should pop without much trouble.
http://img.photobucket.com/albums/v242/greyserendipity/bw film and digi/step4.jpg
Here we can see the female section under the ass-pad.

-------------------------------------------------------------------------------------------------------
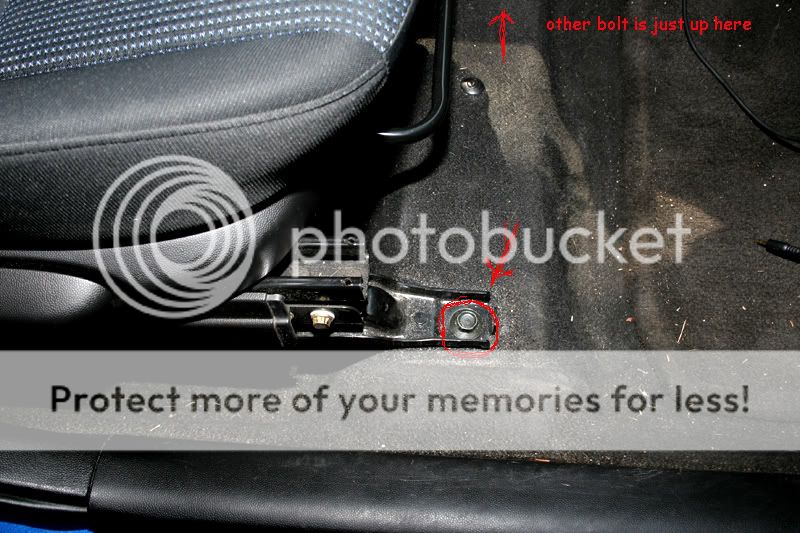
Step 4: At the base of the front passenger seat, there are four clips covering the feet of the rails. Pop them off to expose the 14mm bolts. Again, getting them started takes some muscle. ***DO NOT*** just pull the seat out after removing the bolts.

------------------------------------------------------------------------------------------------------
Step 5: Underneath the passenger seat is the passenger airbag sensor.
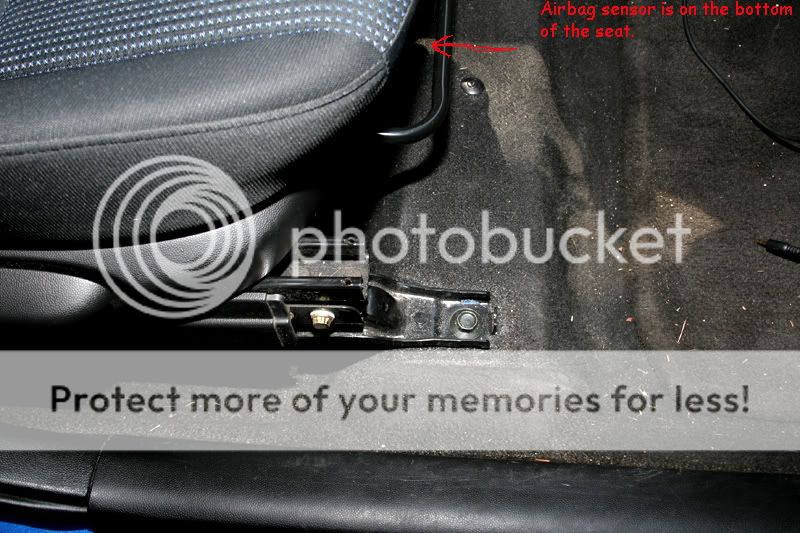
The sensor is the only piece with a cable running from the seat to the car. Removing it is easy, once you figure out where to squeeze.
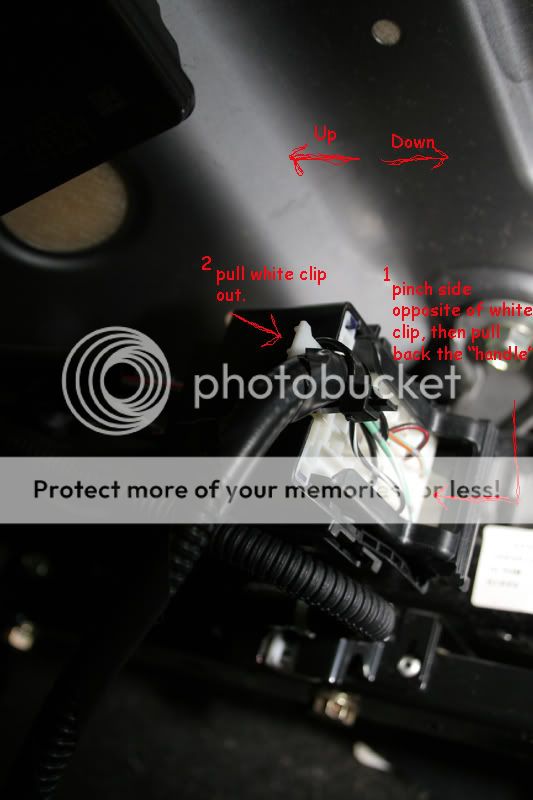
Make sure you don't have the ignition set to Accy. Remove the sensor and place it under the seat.
------------------------------------------------------------------------------------------------------
Step 6: Tilt the seat sideways. On the outboard side of the seat bottom, remove the plastic cover where the seatbelt is mounted to the seat. A 14mm bolt is now exposed.
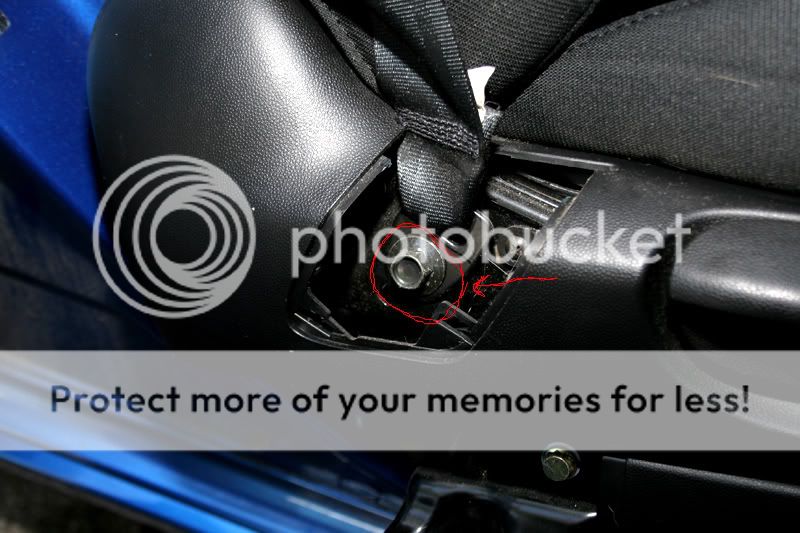
Take care when sliding the seat out through the door space. The rails will easily scratch your car.
-----------------------------------------------------------------------------------------------------
This is a shot from the rear showing an almost-empty cabin.
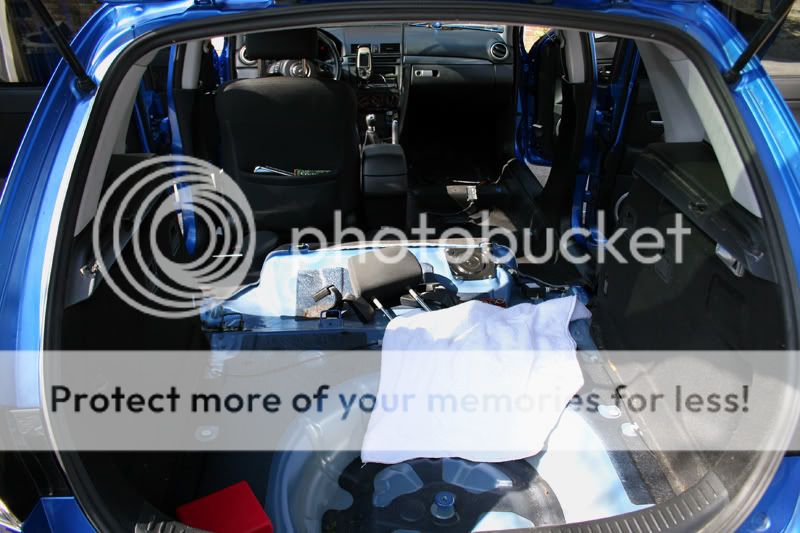
I put every piece on a scale, and when everything added up it came to about 160lbs. Most of the weight came from the rear of the car, and the rear was raised 1/2" with everything removed. While rolling, that 160lbs translates into a theoretical 16hp.
Accelration is significantly better. Roll-on from thrid 2nd and 3rd gears is stronger. The car is now more prone to oversteer due to the upset chassis dynamics. Pitching the car around is more fun, and I had more control over the rear end of the car, thus making for faster exit speeds.
Thanks to ptg06 on a nameless forum...give him the props.
Step 1:
Remove all trunk/deck components. The forward-most plastic tray is held in with 2 screws on either side.
--------------------------------------------------------------------------------------------------------
Step 2: The rear seat back rests are bolted in with six (6) 14mm bolts. There is no loctite on any bolts. Getting these things started takes some muscle. Take care when sliding the assembly through the doorspace.
Here's what we're looking at now.
--------------------------------------------------------------------------------------------------------
Step 3: The back seat ass-pad is secured via two (2) plastic rivet-like slots. From either back door, grab the front portion of the seat and simply lift up. Both sides should pop without much trouble.
http://img.photobucket.com/albums/v242/greyserendipity/bw film and digi/step4.jpg
Here we can see the female section under the ass-pad.
-------------------------------------------------------------------------------------------------------
Step 4: At the base of the front passenger seat, there are four clips covering the feet of the rails. Pop them off to expose the 14mm bolts. Again, getting them started takes some muscle. ***DO NOT*** just pull the seat out after removing the bolts.
------------------------------------------------------------------------------------------------------
Step 5: Underneath the passenger seat is the passenger airbag sensor.
The sensor is the only piece with a cable running from the seat to the car. Removing it is easy, once you figure out where to squeeze.
Make sure you don't have the ignition set to Accy. Remove the sensor and place it under the seat.
------------------------------------------------------------------------------------------------------
Step 6: Tilt the seat sideways. On the outboard side of the seat bottom, remove the plastic cover where the seatbelt is mounted to the seat. A 14mm bolt is now exposed.
Take care when sliding the seat out through the door space. The rails will easily scratch your car.
-----------------------------------------------------------------------------------------------------
This is a shot from the rear showing an almost-empty cabin.
I put every piece on a scale, and when everything added up it came to about 160lbs. Most of the weight came from the rear of the car, and the rear was raised 1/2" with everything removed. While rolling, that 160lbs translates into a theoretical 16hp.
Accelration is significantly better. Roll-on from thrid 2nd and 3rd gears is stronger. The car is now more prone to oversteer due to the upset chassis dynamics. Pitching the car around is more fun, and I had more control over the rear end of the car, thus making for faster exit speeds.
Thanks to ptg06 on a nameless forum...give him the props.