
Tools Needed:
10mm wrench
Wire cutters
Crimp tool
mini torch or soldering iron (only for the heat shrinking.)
What comes with the XEDE:
XEDE unit
Wiring harness
7 Male spade connectors
7 Female spade connectors
3 Scotch locks (taps)
Wiring diagram/instructions
I didnt take a picture before I started because I was too excited. (Can you blame me?)
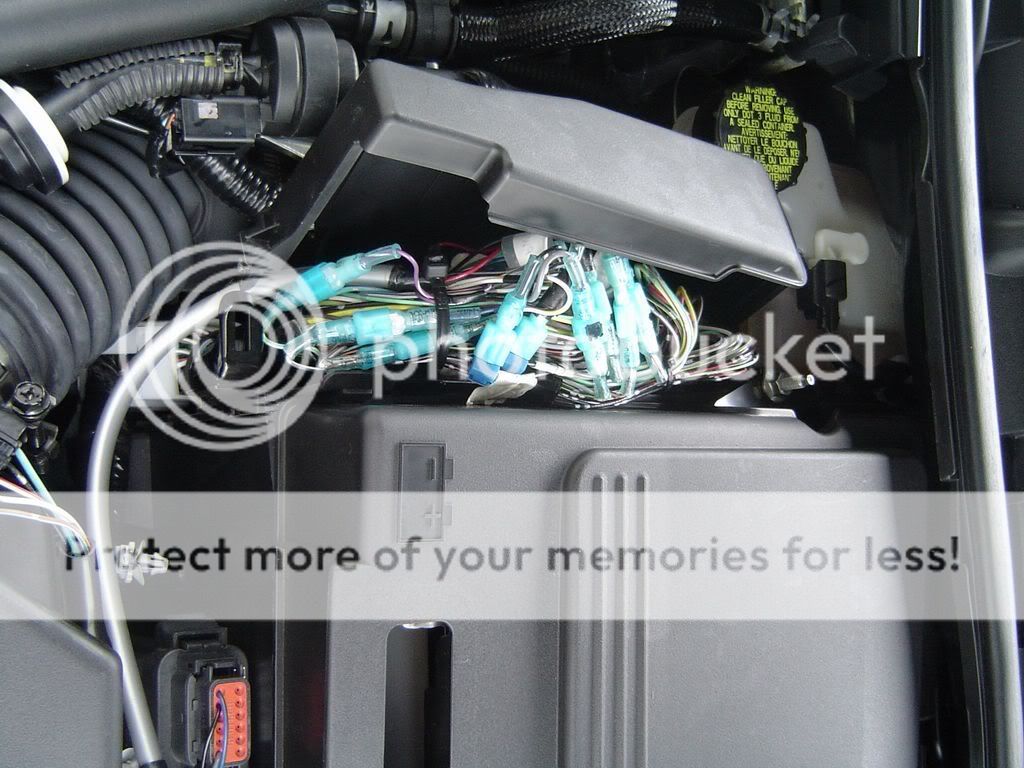
Here is what it should look like (almost) before you start.
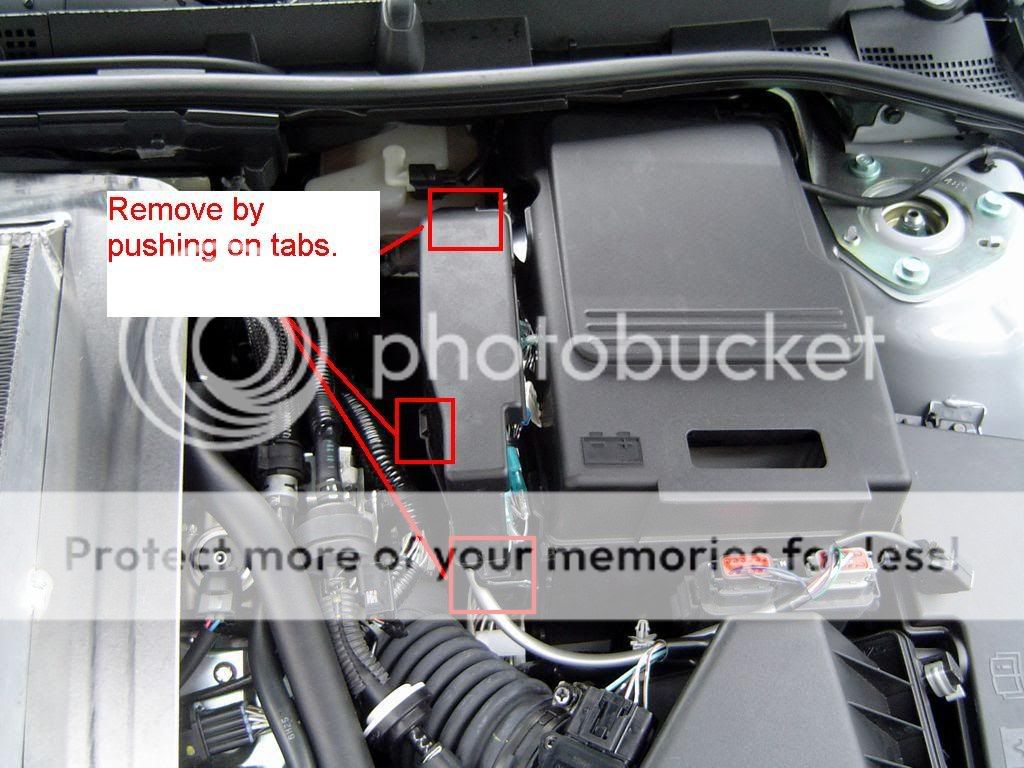
First, remove the harness cover seen here.
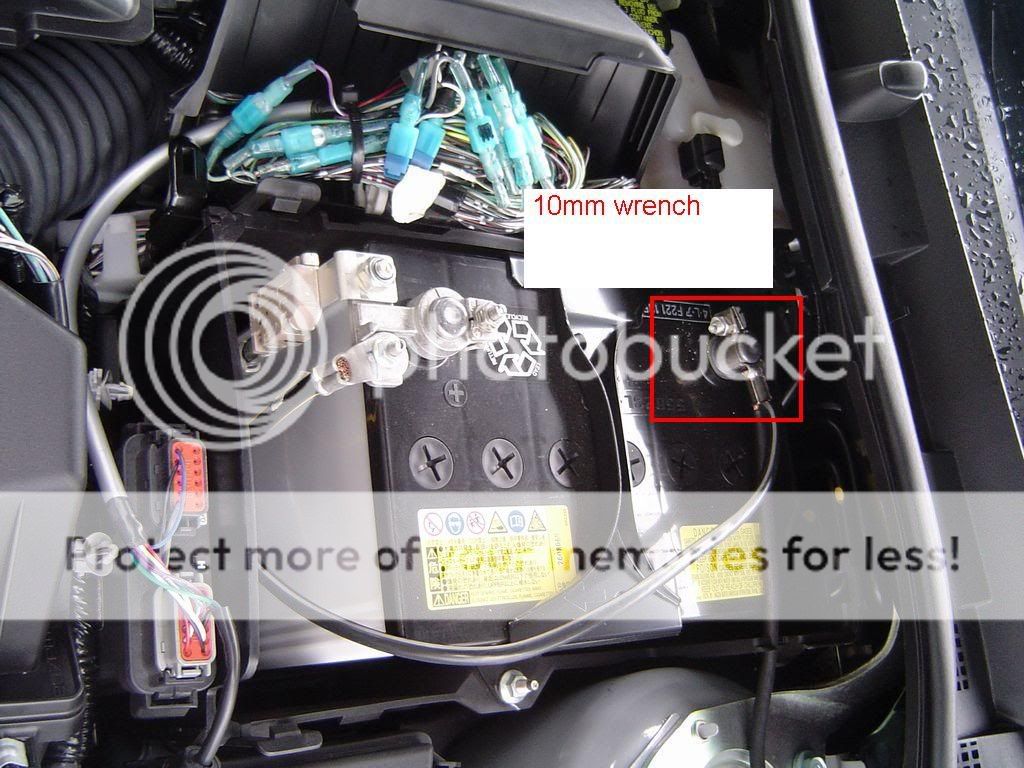
Then remove the battery cover.
Disconnect the Negative (-) side and tape it out of the way. I am extra careful because I hate electricity and actually covered the terminal with tape.
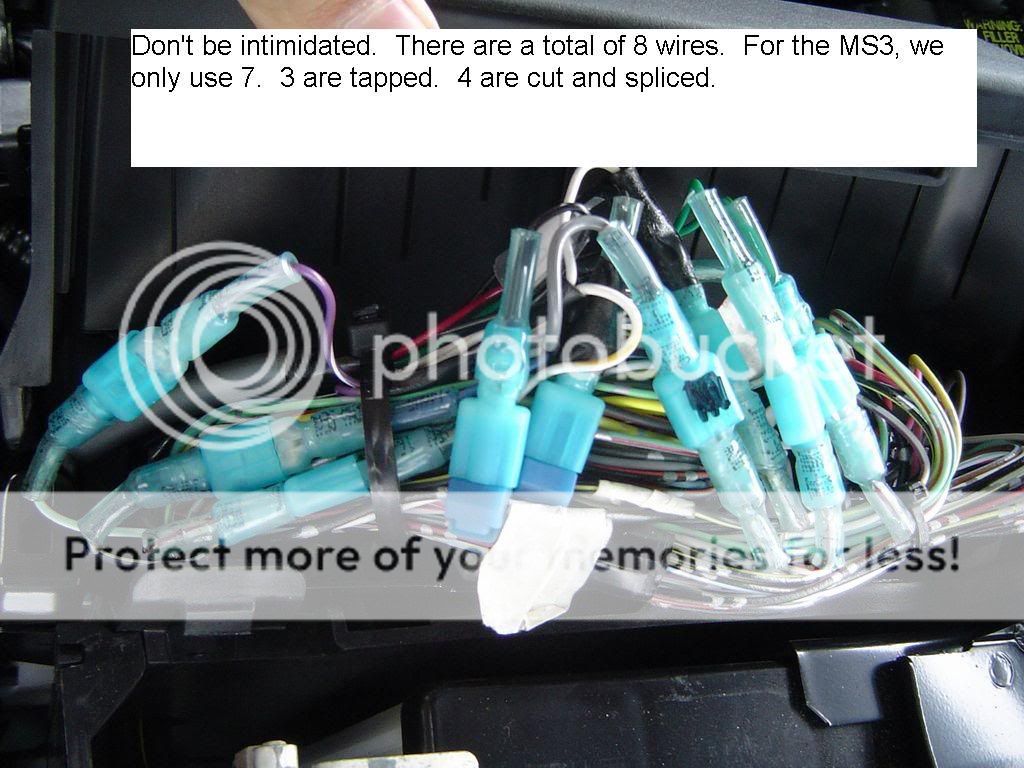
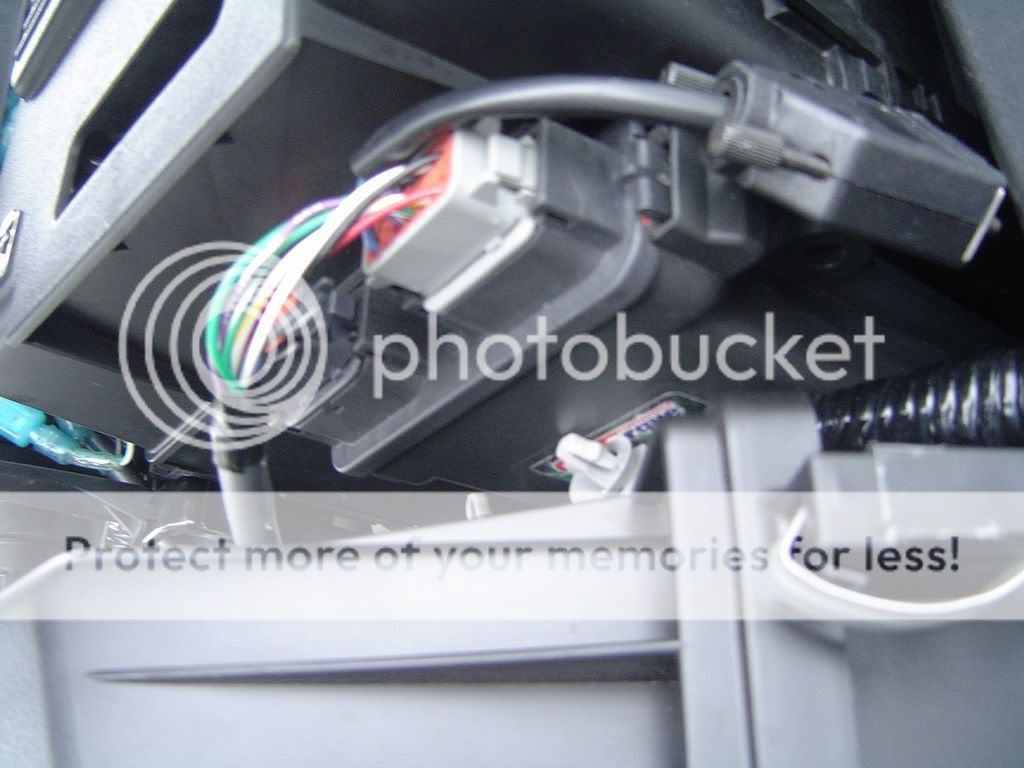
It looks very scary at first but do NOT be intimidated. There are 8 wires coming from the XEDE unit. Our speed 3 only uses 7 of them.
Following the diagram supplied by BEGi, locate the wires on the harnesses. Only one wire from the Right side harness is used. The other 6 or on the left harness.
You have to keep in mind that this unit is an INTERCEPTOR style. It goes in between the sensors and the ECU. Once you can understand that, the install is a breeze. Took me about 20-30 minutes in the rain.
once you have all your wires crimped, use a soldering iron or mini torch (be careful not to hit the other wires) and hit the heat shrinking to insulate your crimps.
All the spade connectors (male and female) and the three wire taps are all supplied by BEGi as well as a bunch of zipties.
Then, plug in the harnesses to the XEDE unit, black to black, gray to gray.
start zip tying and decide where you want to stash away your XEDE unit.
I was just barely able to put back on the covers on both. If I had taken a little more time, I could have done a better job and chose to cut the wires further down.
If you take a look at the pictures, it looks almost stock. You wouldn't be able to tell unless you knew what you were looking for.
Now, to take on some unsuspecting STI's....
Little do they know, an extra 57 whp and 70 ft lbs or torque are waiting for them.
10mm wrench
Wire cutters
Crimp tool
mini torch or soldering iron (only for the heat shrinking.)
What comes with the XEDE:
XEDE unit
Wiring harness
7 Male spade connectors
7 Female spade connectors
3 Scotch locks (taps)
Wiring diagram/instructions
I didnt take a picture before I started because I was too excited. (Can you blame me?)
Here is what it should look like (almost) before you start.
First, remove the harness cover seen here.
Then remove the battery cover.
Disconnect the Negative (-) side and tape it out of the way. I am extra careful because I hate electricity and actually covered the terminal with tape.
It looks very scary at first but do NOT be intimidated. There are 8 wires coming from the XEDE unit. Our speed 3 only uses 7 of them.
Following the diagram supplied by BEGi, locate the wires on the harnesses. Only one wire from the Right side harness is used. The other 6 or on the left harness.
You have to keep in mind that this unit is an INTERCEPTOR style. It goes in between the sensors and the ECU. Once you can understand that, the install is a breeze. Took me about 20-30 minutes in the rain.
once you have all your wires crimped, use a soldering iron or mini torch (be careful not to hit the other wires) and hit the heat shrinking to insulate your crimps.
All the spade connectors (male and female) and the three wire taps are all supplied by BEGi as well as a bunch of zipties.
Then, plug in the harnesses to the XEDE unit, black to black, gray to gray.
start zip tying and decide where you want to stash away your XEDE unit.
I was just barely able to put back on the covers on both. If I had taken a little more time, I could have done a better job and chose to cut the wires further down.
If you take a look at the pictures, it looks almost stock. You wouldn't be able to tell unless you knew what you were looking for.
Now, to take on some unsuspecting STI's....
Little do they know, an extra 57 whp and 70 ft lbs or torque are waiting for them.
Last edited:
")