
Okay, kids. So pulling wire isn't a cake-walk, but it IS something that can be done. Tonight I went out with my usual assortment of tools, and my digicam.
(note: this is reccomended for systems pushing upwards of 50w to your doors. Many have run more without problem, but I for one felt a bit uneasy pushing 75w, so I figured out how to do this.)
First off you should remove your door panels, and speakers. If you need help here, check the how-to forum for lock shortening. The kick-panel relative to where you're working should also be removed.
With the door and kick-panels removed, you then need to locate the Molex plug. This is the point where the bunch of wires inside your door enter the body of your car. There's a rubber boot that surrounds it, this needs to be pried up.
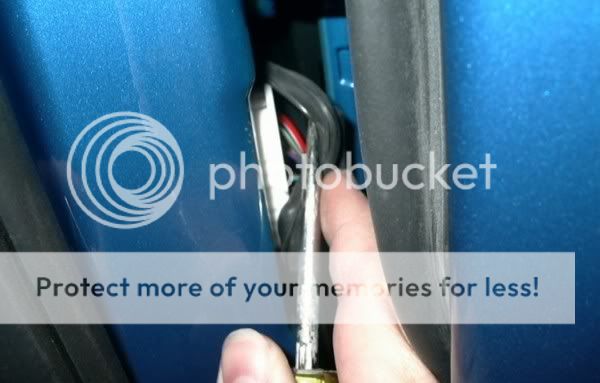
Now you'll have access to the white plastic plug itself. It is secured to the car with 4 little tabs in the 1, 5, 7, adn 11 o'clock positions. 1 and 5, for the record are on the back-side fo your opening, and int he cramped space of the doorjam, quite hard to reach. I've heared of some ppl using zip-ties wrapped around. I, personally managed to just use a coathanger to depress the rearward-one while I pressed and pryed up fornt with a screwdriver. Did the top half first, then the bottom 2.
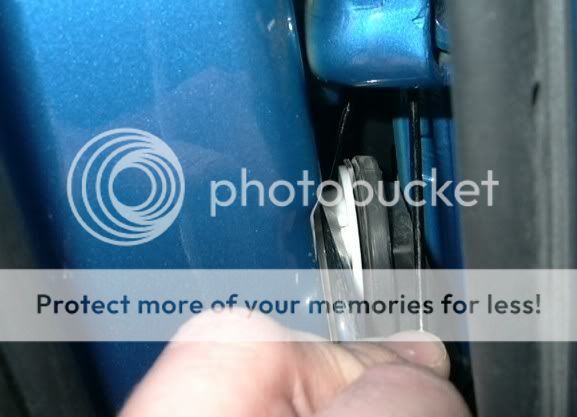
Once the plug is out of the car, locate the green tab on top of it. this must be pulled upward until it stops in order to "unlock" the clip and allow you to seperate the 2 halves.
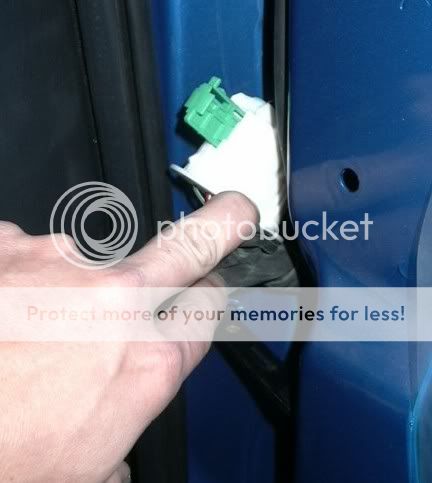
THis is what you have to work with (this one is the body-side one, note that it has quite short wires that reach to it, so it's only possible to get it barely outside and angled where you can get at it. The top lefthand side of this piece is where I cut. (didn't have my dremel on me, so I had at it with the x-acto knife) You can see the 4 holes forming the shape of a square that are un-occupied.
Here's the other piece. THis one comes from the door. Lots of room to work onthis one. Mirror it to matchup with the other one, and you can see my cutting location is going to be on the top-right this time. Now, on THIS half of the clip there is an exra wire so I left it in place, and only made an "L" over here.

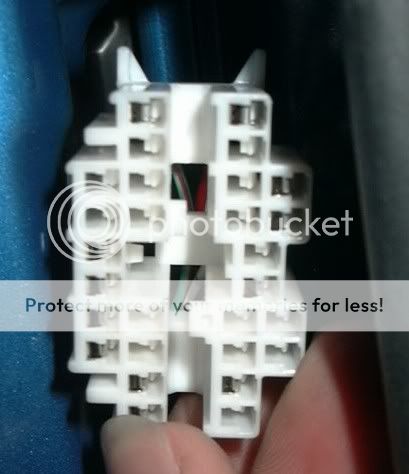
Enough visualizing. This is the wire side of the door-plug. Note the bottom rightside of it where I've cutout my "L"
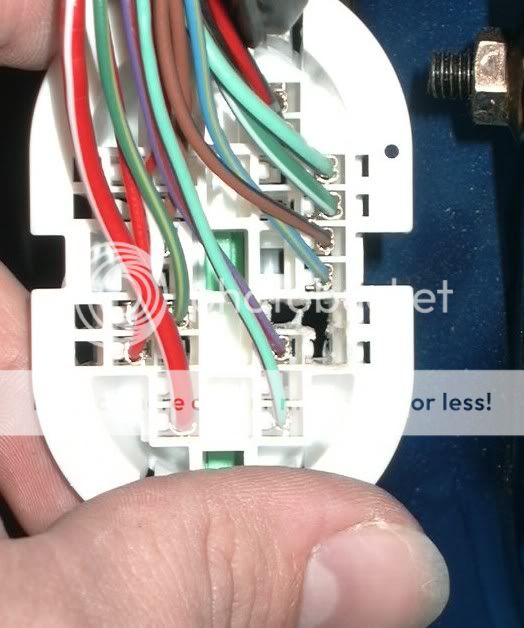
I really didn't document the cutting and locations very well. The cutting took me alot of time mostly because, as I said, no dremel tool on hand, and an x-acto will only cut halfway through one clip, so you've got to flip it and go from the back side too.. It's all fairly straightforward, though. just find somewhere on the clip where you'll have room to fit whatever wire you wish to run, and make the room for it to pass through By whatever means you've got that won't chew into any interlocking shapes, or hit any of the other wires.
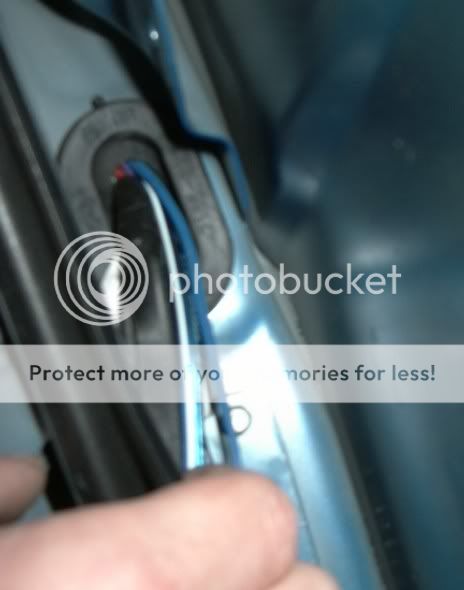
Okay, so assume the plastic's cut and ready to go. Feed the wire through to the door-side it will go inside the RUbber boot, and the "snake" that runs to the door. Get a hadn inside the door, and Feel around in there, just beyond and above the end of the window track is where the wire enters the door. Yours will show up here, too. Hey guesswhat? Your head won't fit inside the door, but my camera will. I thought it was cool to get to see the unseeable. The black vertical rubber strip under my hand is the front window track, and there's our rubber boot, and My wires coming through it.
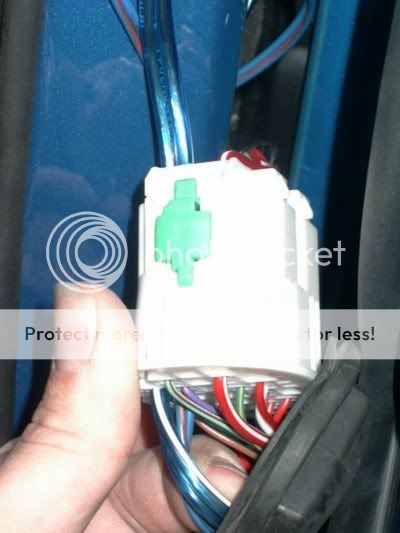
Sorry for the fuzzy pic, but here's the 2 pieces of the molex, and now I've threaded the wire(s) through the cabin-side one. I should note that I'm running 2 sets of wire one 14awg, and one 18, because I've always had strange ideas of speaker-illumination. Might turn out lame, but at least I'll be able to try... When threading from one to the other, make sure you flatten out the wire (get rid of any twists) before you go pulling it through the other side.

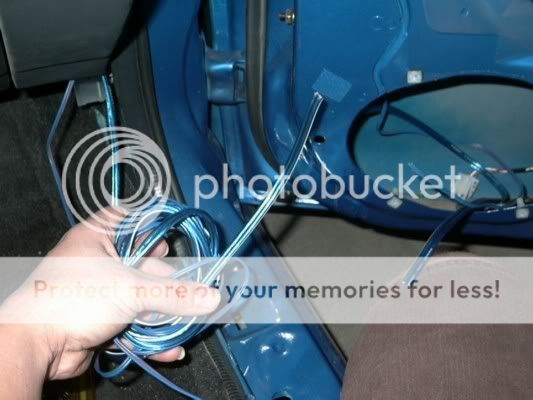
Okay, here's another case of camera can see, but I can't. For refrence, the black strip ont he bottom right corner is the weatherseal at the front of the door frame. The camera was sitting on the floor where a passenger's right foot would possibly be looking straight up. That wire you just pulled through the cabin-side connecter now has to go in the cabin. feed some through and then get into position where you can look/feel for it from the inside while feeding from the out. That white plastic piece is where the wire will hopefully come out. it is approx 6" above the bottom of the dash-panel and as you can see the metal bracket doesn't allow much hand-room.

Make sure to leave more than enough extra wire in either direction, but now, you can now re-connet the molex, hopefully your wire's fed through without a problem. I should also note, that life is MUCH easier if you put the rubber boot back on the molex BEFORE clipping it back into your doorframe.
YAY! I've got 14g wire for my kappas to get plenty of juice directly from my under-seat amp now without the clutter and thin wire of going through the factory harness. I've also got some extra wire for whatever I may want to do. Led's, window control for an alarm, or perhaps i'll have a practical application like a Tweeter with an interior-mounted crossover.
Stuff I used:
Bent coathanger, for depresssing back-side molex clips and "hooking" wire,
a couple different flathead screwdrivers for assorted prying and clip depressing
Phillips head for removing screws securing the door panel and speaker
my little mini leatherman and an x-acto knife set for clutting out holes (You probobally better use a drill or dremel or something)
A petzyl LED headlamp (Words can't describe how much easier these little things make it) Small enough to be out of the way, and just enough light to see what you're doing RIGHT where you need it.
14G wire (I used about 15' and there's about an extra foot worth int he door, and way more than enough to reach under my seat to my amp. 18g wire for my stupid led speaker light deal. I'll get some pics up of that if it turns out with some semblance of non-lameness.
(note: this is reccomended for systems pushing upwards of 50w to your doors. Many have run more without problem, but I for one felt a bit uneasy pushing 75w, so I figured out how to do this.)
First off you should remove your door panels, and speakers. If you need help here, check the how-to forum for lock shortening. The kick-panel relative to where you're working should also be removed.
With the door and kick-panels removed, you then need to locate the Molex plug. This is the point where the bunch of wires inside your door enter the body of your car. There's a rubber boot that surrounds it, this needs to be pried up.
Now you'll have access to the white plastic plug itself. It is secured to the car with 4 little tabs in the 1, 5, 7, adn 11 o'clock positions. 1 and 5, for the record are on the back-side fo your opening, and int he cramped space of the doorjam, quite hard to reach. I've heared of some ppl using zip-ties wrapped around. I, personally managed to just use a coathanger to depress the rearward-one while I pressed and pryed up fornt with a screwdriver. Did the top half first, then the bottom 2.
Once the plug is out of the car, locate the green tab on top of it. this must be pulled upward until it stops in order to "unlock" the clip and allow you to seperate the 2 halves.
THis is what you have to work with (this one is the body-side one, note that it has quite short wires that reach to it, so it's only possible to get it barely outside and angled where you can get at it. The top lefthand side of this piece is where I cut. (didn't have my dremel on me, so I had at it with the x-acto knife) You can see the 4 holes forming the shape of a square that are un-occupied.
Here's the other piece. THis one comes from the door. Lots of room to work onthis one. Mirror it to matchup with the other one, and you can see my cutting location is going to be on the top-right this time. Now, on THIS half of the clip there is an exra wire so I left it in place, and only made an "L" over here.
Enough visualizing. This is the wire side of the door-plug. Note the bottom rightside of it where I've cutout my "L"
I really didn't document the cutting and locations very well. The cutting took me alot of time mostly because, as I said, no dremel tool on hand, and an x-acto will only cut halfway through one clip, so you've got to flip it and go from the back side too.. It's all fairly straightforward, though. just find somewhere on the clip where you'll have room to fit whatever wire you wish to run, and make the room for it to pass through By whatever means you've got that won't chew into any interlocking shapes, or hit any of the other wires.
Okay, so assume the plastic's cut and ready to go. Feed the wire through to the door-side it will go inside the RUbber boot, and the "snake" that runs to the door. Get a hadn inside the door, and Feel around in there, just beyond and above the end of the window track is where the wire enters the door. Yours will show up here, too. Hey guesswhat? Your head won't fit inside the door, but my camera will. I thought it was cool to get to see the unseeable. The black vertical rubber strip under my hand is the front window track, and there's our rubber boot, and My wires coming through it.
Sorry for the fuzzy pic, but here's the 2 pieces of the molex, and now I've threaded the wire(s) through the cabin-side one. I should note that I'm running 2 sets of wire one 14awg, and one 18, because I've always had strange ideas of speaker-illumination. Might turn out lame, but at least I'll be able to try... When threading from one to the other, make sure you flatten out the wire (get rid of any twists) before you go pulling it through the other side.
Okay, here's another case of camera can see, but I can't. For refrence, the black strip ont he bottom right corner is the weatherseal at the front of the door frame. The camera was sitting on the floor where a passenger's right foot would possibly be looking straight up. That wire you just pulled through the cabin-side connecter now has to go in the cabin. feed some through and then get into position where you can look/feel for it from the inside while feeding from the out. That white plastic piece is where the wire will hopefully come out. it is approx 6" above the bottom of the dash-panel and as you can see the metal bracket doesn't allow much hand-room.
Make sure to leave more than enough extra wire in either direction, but now, you can now re-connet the molex, hopefully your wire's fed through without a problem. I should also note, that life is MUCH easier if you put the rubber boot back on the molex BEFORE clipping it back into your doorframe.
YAY! I've got 14g wire for my kappas to get plenty of juice directly from my under-seat amp now without the clutter and thin wire of going through the factory harness. I've also got some extra wire for whatever I may want to do. Led's, window control for an alarm, or perhaps i'll have a practical application like a Tweeter with an interior-mounted crossover.
Stuff I used:
Bent coathanger, for depresssing back-side molex clips and "hooking" wire,
a couple different flathead screwdrivers for assorted prying and clip depressing
Phillips head for removing screws securing the door panel and speaker
my little mini leatherman and an x-acto knife set for clutting out holes (You probobally better use a drill or dremel or something)
A petzyl LED headlamp (Words can't describe how much easier these little things make it) Small enough to be out of the way, and just enough light to see what you're doing RIGHT where you need it.
14G wire (I used about 15' and there's about an extra foot worth int he door, and way more than enough to reach under my seat to my amp. 18g wire for my stupid led speaker light deal. I'll get some pics up of that if it turns out with some semblance of non-lameness.
Last edited:
") This should be a sticky!
This should be a sticky!