
You are using an out of date browser. It may not display this or other websites correctly.
You should upgrade or use an alternative browser.
You should upgrade or use an alternative browser.
Lighter = Faster (RX-7 Build #2)
- Thread starter magnumP5
- Start date
LOL, knew Evan would support black. Red and orange/yellow are my leading options. It'll come down to which is least expensive come time to paint (bumpers and side skirts are already red). Need to get a few things done before then.
Engine porn:
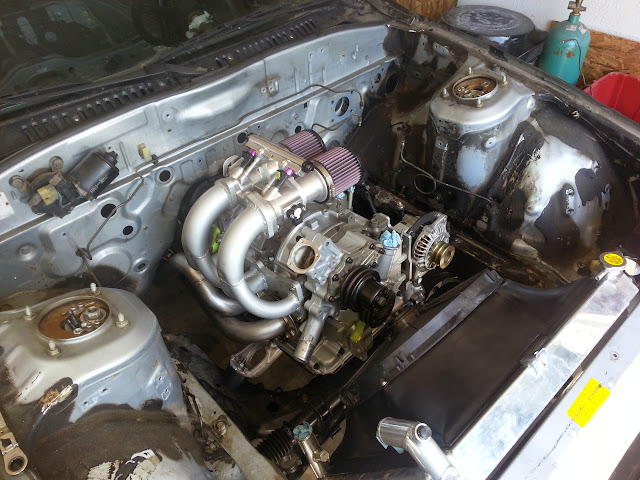
Mocking up everything for wiring. Took a bunch of pictures for the harness maker to reference. I think I over-did the fan shroud. There's actually <2 inches of clearance between it and the pulleys and <1 in. between it and the front swaybar. Biggest issue now is where to mount the ignition coils. I had them behind the driver's headlight but that puts them a little far away to be part of the engine harness. Other options are in a line on the driver's strut tower or mounted to the engine on the front rotor and side housings. Damn side-mount alternator makes things difficult.
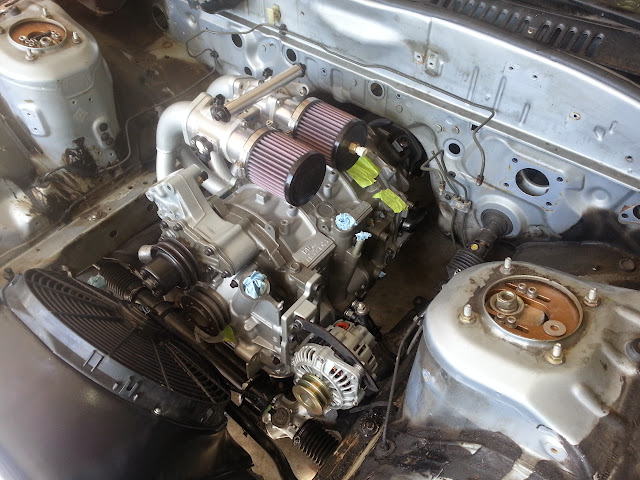
Engine porn:
Mocking up everything for wiring. Took a bunch of pictures for the harness maker to reference. I think I over-did the fan shroud. There's actually <2 inches of clearance between it and the pulleys and <1 in. between it and the front swaybar. Biggest issue now is where to mount the ignition coils. I had them behind the driver's headlight but that puts them a little far away to be part of the engine harness. Other options are in a line on the driver's strut tower or mounted to the engine on the front rotor and side housings. Damn side-mount alternator makes things difficult.
Thanks! I've been criticized for not making it "flashy" enough. People like to paint the housings alternate colors but I've never seen that hold up. I went for a "natural" look that hopefully will keep the corrosion to a minimum. I found out over the weekend I need to look into getting the silver bits on the throttle body anodized silver or clear.I vote orange because it is different. Your engine looks great, all though I am no rotary expert by any stretch.
Nah, none of the existing paint is going to be up to the job. Even rattle can would be an improvement at this point.damn that IS porn
For color I vote multicolored haha, paint ads too much weight
Did some small odds 'n ends over the weekend. Prepped the fuel tank cover for POR-15. Finally got the outer window trim off. Pulled the older, heavier wiper motor, which will be replaced by the lighter unit from the '89. Pulled the side mirrors. Cut down some studs on the intake manifold for throttle body clearance. Painted the last of the interior trim.
Ordered: analog 0-5 V fuel level sender, digital speedometer sender, and ignition coil brackets.
Apparently a company called SakeBomb Garage (um, yeah) makes brackets specifically for the the AEM (IGN-1A) ignition coils. Each one supports two coils and the system is modular so the brackets can be combined in a number of ways. This gives more flexibility than my homemade bracket. I think I can wedge the coils above the driver's side frame rail between the alternator and the steering column. It's tight - only ~1.5" between one of the coil posts and the alternator posts but it results in the shortest possible spark plug leads.
Trying to get the harness going. Basically sent a note to the guy saying "send me a quote and I'll give you money."
Fuel lever sender, speedo sender, and coil brackets have all arrived. Very neat pieces. I'll have to take some pictures...
Dropped $3K on ECU, harness, and display stuff. I seriously need to sell the 2 to keep this project going. Haven't done much work since other than covering the fuel tank cover with POR-15. Interesting stuff. I've got some other things to do this weekend (e.g. wash the Flex) but hopefully I've get around to doing some things to the RX7.
Dropped $3K on ECU, harness, and display stuff. I seriously need to sell the 2 to keep this project going. Haven't done much work since other than covering the fuel tank cover with POR-15. Interesting stuff. I've got some other things to do this weekend (e.g. wash the Flex) but hopefully I've get around to doing some things to the RX7.
Pictures of new goodies as promised.
Analog fuel level sender:
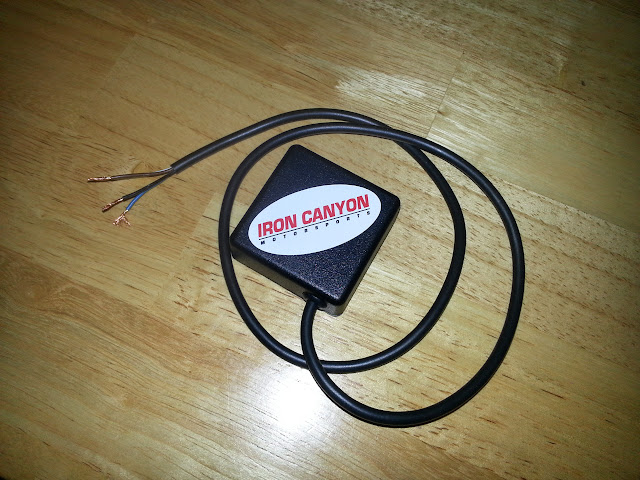
I give it a 12 V power source, a ground, connect it to the stock resistance-based fuel level sender, and through electronic magic it outputs a 0-5 V signal readable by almost all aftermarket ECUs and displays.
Digital speedometer conversion:
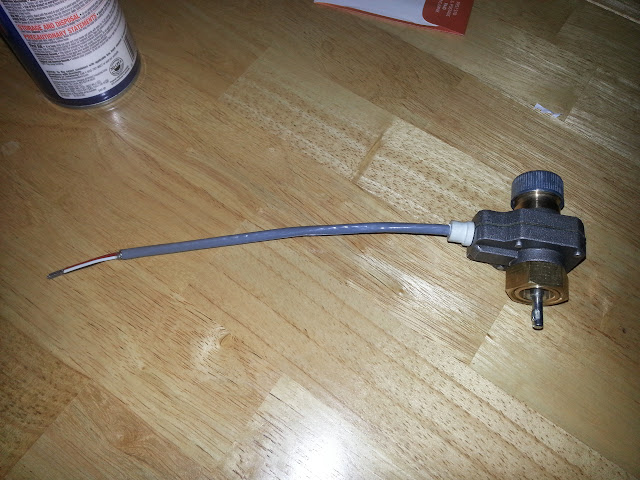
It screws right on the stock speedometer cable takeoff on the transmission. I give it a 12 V signal and a ground, and it spits out a 16/rev digital signal via Hall Effect sensor.
Coil brackets:
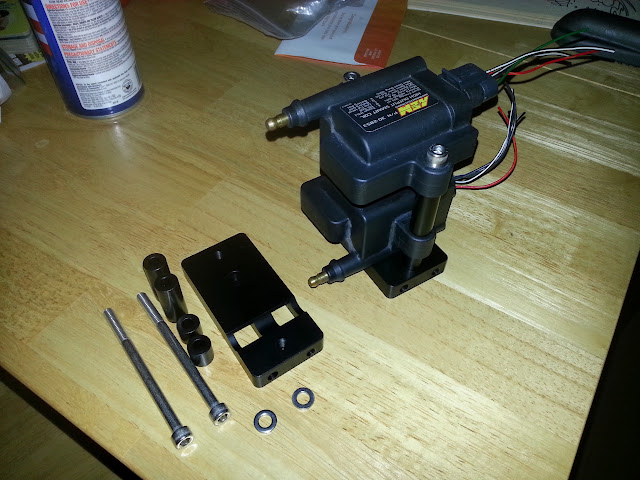
There's not much to say. They hold the ignition coils. What makes them interesting is the cutout, allowing a more compact design, and provisions that allow them to be connected together in a variety of ways.
I spent most of the day on Saturday cleaning and doing a quick detail on the Flex. I did spend some time on the fuel tank cover. I got the AN fittings and pump power connection installed.
For some reason everything is lot closer together this time around. I had to arrange nearly all the fittings in a specific manner so they didn't interfere with the fuel level sender. I guess there's some small difference between S4 and S5 covers. Here's a closer look at the power pass-through:
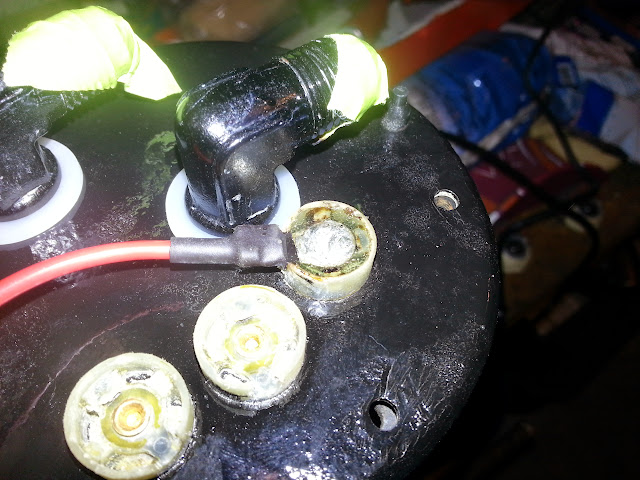
The stock ring terminals were riveted in place. Fortunately, what remains of the rivet is very close in diameter to a #10 bolt. I took a #10 ring terminal and soldered it to to the rivet. It was hard to get a good bond due to the dissimilar metals so I filled the "pod" with epoxy to guarantee everything stays in place. A quick continuity check showed no voltage drop across the connection to .01 V.
Analog fuel level sender:
I give it a 12 V power source, a ground, connect it to the stock resistance-based fuel level sender, and through electronic magic it outputs a 0-5 V signal readable by almost all aftermarket ECUs and displays.
Digital speedometer conversion:
It screws right on the stock speedometer cable takeoff on the transmission. I give it a 12 V signal and a ground, and it spits out a 16/rev digital signal via Hall Effect sensor.
Coil brackets:
There's not much to say. They hold the ignition coils. What makes them interesting is the cutout, allowing a more compact design, and provisions that allow them to be connected together in a variety of ways.
I spent most of the day on Saturday cleaning and doing a quick detail on the Flex. I did spend some time on the fuel tank cover. I got the AN fittings and pump power connection installed.
For some reason everything is lot closer together this time around. I had to arrange nearly all the fittings in a specific manner so they didn't interfere with the fuel level sender. I guess there's some small difference between S4 and S5 covers. Here's a closer look at the power pass-through:
The stock ring terminals were riveted in place. Fortunately, what remains of the rivet is very close in diameter to a #10 bolt. I took a #10 ring terminal and soldered it to to the rivet. It was hard to get a good bond due to the dissimilar metals so I filled the "pod" with epoxy to guarantee everything stays in place. A quick continuity check showed no voltage drop across the connection to .01 V.
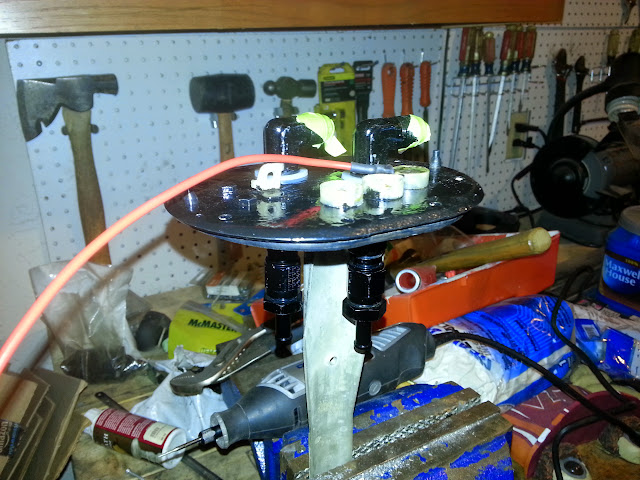
Got the external wiring completed on the fuel pump assembly.
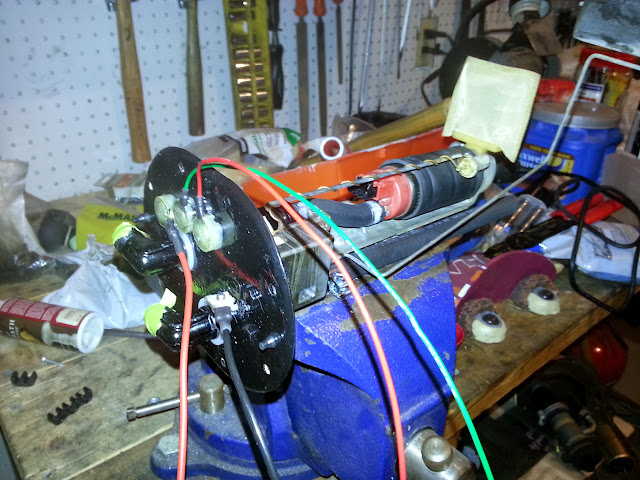
I didn't have W/G or W/R 20 ga wire so G and R will have to do. Continuity checks out and the level sender is outputting the correct 3-110 ohm. I started assembling the rest of the fuel pump and am about 90% done. I need to make the internal power and ground wires for the pump and secure the pump to the cover.
I didn't have W/G or W/R 20 ga wire so G and R will have to do. Continuity checks out and the level sender is outputting the correct 3-110 ohm. I started assembling the rest of the fuel pump and am about 90% done. I need to make the internal power and ground wires for the pump and secure the pump to the cover.
Thanks Evan. Lately I've been using this thread more to keep track of what I've done/need to do than anything else. I need to get the car to a body shop ASAP to get it on the road early next year. I really need to sell the 2 for funds though.I always like reading your updated posts and pics, Jon. Keep up the good work, buddy! See ya on track in 2015.")
I got the fuel pump assembly 98% completed last night. The last 2% is really just looming the harness. I'm thinking some Techflex-type stuff with Deutsch DTM and DTP connectors for the sending unit/warning light and power.
I really need to take care of a few items on the chassis (e.g. mounting the coils and catch can, drilling holes for the battery tray and roll bar, make door covers, etc.). I don't want to be fitting items and making brackets when the car comes back form the body shop.
Last edited:
This is getting frustrating. One step forward, two steps backward. I finally figure out a clean vacuum system configuration that cleverly hides the manifold and uses the shortest possible lines so I switch my focus back to the ignition coils. I get halfway into making a temporary prototype mount and realize I forgot to account for the damned clutch master cylinder. There goes that plan... Now I'm back to cramming the coils between the alternator and the steering column or putting them back behind the driver's headlight like I had before.
Fap-fap-fap.
+1
Perro del Sol
Member
- :
- 2003 MSP, Spicy Orange, 2004 Mazda 6 Hatch, 2004 Mazda 6 Wagon
Nothing like new parts to make me feel better...
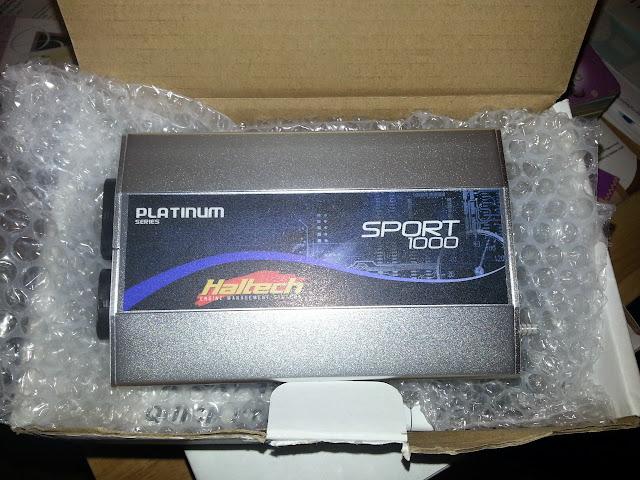
Haltech PS1000 (need to sell the Sprint RE):
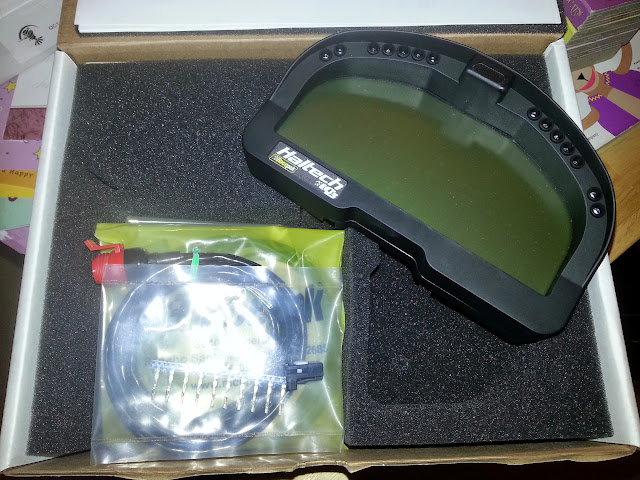
RacePak/Haltech IQ3 Display Dash:
Too much money spent; not enough progress.
You will like the set up, Jon! You did spend a pretty penny with 1000 and th IQ3 set up.......
Fap-fap-fap.
My wife didn't understand my enthusiasm.
I forget, you're running the PS1000 too, right? The dash is smaller than I'd like but no other option gives the number of displays and ease of integration. It doesn't really fit the "80's theme" of the car but it's better than having 7 individual gauges floating around.You will like the set up, Jon! You did spend a pretty penny with 1000 and th IQ3 set up.......
Yesterday I ordered some individual turn signal and high-beam indicators for the rest of the display. I could have used LEDs but I didn't want to mess with resistors and all. I can now say I have Harley Davidson parts in my car, haha!
Also got some stuff in from McMaster. I go to them for all my random material needs: 1/8" BSPT plug for the stock water temperature sending unit, 1/8" BSPT male to 1/8" NPT adapter for the oil pressure sending unit, rubber weatherstripping for the radiator duct, closed-cell foam for the fan shroud, 90 degree 1/8" NPT adapters for the vacuum manifold, blind rivot install tool and rivets, and M6 and M8 riv-nuts.
I keep forgetting about McMaster-Carr for car parts, good call. I always end up at Home Depot Racing.
Think everything will show up in time for some wrenching this weekend? My Mondays are always a little bit brighter with updated pics in this build thread.
edit- I saw in the Ohio thread you already have the parts. So get to work, turkey!
Think everything will show up in time for some wrenching this weekend? My Mondays are always a little bit brighter with updated pics in this build thread.
edit- I saw in the Ohio thread you already have the parts. So get to work, turkey!
Last edited:
McMaster for the common hardware. Summit if I want something fancy (like ARP bolts/nuts or special fittings). DelCity and Waytek for most electronic stuff though I order the fancier things from ProWireUSA.I keep forgetting about McMaster-Carr for car parts, good call. I always end up at Home Depot Racing.
Think everything will show up in time for some wrenching this weekend? My Mondays are always a little bit brighter with updated pics in this build thread.
edit- I saw in the Ohio thread you already have the parts. So get to work, turkey!
It's been hard to find time to work on it and the little 1-2 hour spurts end up being more frustrating than not. The weekends for the next three weeks look busy so I don't know how much progress I'm going to make. I'm leaving the coils along for now so maybe that'll make me feel better...
2-3 hours of work on Saturday. Got some templates made for the remaining pieces of the radiator/oil cooler duct. I put an order into McMaster for some .040" aluminum sheet to finish everything off. Also ordered some 1/16" ABS sheets for the door panels. The vacuum block is complete but I need to paint its bracket. A small victory was installing some rivets in the radiator support to hold the overflow bottle. For some reason the early FCs had a different overflow bottle and mounting location. Unfortunately I discovered a pretty big hole in the radiator. Not sure how but one of the rows get smashed to the point it was ripped open. I'm pretty sure it's not repairable so another radiator is needed. What's another $400...
Similar threads
Latest posts
-
2016~2023 CX-9 DIY Cylinder head replacement (workshop/service manual)
- Latest: Silly Wabbit
-
