
I originally followed THIS THREAD when I was doing my retro-fit, along with some other information I found online. People have requested certain individuals re-post their how-to, but for some reason they haven't and the pictures from the P5 thread no longer work. So, here's my attempt to help out some fellow forum members.
You should also watch this video, which will help you understand the instructions below. Hell you might not even need to read the rest of this with the video.
https://www.youtube.com/watch?v=MALhlsdNtl0
TOOLS
Philips screwdrivers
Flathead screwdrivers
Typical hand tools (wrenches, sockets, etc) in the typical Japanese sizes (10mm, 12mm, 14mm, etc)
Channel-locks or large pliers
Sandpaper (optional)
Flat black high temp spray paint (e.g. Rustoleum BBQ paint) (optional)
High temp primer (optional)
Aluminum tape (optional)
JB Quick (optional)
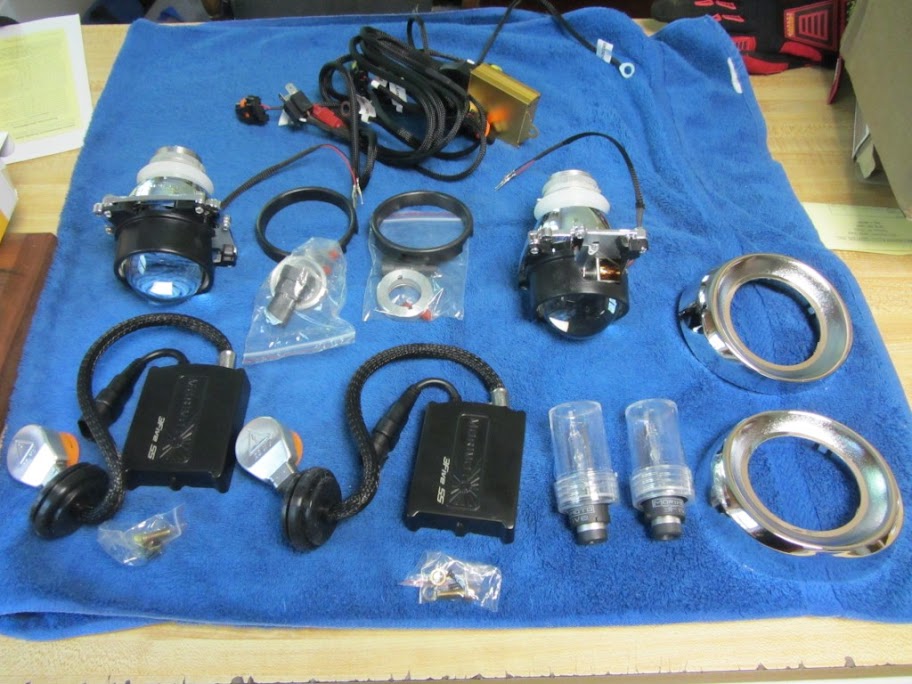
PREFACE: What makes up an HID retrofit kit
1) Projector. This is the headlight lens, which has a cut off inside of it so it doesn't blind other drivers on the road. Bi-xenon projects have the capability of lowering the cut-off, so you have a high beam and low beam.
2) HID bulb. Self explanatory. From my understanding the bulbs come in either H1 or D2S, which just refers to the plug for connecting them. Colors vary, but OEMs use 4300k and the most common is 5000k.
3) Ballast. This is the power supply for the bulbs. They come in 35w and 55w. 55w will make your bulbs brighter but will burn them out more quickly. Bulbs are expensive as hell, so go with 35w.
4) Harness. Most kits come with a control module and wiring harness, it's all plug and play.
5) Shroud. This is they fancy silver piece of plastic that goes around the projector lamp. It's a dress up item, so you can pick whatever you want to fit your style.
As far as wiring is concerned, the kits are straight forward. The ballasts are connected to power, ground, and one gets plugged into the OEM headlight bulb connector.
STEP 0: Mark your current headlight aiming
1) On a flat surface, pull your car within 60 feet of a flat wall, garage door, etc
2) Use painters tape to mark where your headlights currently sit and mark the cut offs
3) Driver's side will sit slightly lower than passenger side
4) These instructions might be wrong, but you can look up how to aim headlights in the FSM or online.
STEP 1: What kind of headlights do you currently have?
P5 lights have two bulbs, one for high beam and the other for low beam. The retrofit kit you want is for low-beam, or you can use bi-xenon and just cut the wires for cut off activation.
MSP and regular Protege have one bulb, an H4 that takes care of high and low beam. You need a bi-xenon retrofit kit.
STEP 2: Pick out your kit
You can buy any kit you want, from where you want, but there are some that will be plug-n-play, and others will require more work to make the retrofit successful.
The Retrofit Source is a one stop shop, great customer service, and good products. I would suggest you go through them, and my how-to is for a kit purchased from them.
Bi-Xenon Morimoto Mini Stage III Kit (H1): Don't know much about this kit, but I'm pretty sure it's identical to the D2S kit that I bought, except it comes with H1 style bulbs instead of D2S.
Bi-Xenon Morimoto Mini Stage III Kit (D2S): This it the kit I purchased. I've been happy with it with the exception of the ballasts which were flickering and sometimes shut off. TRS said the ballasts were recalled and they sent me replacements free of charge and the new ballasts have worked great. It is basically a plug-n-play kit.
Bi-Xenon FX-R Stage III Kit: This is a more advanced kit. Installation will be similar to the P5 install I linked at the beginning and will require cutting and fairly precise measurements to make sure they are level.
SUGGESTION: If you're buying from TRS, I would suggest upgrading to the Denso ballasts and the Philips bulbs. I've been having difficulties with the Moriomoto ballasts and have heard nothing but good things about the Denso ballasts. You get what you pay for.
STEP 3: Remove your headlights
0) Pre-heat your oven to 200 degrees. You can do it now, or wait until you have the headlights out of the car.
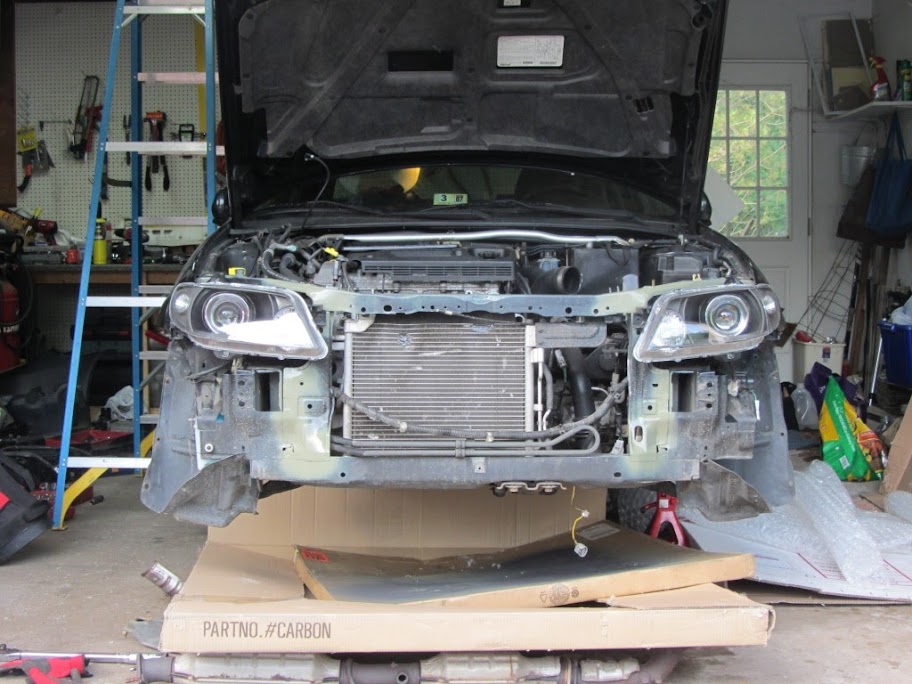
1) Remove your front bumper
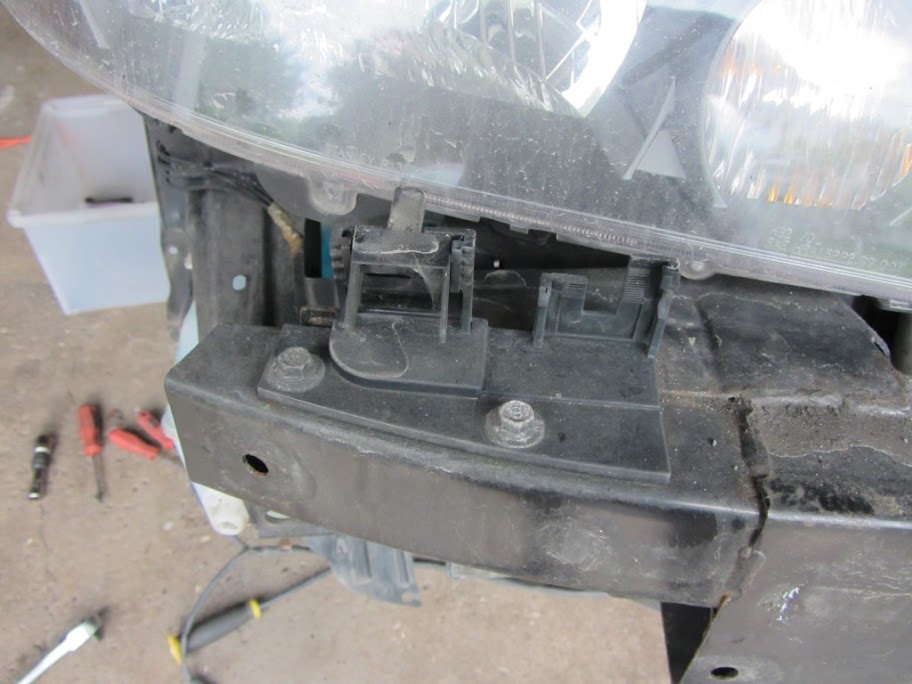
2) Remove the bumper support brackets. They look like the picture below, only yours likely won't be broken from a front end collision.
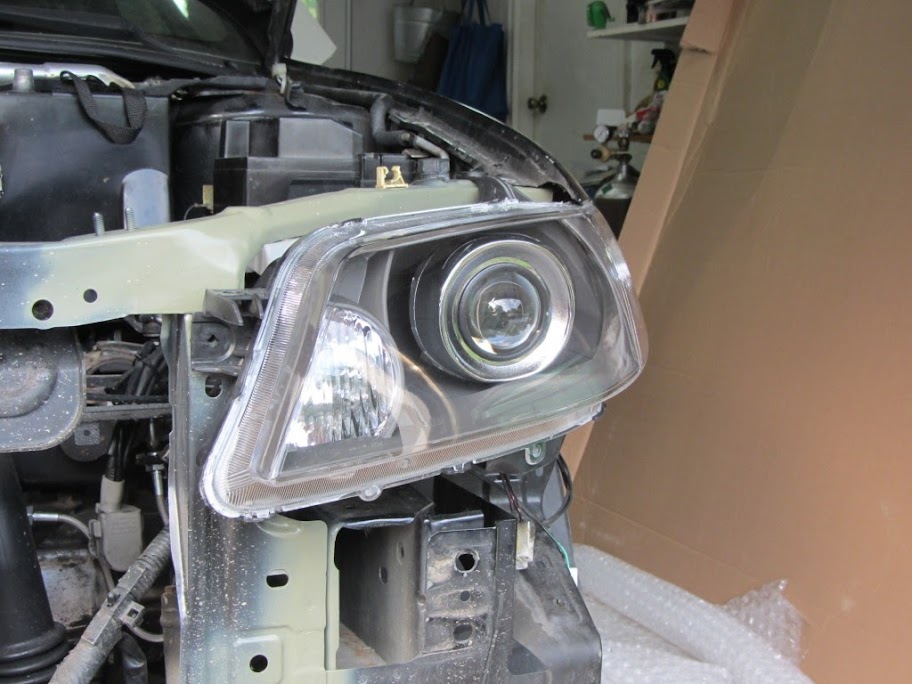
3) Remove the three bolts holding the headlight to the car
4) Remove all plugs for the lights themselves
5) Pull out the headlights
STEP 4: Pull apart your headlights
1) Remove all of the philips head screws from the back of the headlight assemblies
2) Be sure to get all of the screws, moisture escape tubes, etc. Everything in red in the picture below should be removed.

3) Put cookie sheet in the oven, cover with a towel, and put HL on the towel. Bake the headlight for 10 minutes
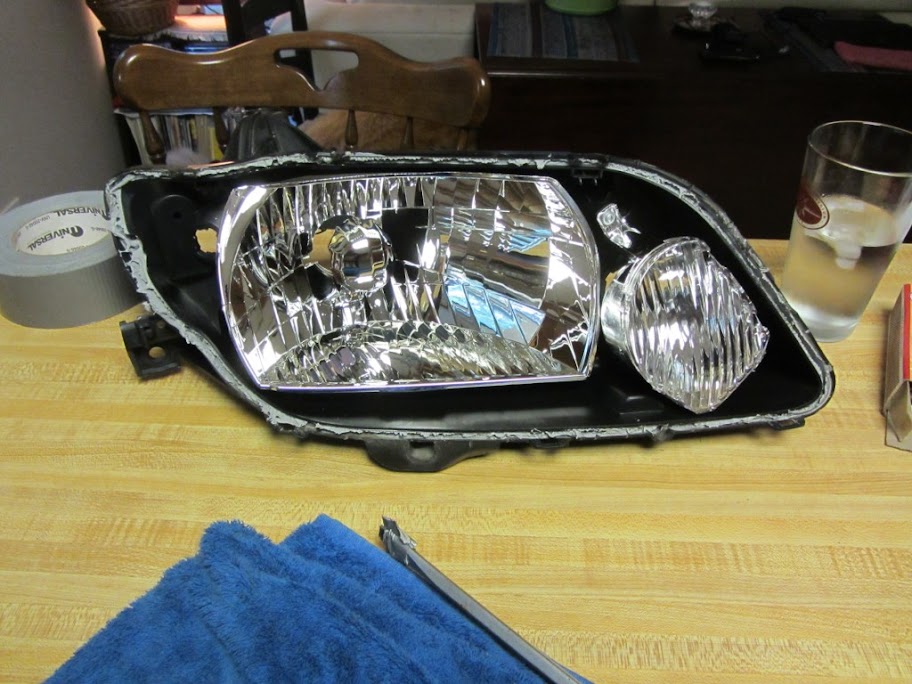
4) Pull out the headlight (use gloves), and pull them apart using a flat head screwdriver. Take your time to pop the tabs and work the two pieces loose. If the glue isn't releasing, put the light back in the over for a bit more.
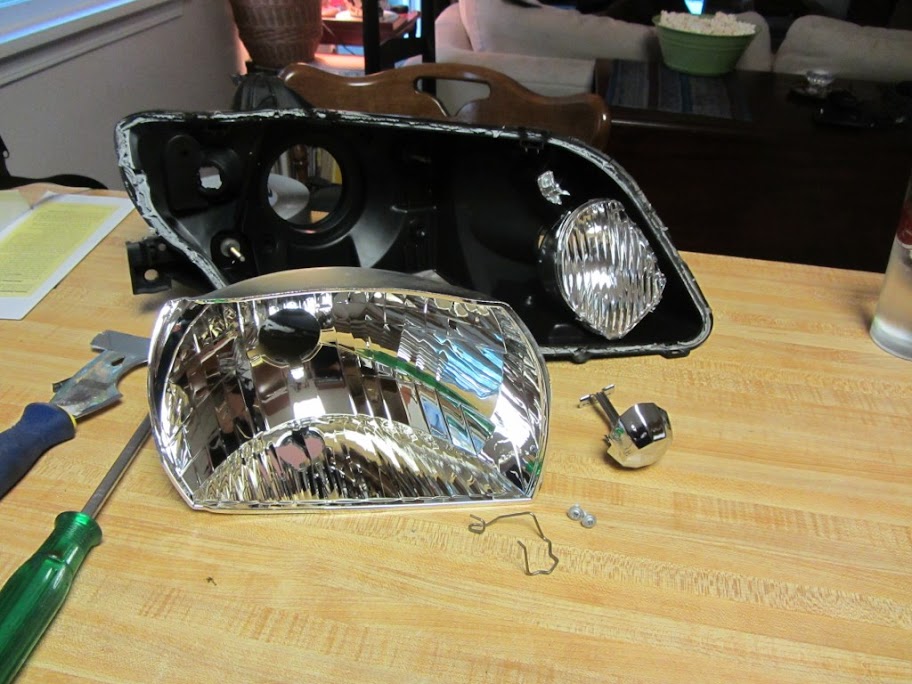
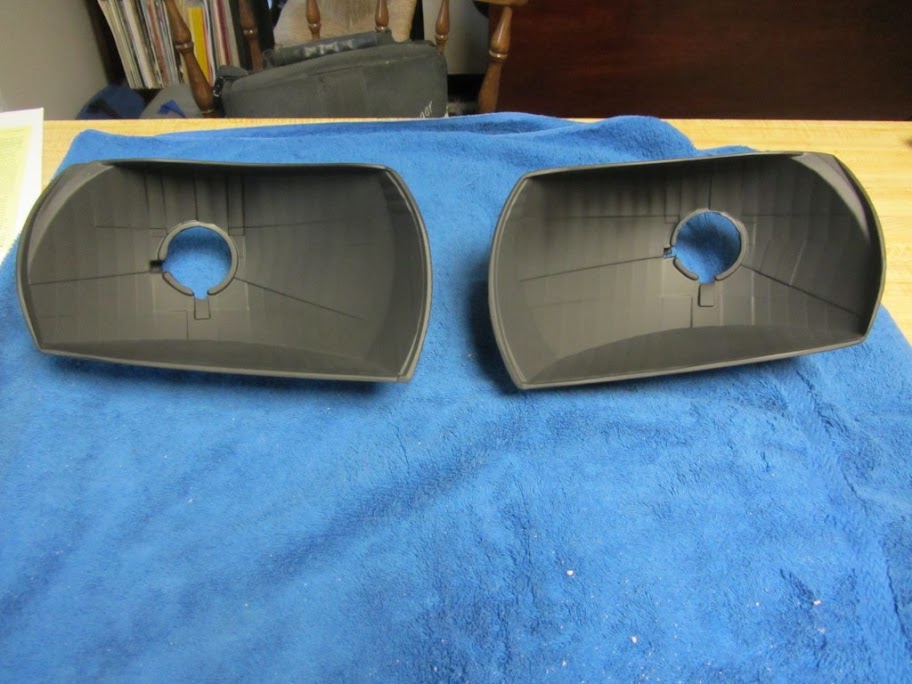
5) Remove the rest of the internal components (bezel, reflector, etc)
STEP 5: Paint the reflector (optional)
1) Sand the reflector, doesn't have to be complete, but just rough it up so the paint will stick
2) Wash the reflector and let it dry
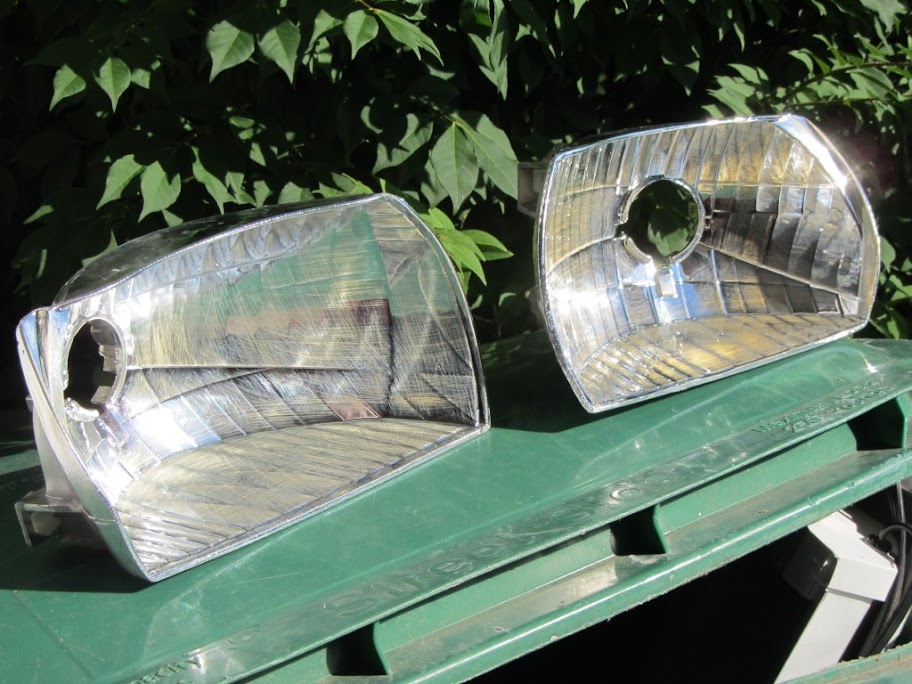
3) Hit the reflectors with two coats of high temp primer and 2-3 coats of flat black high temp paint.
STEP 6: Mock up the retrofit
1) Reinstall the reflector and turn signal
2) Layout your HID retrofit kit and take inventory
3) Read the instructions included with your HID retrofit kit
4) (Bi-xenon only step) Test the cut-off on your projector and exercise it to make sure it doesn't get stuck. Using a piece of wire, hook the positive to a power source (9V battery, or your car battery). Now hook another piece of wire to the negative side and tap it to the negative terminal on your power supply. Do this a bunch of times to make sure the cut off works. NOTE: The bi-xenon kits from TRS have connectors that you put together that are weather tight. These connectors are pretty crappy and can vibrate apart a few months of driving. I suggest cutting the wires apart and using some all weather quick disconnects.
5) (Optional) If you look at the projector lens from the side, you can see there's a black four-legged bracket that holds the lens onto the housing. There are huge holes leaving the innards exposed. It was suggested somewhere in some video to cover those holes with aluminum tape to prevent light from spilled out into the headlight housing. I'm not sure that's true, but I did it any ways. It's optional, it was tedious to do it, so I'll leave it up to you.
6) Dry run your install in headlight housing to make sure everything lines up, fits, etc. Depending on your shroud, kit, etc you might need to trim some pieces of the shroud or headlight housing to make everything fit.
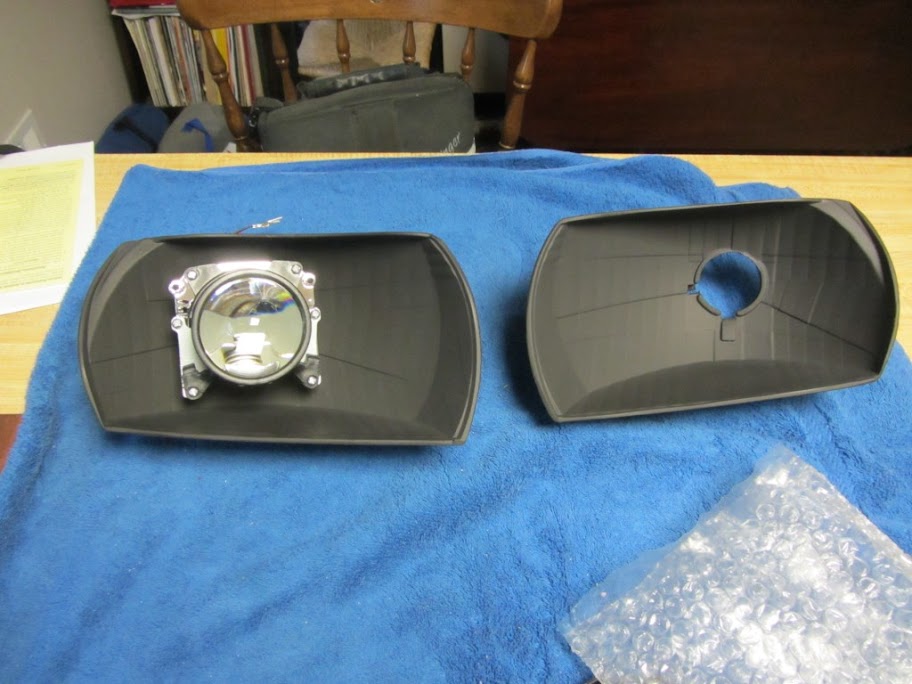

7) (Optional) It is suggested in the kit instructions that you use JB Quick to install the shrouds onto the projectors. I did this, but it's optional. The risk is eventually the shroud might work its way loose from the projector and flop around inside the headlight, forcing you to remove everything to re-seat it. Since that's a pain, I went ahead with the JB Quick for the shroud. The other risk is if you do use the JB Quick, you'll never be able to remove the shroud again. This will take about 30 minutes to cure.
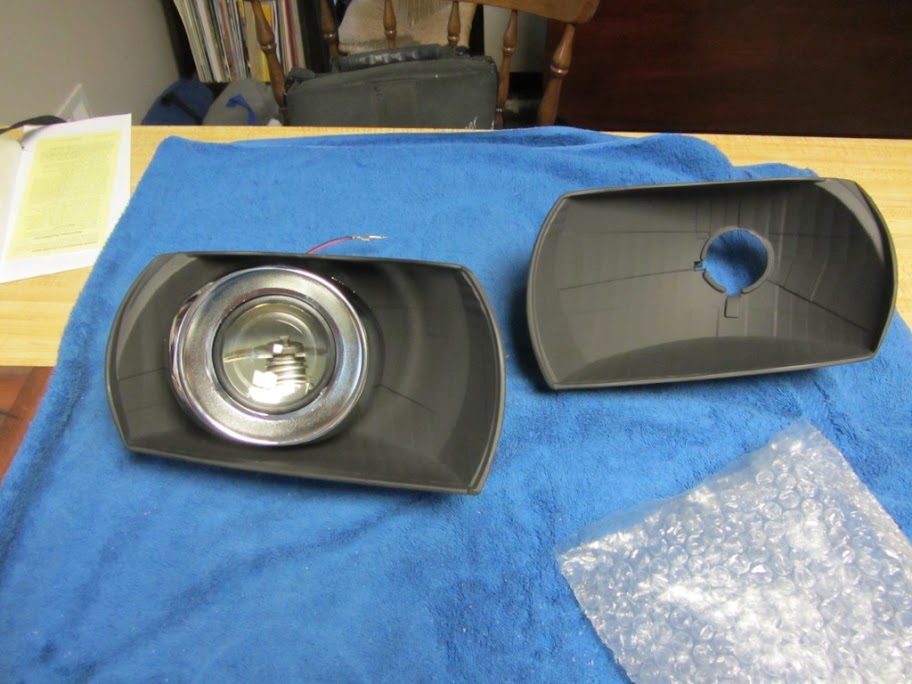
STEP 7: Install the projector for good
1) Follow the instructions for your kit for the permanent install.
2) For the D2S kit I bought, the only difference between this and the mock up was using channel locks to really tighten down the locking nut on the back of the projector housing.
3) Double check everything, make sure the projector is night and tight. It will still wobble some (if you're using the Morimoto Mini kit), but that's normal.
4) Pre-heat the oven to 200 degrees and if you bought replacement glue, put a bead of it along the housing side of the headlight
5) Put cookie sheet in the oven, cover with a towel, and put HL on the towel. Bake the headlight for 10 minutes
6) Pull out the headlight (use gloves) and push the two pieces together. Make sure the snaps go back into place and you'll want some of the glue to ooze out.
7) Put the philips screws, brackets, and moisture weeping tubes back into place
STEP 8: Install the wiring
I don't have any pictures for this, but it's straight forward.
1) Find a location and mount the wiring control (mine was a copper box). I installed mine around the transmission motor mount on the driver side. There was just enough room. The wire harness is bound up a little bit, but it hasn't been an issue.
2) Find a location for the driver's side ballast. I mounted mine right behind the driver's side headlight.
3) Find a location for the passenger's side ballast. I mounted mine on top of the AC lines behind the passenger's side headlight.
4) Make the ground, power, and headlight signal connections
STEP 9: Test the lights
1) Install your HID bulbs
2) Throw the headlights onto your car and replace the 10mm bolt back into the radiator support bracket for the lights.
3) Connect the bulbs to the ballasts
4) Turn on your headlights
** Verify they work, if they don't, start troubleshooting your wire connections
5) (Bi-Xenon step only) Flick your high beams on and off to verify the cut offs are working
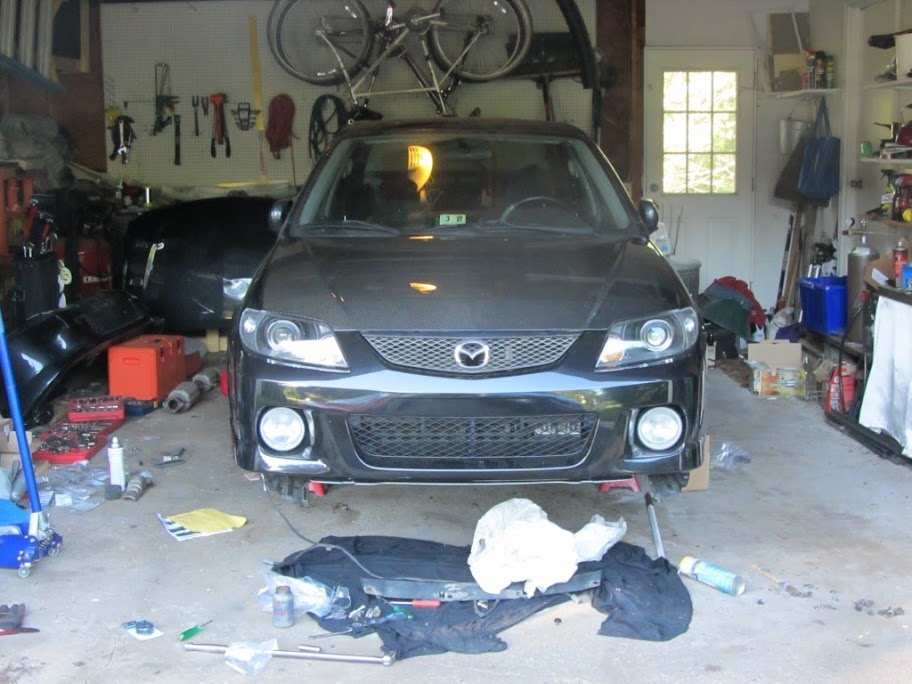
6) If everything is working, bolts everything back up and reinstall the front bumper. If everything is not working, you can go through the FAQ on the TRS web site or submit questions to their forum or customer support.
STEP 10: Aiming
1) Go back to the wall where you initially did your aiming and adjust your new projectors so they match where your old ones were.
2) Err on the side of lower than higher, because you'll blind the crap out of everyone on the road if you aim them too high.
3) You adjust the aiming with the large screws on the back of the headlight, which can be a pain to get to.
You should also watch this video, which will help you understand the instructions below. Hell you might not even need to read the rest of this with the video.
https://www.youtube.com/watch?v=MALhlsdNtl0
TOOLS
Philips screwdrivers
Flathead screwdrivers
Typical hand tools (wrenches, sockets, etc) in the typical Japanese sizes (10mm, 12mm, 14mm, etc)
Channel-locks or large pliers
Sandpaper (optional)
Flat black high temp spray paint (e.g. Rustoleum BBQ paint) (optional)
High temp primer (optional)
Aluminum tape (optional)
JB Quick (optional)
PREFACE: What makes up an HID retrofit kit
1) Projector. This is the headlight lens, which has a cut off inside of it so it doesn't blind other drivers on the road. Bi-xenon projects have the capability of lowering the cut-off, so you have a high beam and low beam.
2) HID bulb. Self explanatory. From my understanding the bulbs come in either H1 or D2S, which just refers to the plug for connecting them. Colors vary, but OEMs use 4300k and the most common is 5000k.
3) Ballast. This is the power supply for the bulbs. They come in 35w and 55w. 55w will make your bulbs brighter but will burn them out more quickly. Bulbs are expensive as hell, so go with 35w.
4) Harness. Most kits come with a control module and wiring harness, it's all plug and play.
5) Shroud. This is they fancy silver piece of plastic that goes around the projector lamp. It's a dress up item, so you can pick whatever you want to fit your style.
As far as wiring is concerned, the kits are straight forward. The ballasts are connected to power, ground, and one gets plugged into the OEM headlight bulb connector.
STEP 0: Mark your current headlight aiming
1) On a flat surface, pull your car within 60 feet of a flat wall, garage door, etc
2) Use painters tape to mark where your headlights currently sit and mark the cut offs
3) Driver's side will sit slightly lower than passenger side
4) These instructions might be wrong, but you can look up how to aim headlights in the FSM or online.
STEP 1: What kind of headlights do you currently have?
P5 lights have two bulbs, one for high beam and the other for low beam. The retrofit kit you want is for low-beam, or you can use bi-xenon and just cut the wires for cut off activation.
MSP and regular Protege have one bulb, an H4 that takes care of high and low beam. You need a bi-xenon retrofit kit.
STEP 2: Pick out your kit
You can buy any kit you want, from where you want, but there are some that will be plug-n-play, and others will require more work to make the retrofit successful.
The Retrofit Source is a one stop shop, great customer service, and good products. I would suggest you go through them, and my how-to is for a kit purchased from them.
Bi-Xenon Morimoto Mini Stage III Kit (H1): Don't know much about this kit, but I'm pretty sure it's identical to the D2S kit that I bought, except it comes with H1 style bulbs instead of D2S.
Bi-Xenon Morimoto Mini Stage III Kit (D2S): This it the kit I purchased. I've been happy with it with the exception of the ballasts which were flickering and sometimes shut off. TRS said the ballasts were recalled and they sent me replacements free of charge and the new ballasts have worked great. It is basically a plug-n-play kit.
Bi-Xenon FX-R Stage III Kit: This is a more advanced kit. Installation will be similar to the P5 install I linked at the beginning and will require cutting and fairly precise measurements to make sure they are level.
SUGGESTION: If you're buying from TRS, I would suggest upgrading to the Denso ballasts and the Philips bulbs. I've been having difficulties with the Moriomoto ballasts and have heard nothing but good things about the Denso ballasts. You get what you pay for.
STEP 3: Remove your headlights
0) Pre-heat your oven to 200 degrees. You can do it now, or wait until you have the headlights out of the car.
1) Remove your front bumper
2) Remove the bumper support brackets. They look like the picture below, only yours likely won't be broken from a front end collision.
3) Remove the three bolts holding the headlight to the car
4) Remove all plugs for the lights themselves
5) Pull out the headlights
STEP 4: Pull apart your headlights
1) Remove all of the philips head screws from the back of the headlight assemblies
2) Be sure to get all of the screws, moisture escape tubes, etc. Everything in red in the picture below should be removed.
3) Put cookie sheet in the oven, cover with a towel, and put HL on the towel. Bake the headlight for 10 minutes
4) Pull out the headlight (use gloves), and pull them apart using a flat head screwdriver. Take your time to pop the tabs and work the two pieces loose. If the glue isn't releasing, put the light back in the over for a bit more.
5) Remove the rest of the internal components (bezel, reflector, etc)
STEP 5: Paint the reflector (optional)
1) Sand the reflector, doesn't have to be complete, but just rough it up so the paint will stick
2) Wash the reflector and let it dry
3) Hit the reflectors with two coats of high temp primer and 2-3 coats of flat black high temp paint.
STEP 6: Mock up the retrofit
1) Reinstall the reflector and turn signal
2) Layout your HID retrofit kit and take inventory
3) Read the instructions included with your HID retrofit kit
4) (Bi-xenon only step) Test the cut-off on your projector and exercise it to make sure it doesn't get stuck. Using a piece of wire, hook the positive to a power source (9V battery, or your car battery). Now hook another piece of wire to the negative side and tap it to the negative terminal on your power supply. Do this a bunch of times to make sure the cut off works. NOTE: The bi-xenon kits from TRS have connectors that you put together that are weather tight. These connectors are pretty crappy and can vibrate apart a few months of driving. I suggest cutting the wires apart and using some all weather quick disconnects.
5) (Optional) If you look at the projector lens from the side, you can see there's a black four-legged bracket that holds the lens onto the housing. There are huge holes leaving the innards exposed. It was suggested somewhere in some video to cover those holes with aluminum tape to prevent light from spilled out into the headlight housing. I'm not sure that's true, but I did it any ways. It's optional, it was tedious to do it, so I'll leave it up to you.
6) Dry run your install in headlight housing to make sure everything lines up, fits, etc. Depending on your shroud, kit, etc you might need to trim some pieces of the shroud or headlight housing to make everything fit.
7) (Optional) It is suggested in the kit instructions that you use JB Quick to install the shrouds onto the projectors. I did this, but it's optional. The risk is eventually the shroud might work its way loose from the projector and flop around inside the headlight, forcing you to remove everything to re-seat it. Since that's a pain, I went ahead with the JB Quick for the shroud. The other risk is if you do use the JB Quick, you'll never be able to remove the shroud again. This will take about 30 minutes to cure.
STEP 7: Install the projector for good
1) Follow the instructions for your kit for the permanent install.
2) For the D2S kit I bought, the only difference between this and the mock up was using channel locks to really tighten down the locking nut on the back of the projector housing.
3) Double check everything, make sure the projector is night and tight. It will still wobble some (if you're using the Morimoto Mini kit), but that's normal.
4) Pre-heat the oven to 200 degrees and if you bought replacement glue, put a bead of it along the housing side of the headlight
5) Put cookie sheet in the oven, cover with a towel, and put HL on the towel. Bake the headlight for 10 minutes
6) Pull out the headlight (use gloves) and push the two pieces together. Make sure the snaps go back into place and you'll want some of the glue to ooze out.
7) Put the philips screws, brackets, and moisture weeping tubes back into place
STEP 8: Install the wiring
I don't have any pictures for this, but it's straight forward.
1) Find a location and mount the wiring control (mine was a copper box). I installed mine around the transmission motor mount on the driver side. There was just enough room. The wire harness is bound up a little bit, but it hasn't been an issue.
2) Find a location for the driver's side ballast. I mounted mine right behind the driver's side headlight.
3) Find a location for the passenger's side ballast. I mounted mine on top of the AC lines behind the passenger's side headlight.
4) Make the ground, power, and headlight signal connections
STEP 9: Test the lights
1) Install your HID bulbs
2) Throw the headlights onto your car and replace the 10mm bolt back into the radiator support bracket for the lights.
3) Connect the bulbs to the ballasts
4) Turn on your headlights
** Verify they work, if they don't, start troubleshooting your wire connections
5) (Bi-Xenon step only) Flick your high beams on and off to verify the cut offs are working
6) If everything is working, bolts everything back up and reinstall the front bumper. If everything is not working, you can go through the FAQ on the TRS web site or submit questions to their forum or customer support.
STEP 10: Aiming
1) Go back to the wall where you initially did your aiming and adjust your new projectors so they match where your old ones were.
2) Err on the side of lower than higher, because you'll blind the crap out of everyone on the road if you aim them too high.
3) You adjust the aiming with the large screws on the back of the headlight, which can be a pain to get to.
Last edited:
