
Sledgehammer
Member
- :
- Mazdaspeed6
How To: Replacing the front wheel bearings on a Mazdaspeed 6
Replacing the wheel bearings will likely happen around 100,000 miles for our cars. You will know by the sound, the faster you go, the louder it gets. You can confirm that the bearing is bad by jacking up the car and spinning the wheel or lifting it against the spring. You don’t have to remove the wheel for this.
Difficulty 1-10:
“4”, harder than changing your own brake pads, but easier than replacing the front drive shafts and CV joints, as I ultimately found out.
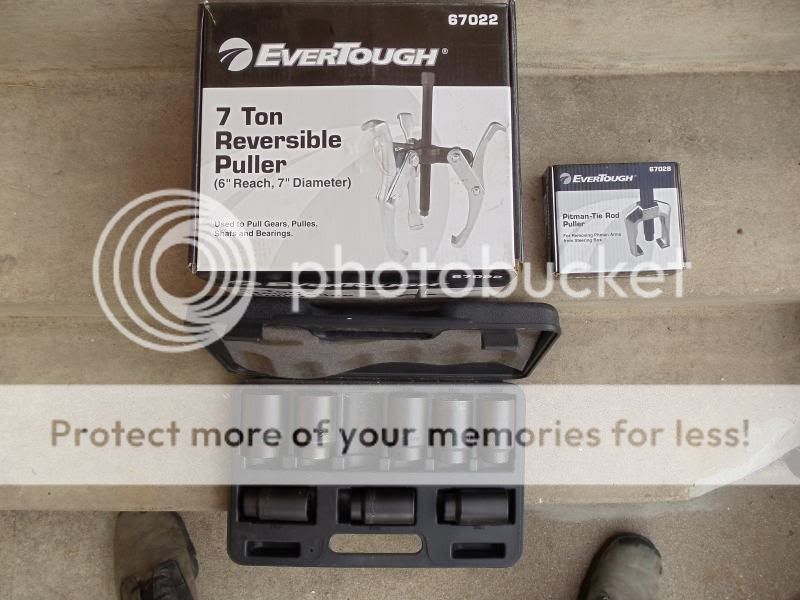
Tools:
A number of specialty tools will be required. Using the right tools will keep you from damaging the dust bushings (as I found out the hard way). Tools used
- Crescent Wrench
- Breaker Bar
- Impact Wrench (electric and rented)
- 7 Ton Reverse Puller (Rented)
- Pitman Tie Rod (Rented)
- Socket Wrench
- 35mm socket (Rented)
- 23mm socket
- 17mm socket
- 12 mm socket
Cost:
$54 per bearing from Napa. $20 per side bearing removal and installation. $15 impact wrench rental.
O Factor: “1”, invisible and unheard, the way a wheel bearing should be
To start off, jack up the front wheels and put them on jack stands so the car doesn’t fall on you. Make sure the parking brake is on. Then take off the wheels. Your ready to begin.
Step One:
Unbend the wheel nut pinch. I used a nail punch. Just hammer it a little bit and it will bend back.
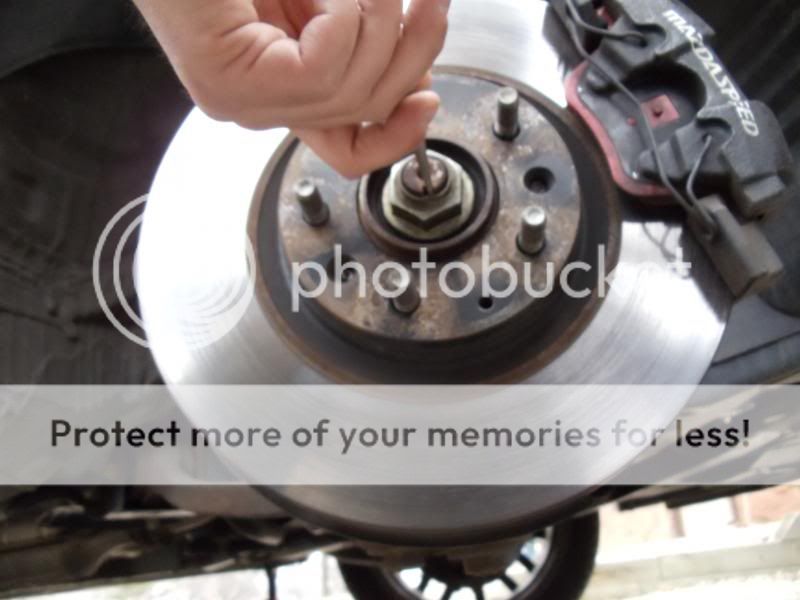
Step Two:
Remove the wheel nut with a 35mm socket. I used an electric impact wrench. If your using a breaker bar, you will need a friend to step on the brakes to keep the wheel from spinning.
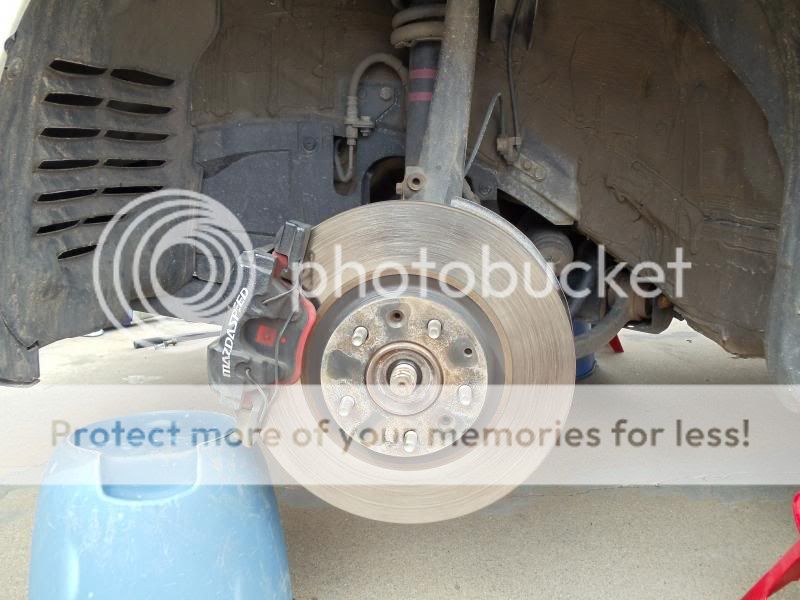
After removal, it should look like this

Step Three:
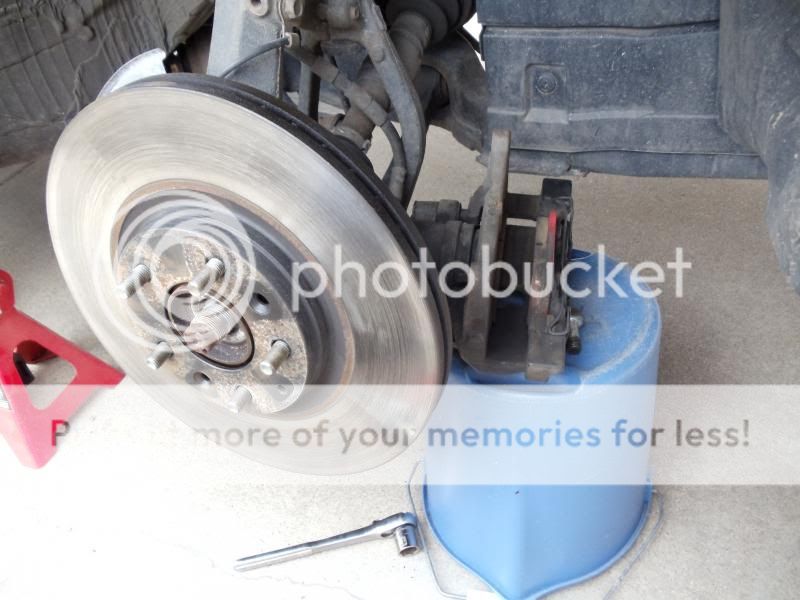
Remove the two bolts holding the brake caliper onto the wheel hub assembly (wheel knuckle) using a 17 mm socket.
Place the brake caliper on something so your not stressing the brake line, I used an upside down bucket but anything will work.
Step Four: As a note, on the passenger side, I did this step last, on the driver side, I did it right after removing the brake calipers and it was MUCH easier so I recommend others to do this after removing the brake calipers.
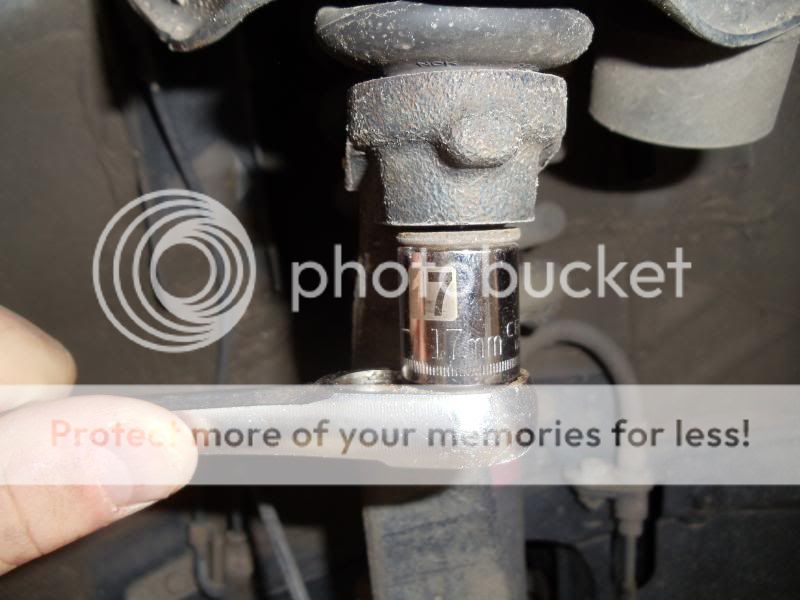
The next two bolts are on pretty tight. They are located on the bottom side of the wheel knuckle and are size 23mm.
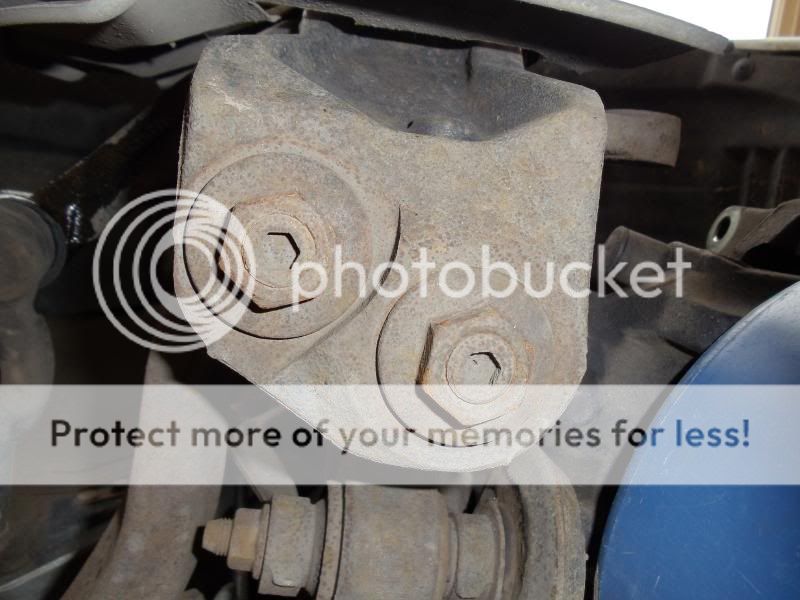
If you can fit your impact wrench under the car onto the bolts it makes this easy, if not, use a breaker bar like I did. Spin those puppies off.

Next you have the not so fun part of removing the two bolts from the wheel hub assembly. I first tried using a wedge but ended up damaging the dust bushing (replacement on order and its $24 for the part. Costly mistake). Also, the wedge doesn’t remove the bolts from the wheel knuckle, double doh!
Ultimately, I ended up using the reverse puller and setting two of the fingers at 180 degrees from each other. When these pop out, they come out with a bang. Make sure your wearing eye protection.

First one off.
Step Five:
Remove the steering column pin from the steering tie rod.
Then remove the nut with a 17mm socket, use a deep socket if you can.

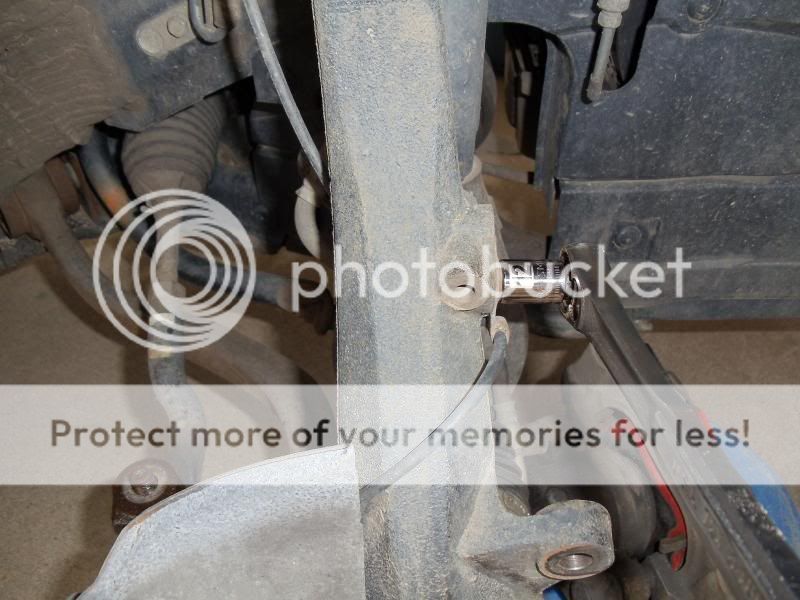
Step Six:
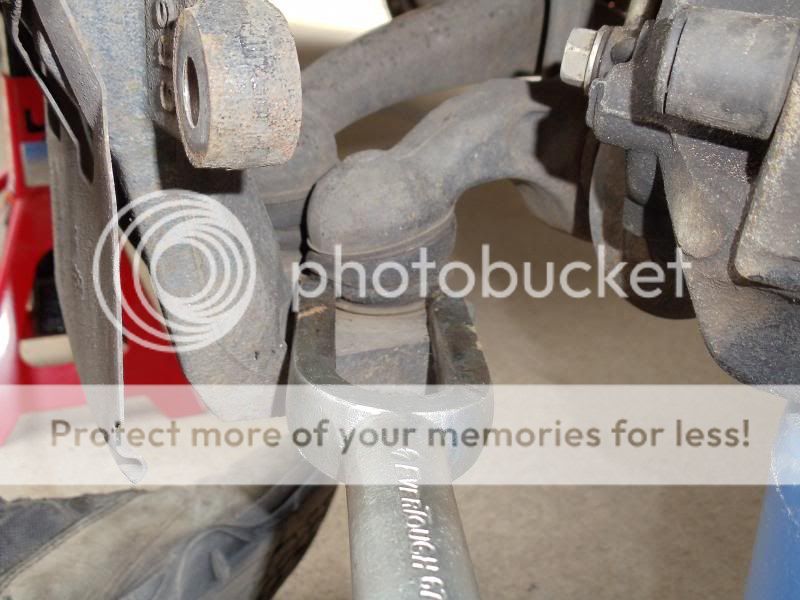
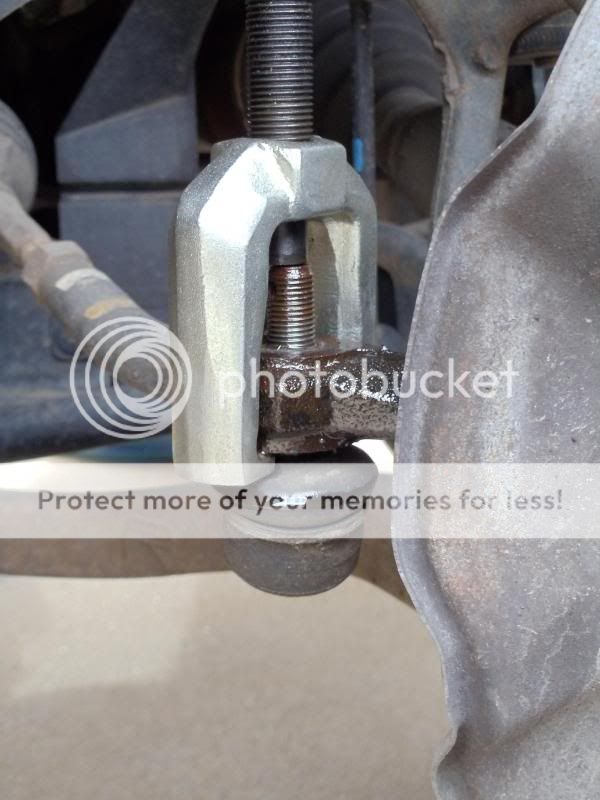
Place the tie rod puller tool on top of the tie rod bolt. I used a crescent wrench to spin the puller. It will pop loose. You can also use a tie rod wedge but it might damage the dust bushing.
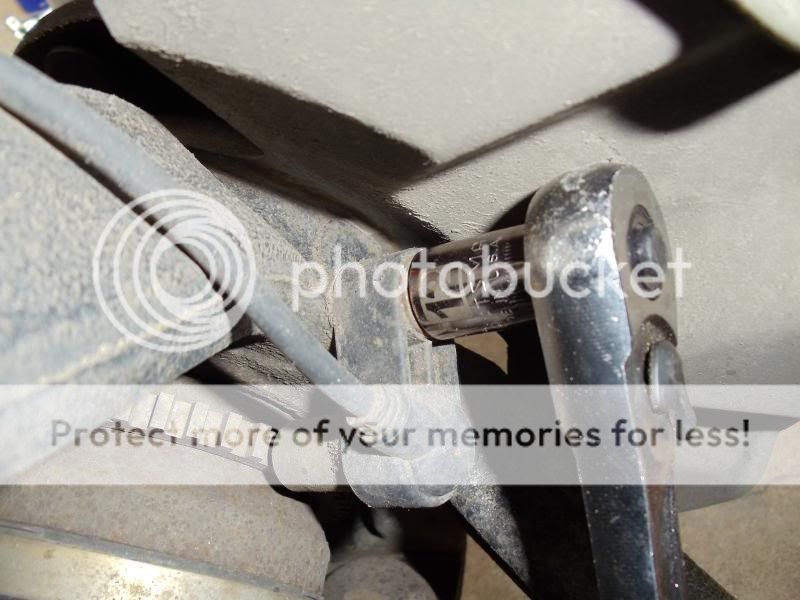
Step Seven:
Removing the nut from the top of the wheel knuckle. Using a 17mm socket, remove the nut from the upper control arm.
Then use the tie rod puller tool in the same way as before.

Step Eight:
Removing the ABS sensor. Removal of this should be done gently or risk breaking the weak plastic holding the sensor in place. It helps to have a little wd-40 or liquid wrench to wiggle the plastic aligner out of the wheel knuckle.
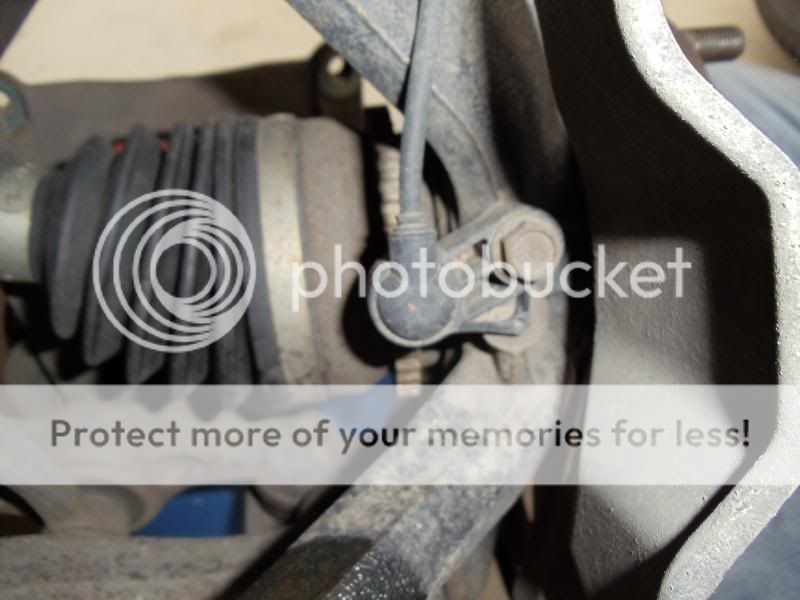
Use a 12 mm socket and keep track of which bolts go where as the sizes differ in length.
Then unbolt the upper ABS sensor from the knuckle, again using a 12 mm
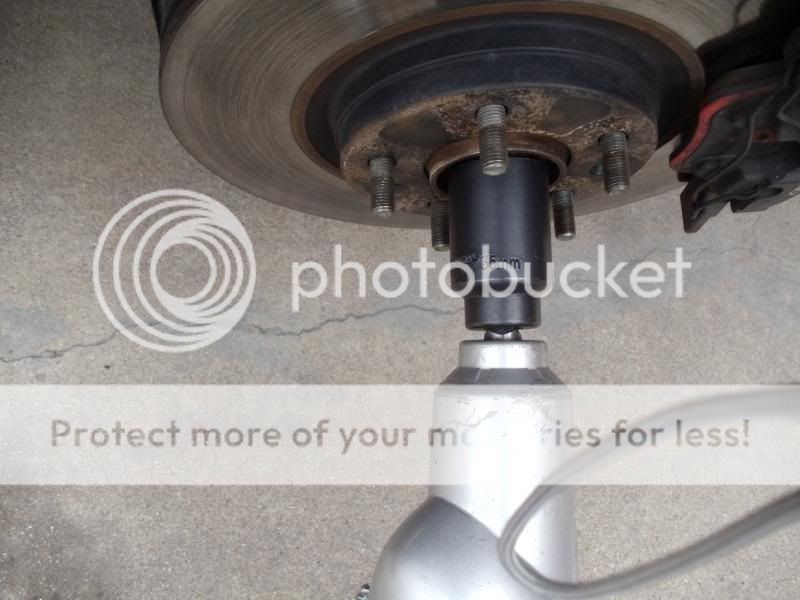
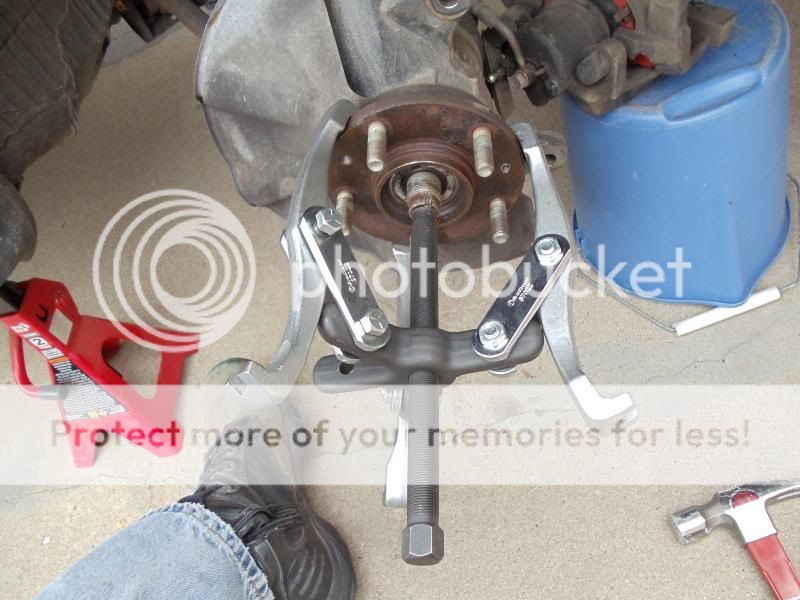
Step Nine:
Removing the drive-shaft from the wheel knuckle. I used a 7 Ton Reversible Puller rented from O’Reilly Auto Parts $0. Hook the three fingers around the wheel sprocket (insert correct name here). Then slowly tighten until you cannot twist by hand. Then give it a few good turns with a crescent wrench to make sure it is on securely. I then put an impact wrench over the nut and spun it out (Mine was on really tight and wouldn’t come loose any other way. Others have used sledge hammers but that will mushroom the metal).
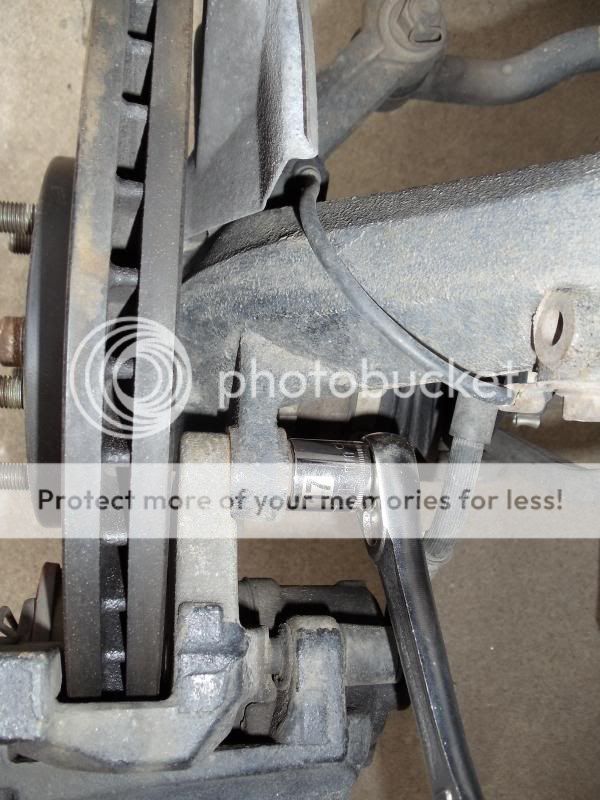
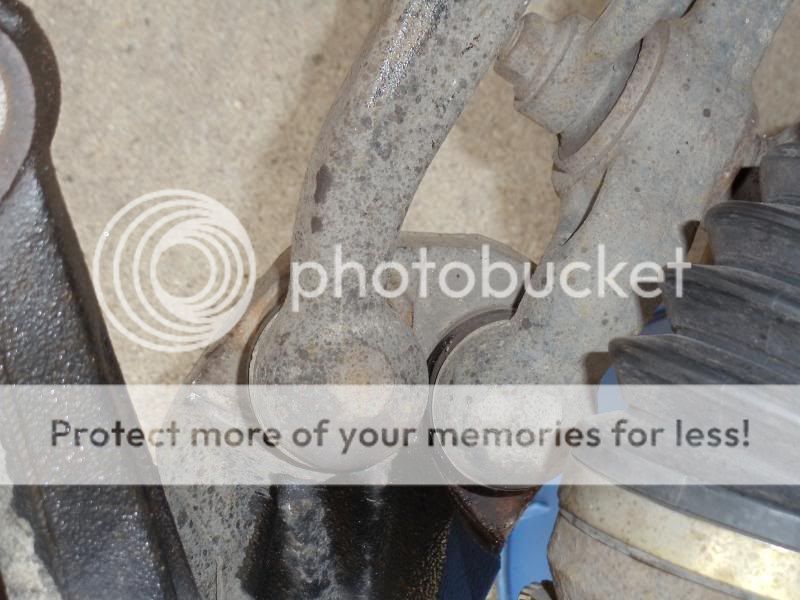
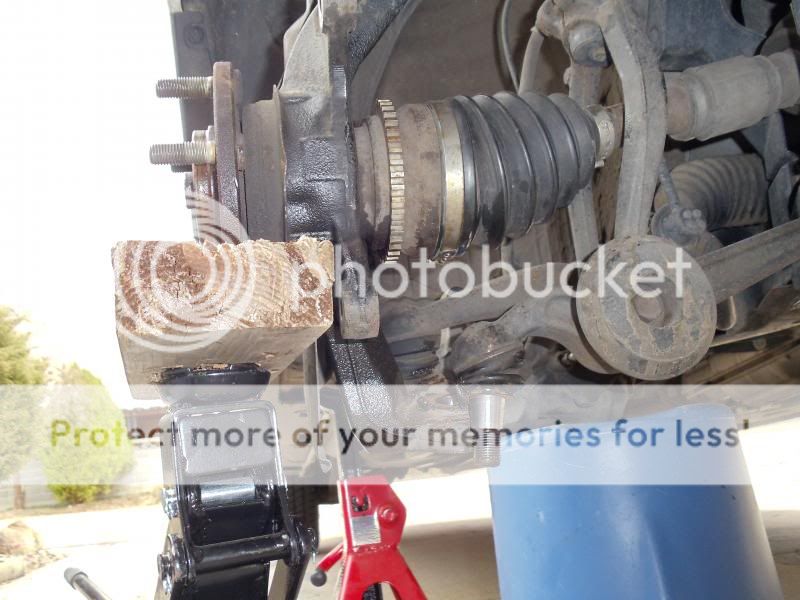
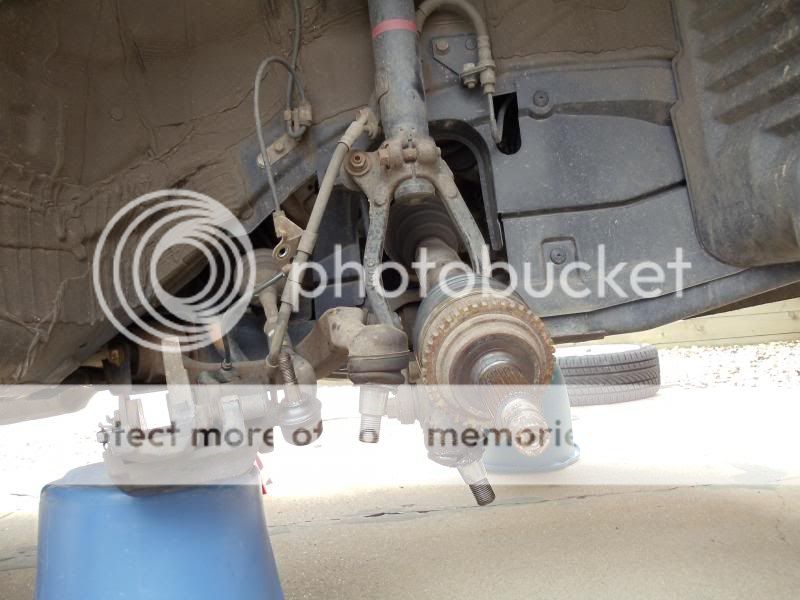
Once removed, it will look like this. DO NOT PULL AT THE DRIVE SHAFT TO GET THE DRIVE SHAFT AND WHEEL KNUCKLE LOOSE. This is a major mistake and can lead to the CV drive-shaft joint coming apart. If this happens, you will know on your test drive. Replacing this is another $100 or so for a remanufactured part.
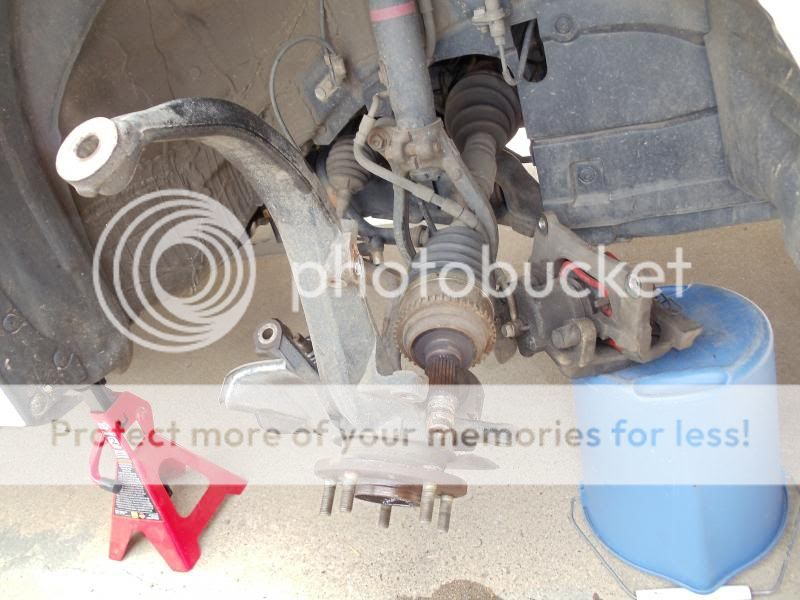
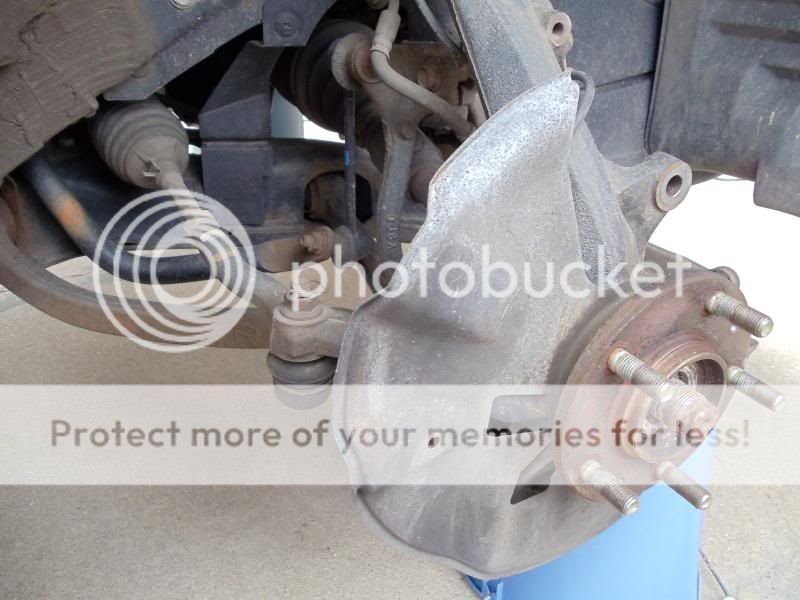
You can now slide the drive shaft off the back of the knuckle and remove the knuckle to get ready to have the bearings replaced.
If you look at the front bolt, you can see the damaged bushing (it is the lowest bolt in the picture).
Step Ten:
Repeat on the drivers side. The drivers side didn’t have any damage and no parts needed replacing.
Step Eleven:
Once both wheel knuckles are free, take them to a shop to have the bearings pushed out and new ones back in. It cost me $20 a side.

New bearings installed

Step Twelve:
Reinstall the wheel knuckles and tighten down the bolts.
Step Thirteen:
Test drive, but go very slow with windows down to listen for strange noises. Make sure the turn the wheel a lot and give the springs a little load to test. If everything checks, move on the step 14
Step Fourteen:
Have a beer.
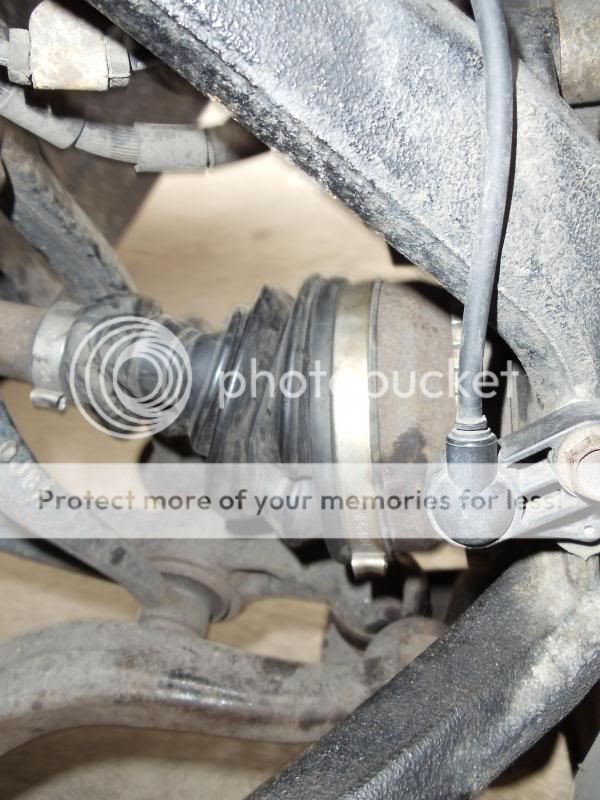
Removing the two wheel knuckles took me about two hours. It can be done quicker but I tried keeping in mind this write-up slowing the pace. The drivers side took me less than 20 minutes. Remember to take your time reinstalling the parts to make sure nothing is missed and all ABS lines and brake lines are how they were. I do have to disclose that I know about the drive-shaft separation problem because that is exactly what I did. This cost me an additional $100 and my car out of operation for a day. A shop stated that my problem wasn’t caused by me and that the driveshaft was breaking before the repair, others stated that they did the same thing once before and made sure not to do it again.
The pic shows the twisted CV boot.
This is a decently difficult repair and if you don’t really know what your doing (like me, I am not a mechanic), you can cost yourself extra money. In total, I still saved myself around $200, but it was at the cost of my time and frustration after I broke the driveshaft. Good luck, and bring a friend for unexpected trips to the parts shop.
Replacing the wheel bearings will likely happen around 100,000 miles for our cars. You will know by the sound, the faster you go, the louder it gets. You can confirm that the bearing is bad by jacking up the car and spinning the wheel or lifting it against the spring. You don’t have to remove the wheel for this.
Difficulty 1-10:
“4”, harder than changing your own brake pads, but easier than replacing the front drive shafts and CV joints, as I ultimately found out.
Tools:
A number of specialty tools will be required. Using the right tools will keep you from damaging the dust bushings (as I found out the hard way). Tools used
- Crescent Wrench
- Breaker Bar
- Impact Wrench (electric and rented)
- 7 Ton Reverse Puller (Rented)
- Pitman Tie Rod (Rented)
- Socket Wrench
- 35mm socket (Rented)
- 23mm socket
- 17mm socket
- 12 mm socket
Cost:
$54 per bearing from Napa. $20 per side bearing removal and installation. $15 impact wrench rental.
O Factor: “1”, invisible and unheard, the way a wheel bearing should be
To start off, jack up the front wheels and put them on jack stands so the car doesn’t fall on you. Make sure the parking brake is on. Then take off the wheels. Your ready to begin.
Step One:
Unbend the wheel nut pinch. I used a nail punch. Just hammer it a little bit and it will bend back.
Step Two:
Remove the wheel nut with a 35mm socket. I used an electric impact wrench. If your using a breaker bar, you will need a friend to step on the brakes to keep the wheel from spinning.
After removal, it should look like this
Step Three:
Remove the two bolts holding the brake caliper onto the wheel hub assembly (wheel knuckle) using a 17 mm socket.
Place the brake caliper on something so your not stressing the brake line, I used an upside down bucket but anything will work.
Step Four: As a note, on the passenger side, I did this step last, on the driver side, I did it right after removing the brake calipers and it was MUCH easier so I recommend others to do this after removing the brake calipers.
The next two bolts are on pretty tight. They are located on the bottom side of the wheel knuckle and are size 23mm.
If you can fit your impact wrench under the car onto the bolts it makes this easy, if not, use a breaker bar like I did. Spin those puppies off.
Next you have the not so fun part of removing the two bolts from the wheel hub assembly. I first tried using a wedge but ended up damaging the dust bushing (replacement on order and its $24 for the part. Costly mistake). Also, the wedge doesn’t remove the bolts from the wheel knuckle, double doh!
Ultimately, I ended up using the reverse puller and setting two of the fingers at 180 degrees from each other. When these pop out, they come out with a bang. Make sure your wearing eye protection.
First one off.
Step Five:
Remove the steering column pin from the steering tie rod.
Then remove the nut with a 17mm socket, use a deep socket if you can.
Step Six:
Place the tie rod puller tool on top of the tie rod bolt. I used a crescent wrench to spin the puller. It will pop loose. You can also use a tie rod wedge but it might damage the dust bushing.
Step Seven:
Removing the nut from the top of the wheel knuckle. Using a 17mm socket, remove the nut from the upper control arm.
Then use the tie rod puller tool in the same way as before.
Step Eight:
Removing the ABS sensor. Removal of this should be done gently or risk breaking the weak plastic holding the sensor in place. It helps to have a little wd-40 or liquid wrench to wiggle the plastic aligner out of the wheel knuckle.
Use a 12 mm socket and keep track of which bolts go where as the sizes differ in length.
Then unbolt the upper ABS sensor from the knuckle, again using a 12 mm
Step Nine:
Removing the drive-shaft from the wheel knuckle. I used a 7 Ton Reversible Puller rented from O’Reilly Auto Parts $0. Hook the three fingers around the wheel sprocket (insert correct name here). Then slowly tighten until you cannot twist by hand. Then give it a few good turns with a crescent wrench to make sure it is on securely. I then put an impact wrench over the nut and spun it out (Mine was on really tight and wouldn’t come loose any other way. Others have used sledge hammers but that will mushroom the metal).
Once removed, it will look like this. DO NOT PULL AT THE DRIVE SHAFT TO GET THE DRIVE SHAFT AND WHEEL KNUCKLE LOOSE. This is a major mistake and can lead to the CV drive-shaft joint coming apart. If this happens, you will know on your test drive. Replacing this is another $100 or so for a remanufactured part.
You can now slide the drive shaft off the back of the knuckle and remove the knuckle to get ready to have the bearings replaced.
If you look at the front bolt, you can see the damaged bushing (it is the lowest bolt in the picture).
Step Ten:
Repeat on the drivers side. The drivers side didn’t have any damage and no parts needed replacing.
Step Eleven:
Once both wheel knuckles are free, take them to a shop to have the bearings pushed out and new ones back in. It cost me $20 a side.
New bearings installed
Step Twelve:
Reinstall the wheel knuckles and tighten down the bolts.
Step Thirteen:
Test drive, but go very slow with windows down to listen for strange noises. Make sure the turn the wheel a lot and give the springs a little load to test. If everything checks, move on the step 14
Step Fourteen:
Have a beer.
Removing the two wheel knuckles took me about two hours. It can be done quicker but I tried keeping in mind this write-up slowing the pace. The drivers side took me less than 20 minutes. Remember to take your time reinstalling the parts to make sure nothing is missed and all ABS lines and brake lines are how they were. I do have to disclose that I know about the drive-shaft separation problem because that is exactly what I did. This cost me an additional $100 and my car out of operation for a day. A shop stated that my problem wasn’t caused by me and that the driveshaft was breaking before the repair, others stated that they did the same thing once before and made sure not to do it again.
The pic shows the twisted CV boot.
This is a decently difficult repair and if you don’t really know what your doing (like me, I am not a mechanic), you can cost yourself extra money. In total, I still saved myself around $200, but it was at the cost of my time and frustration after I broke the driveshaft. Good luck, and bring a friend for unexpected trips to the parts shop.
Last edited: