By odd chance, I managed to get these rare AutoExe chassis braces a couple of months ago from Japan. It was very expensive, but it's very worth it since my Protege is now more than just a converted MSP. ")
It's unfortunate that AutoExe discontinued these braces back in May 2006. I always wanted them because I knew they had engineers that tested and designed these braces, unlike other companies that just copies from others or just make parts without much thought. When I finally had money to buy these 6 years ago, they were discontinued 2 weeks before! :mad:
So that opportunity a couple of months ago was something I didn't want to miss. The auction was expensive but I wasn't going to miss out on these again.
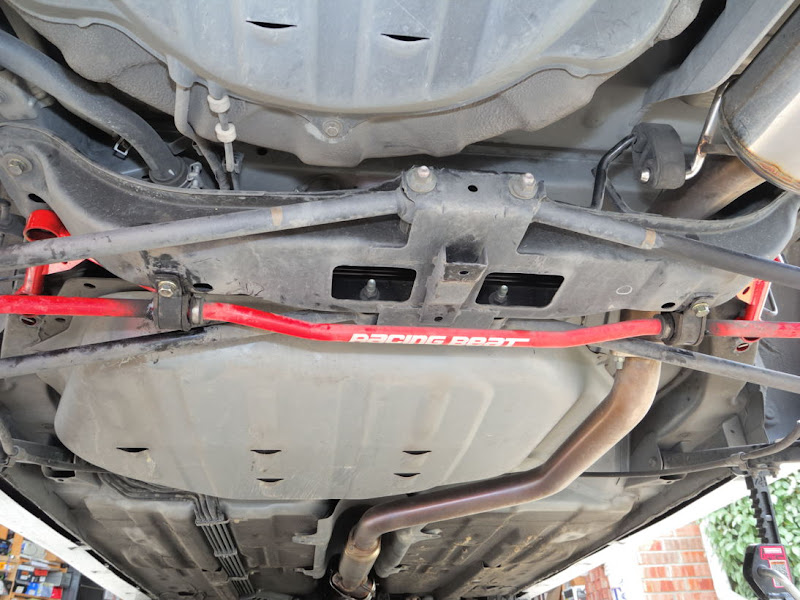
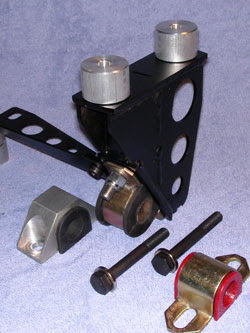
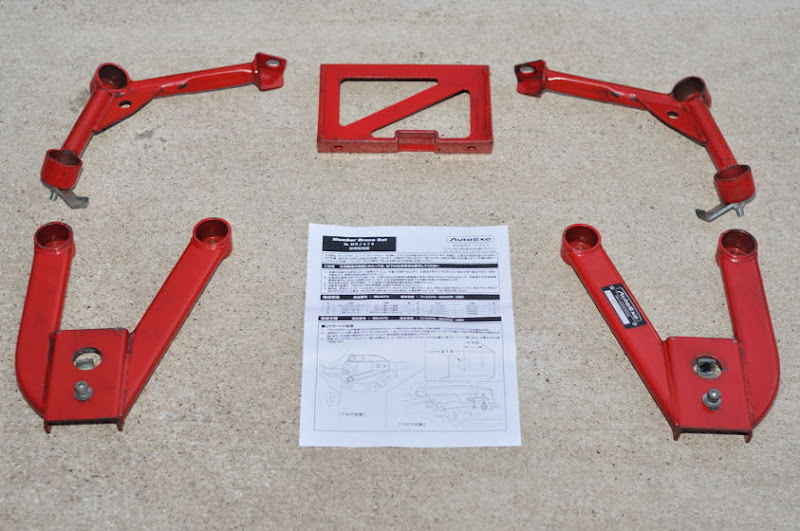
This is a 5 piece "member brace set" that is meant to be combined with the AutoExe lower arm bar. They are meant for the regular Protege/Familia/323s only and not for the MazdaSpeed Familia, MP3, or MazdaSpeed Protege because the rear crossmember is different. I have the MazdaSpeed sway bar set, which mean I have the MazdaSpeed rear crossmember. But this didn't stop me. I managed to make it work!
I will explain each piece of the braces as I go along with each pic to make things understandable.
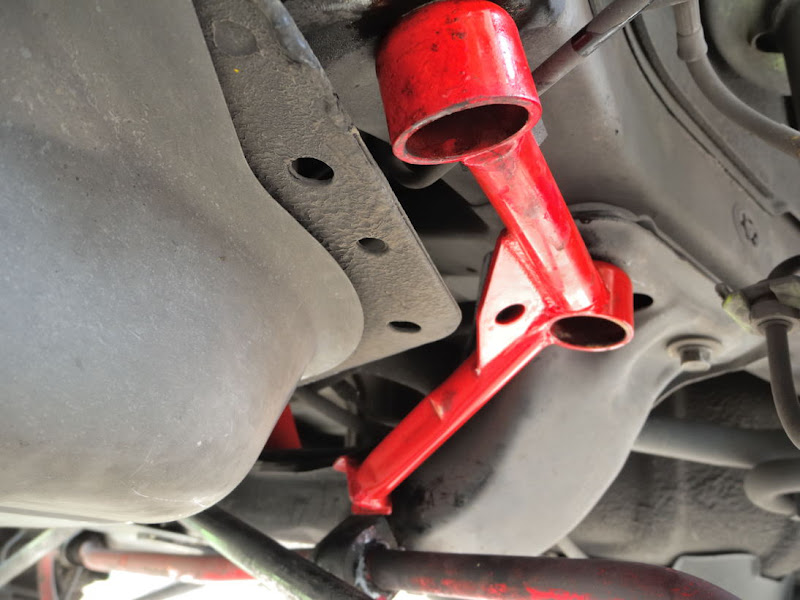
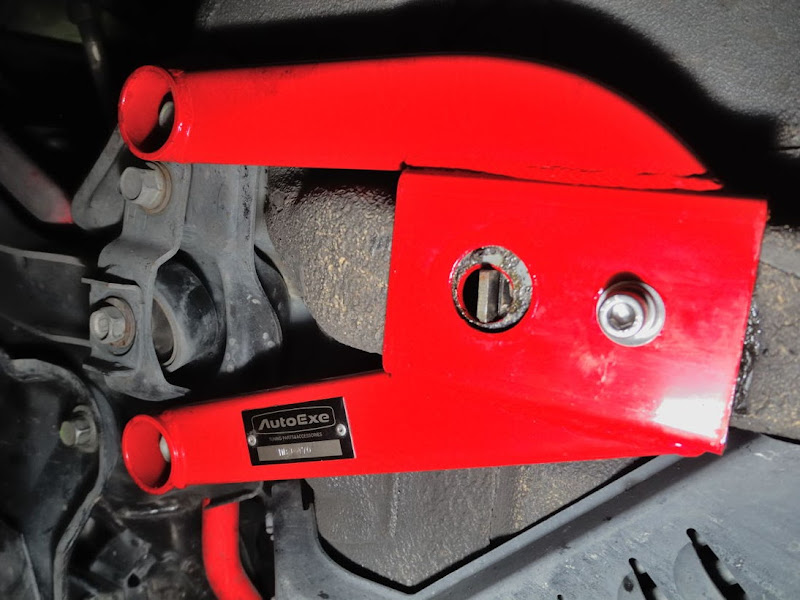
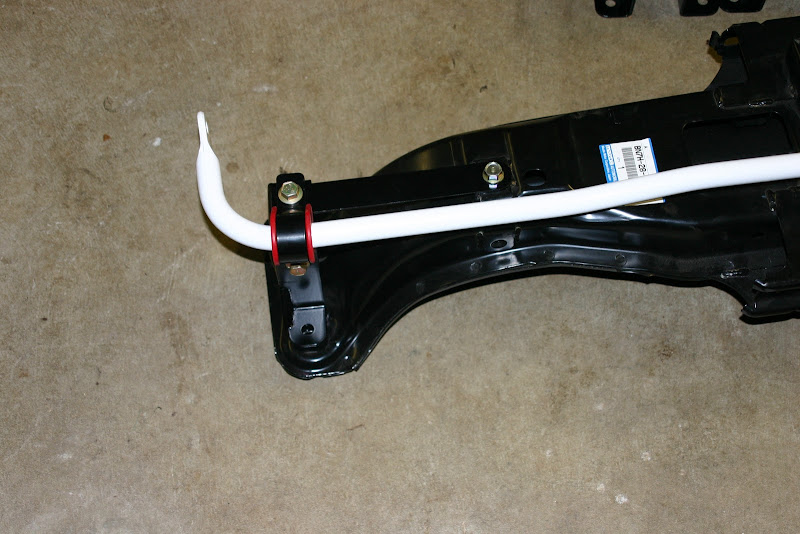
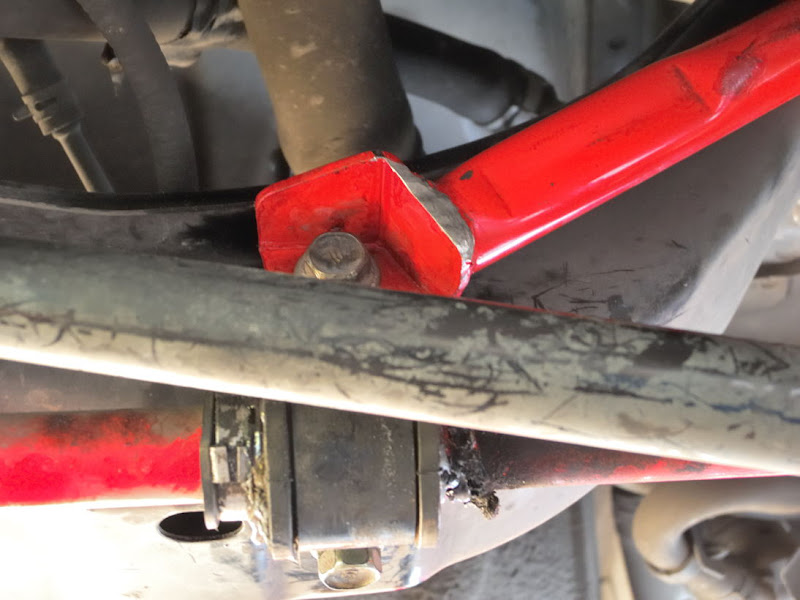
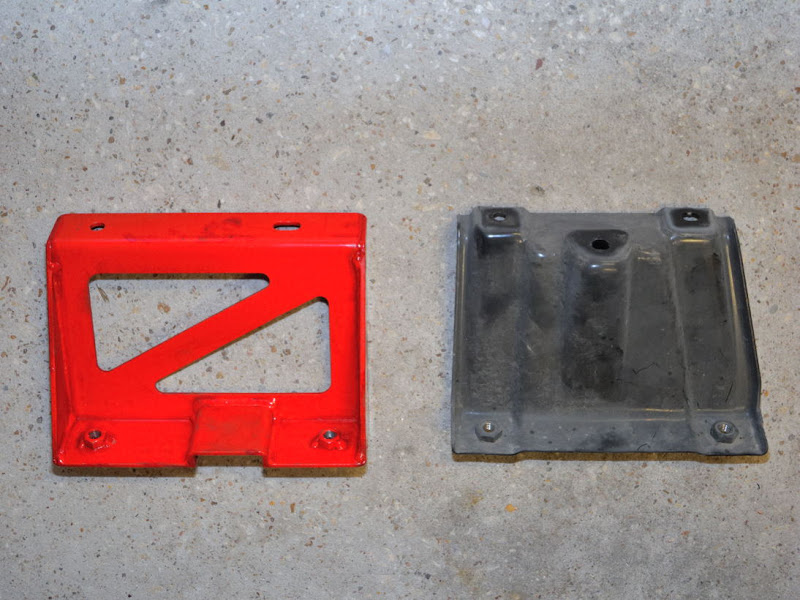
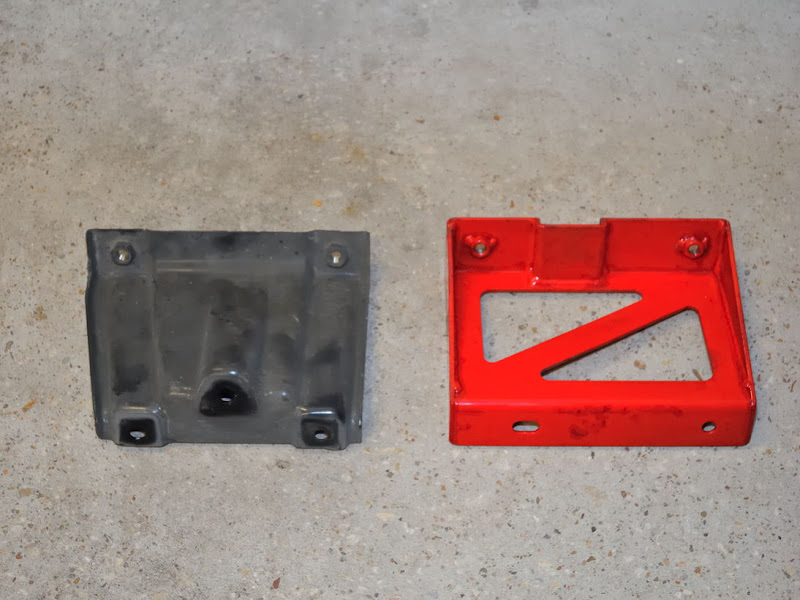
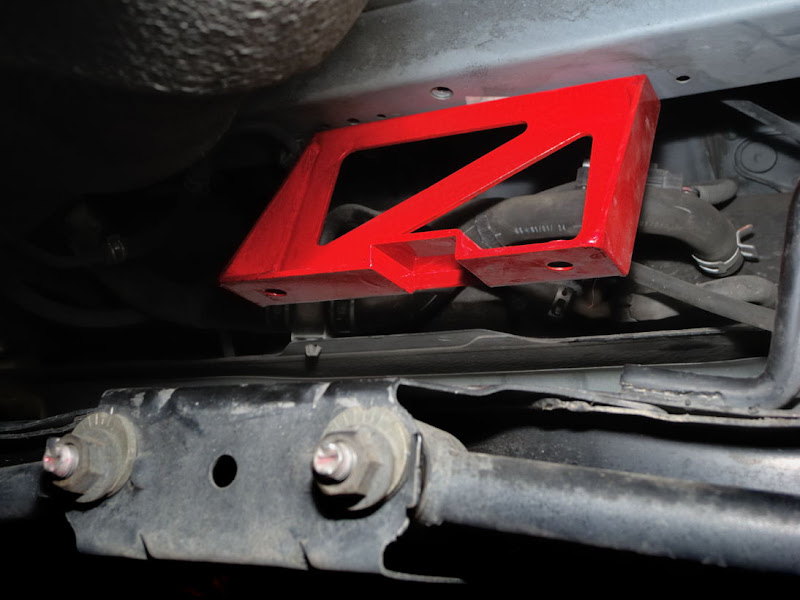
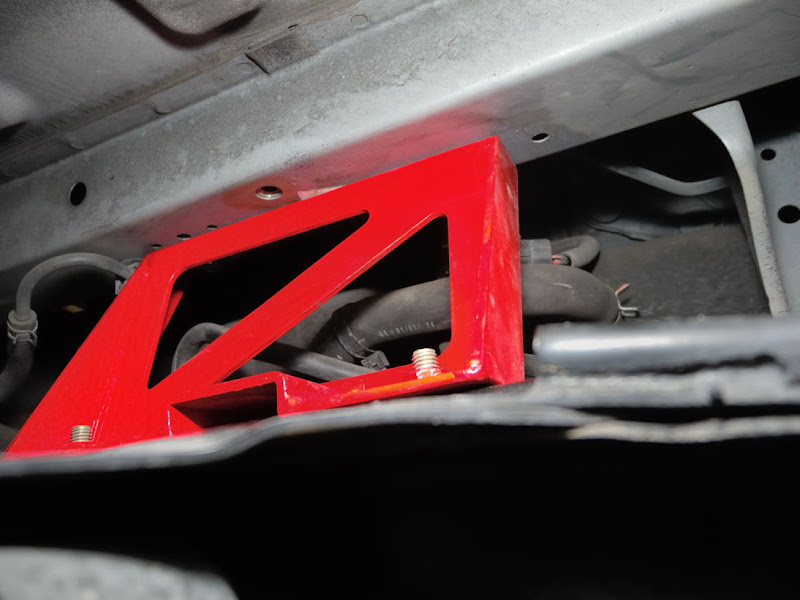
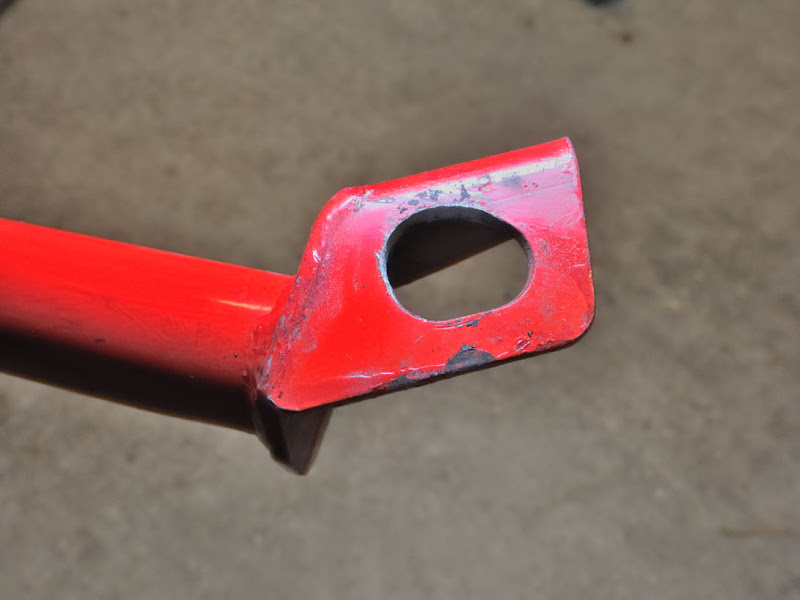
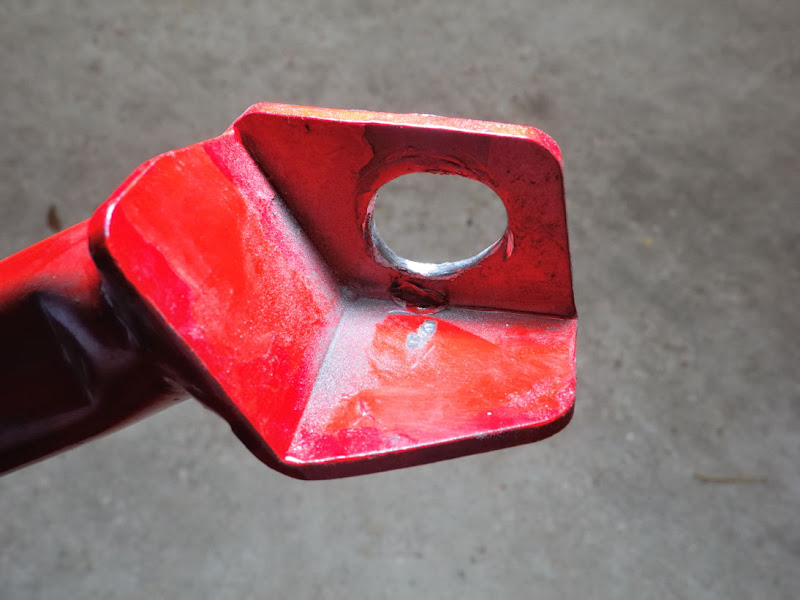
First off, I installed the rear crossmember centre support brace. It is thick gauge steel that's welded together into a box frame, unlike the stock support brace that's only thin stamped steel. This stronger support brace prevents the "U" shaped rear crossmember from deforming in the middle during high suspension loads/stresses.
Installing this brace involves lowering the rear crossmember. It could be done without taking the crossmember out of the car. There isn't as much space to do as taking all the lateral links and crossmember out, but it's worth it because you don't really have to align the suspension again afterwards
You may have noticed earlier that the stock brace uses 3 bolts to the chassis with 2 to the crossmember. The AutoExe brace doesn't use the extra bolt because the better brace doesn't need it
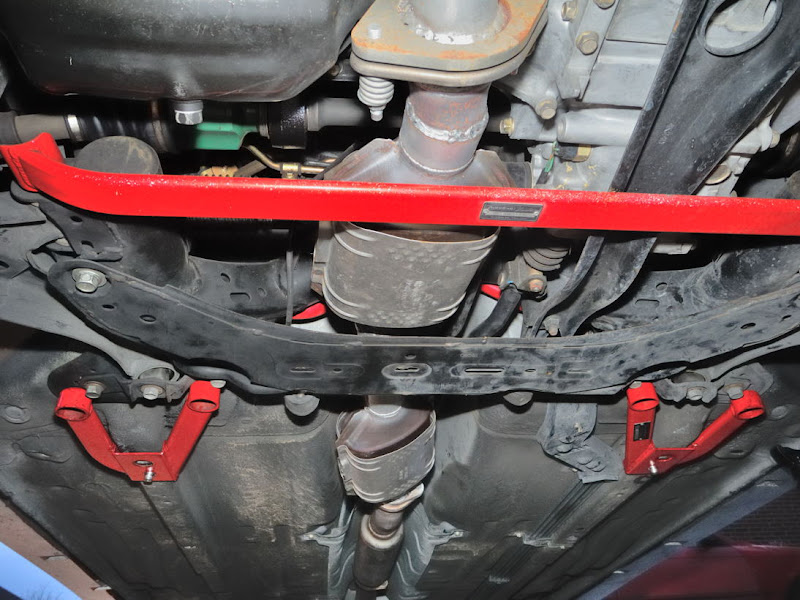
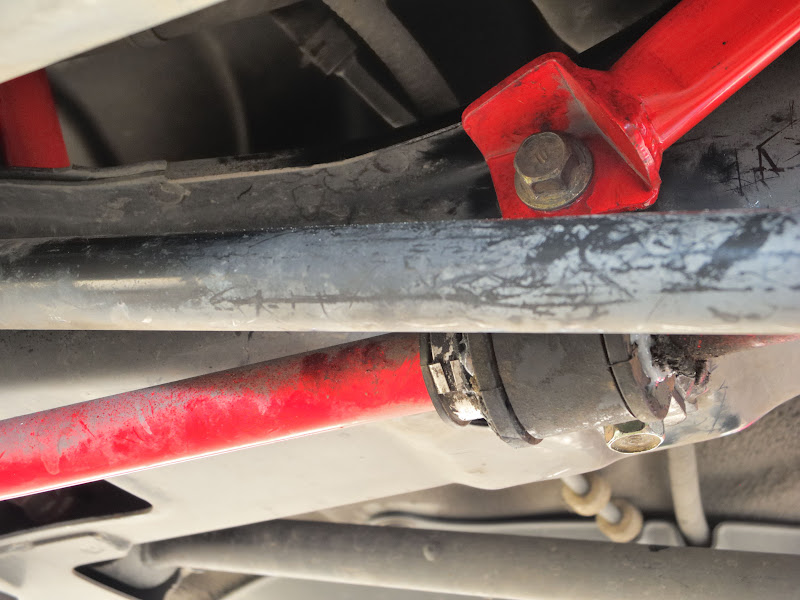
Anyway, here is it all bolted back up to the car... no interference issues with the USDM evaporative emissions system either
Then came the very painful part... took a lot of expletives to get this done!
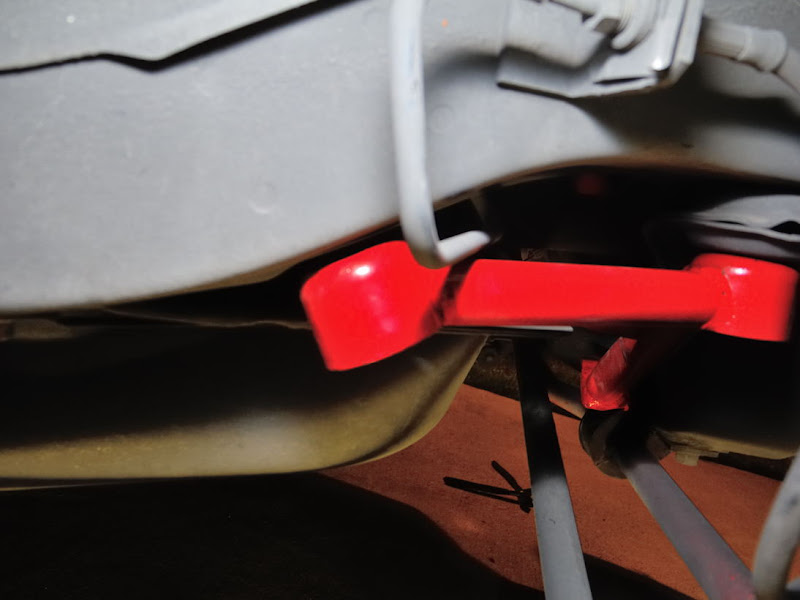
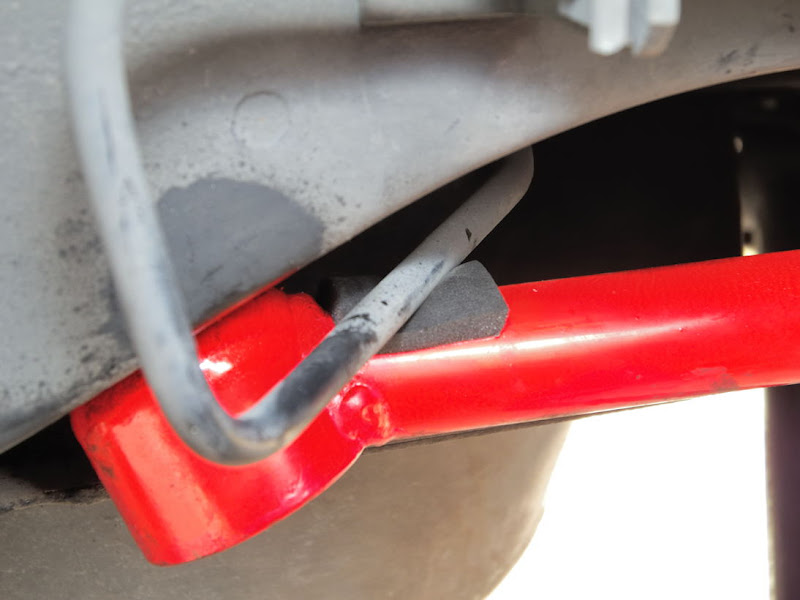
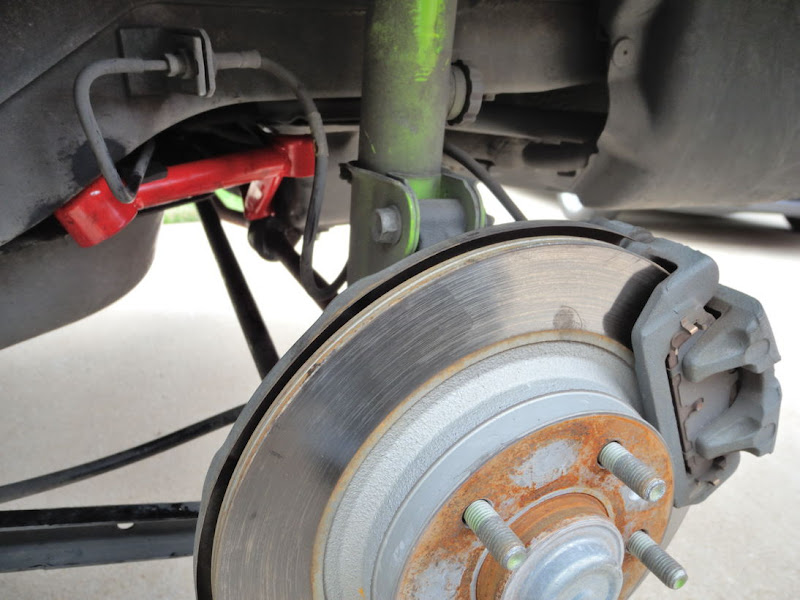
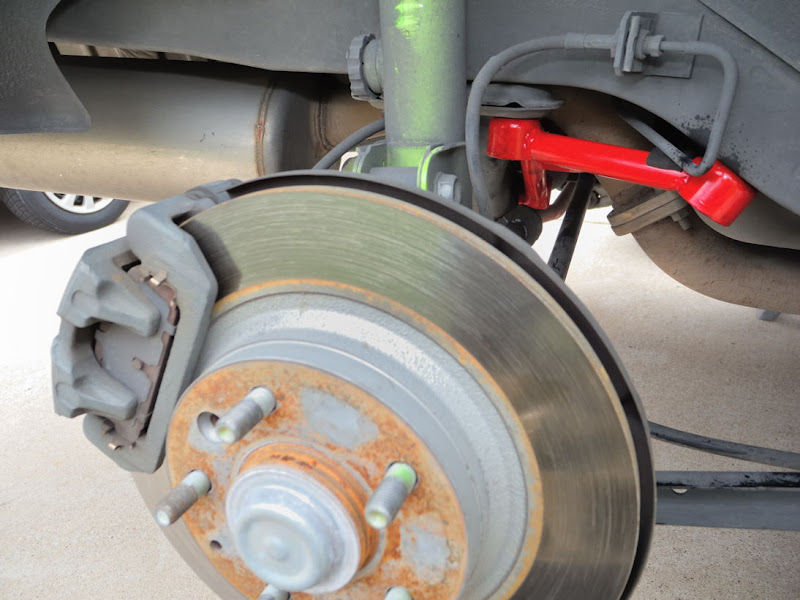
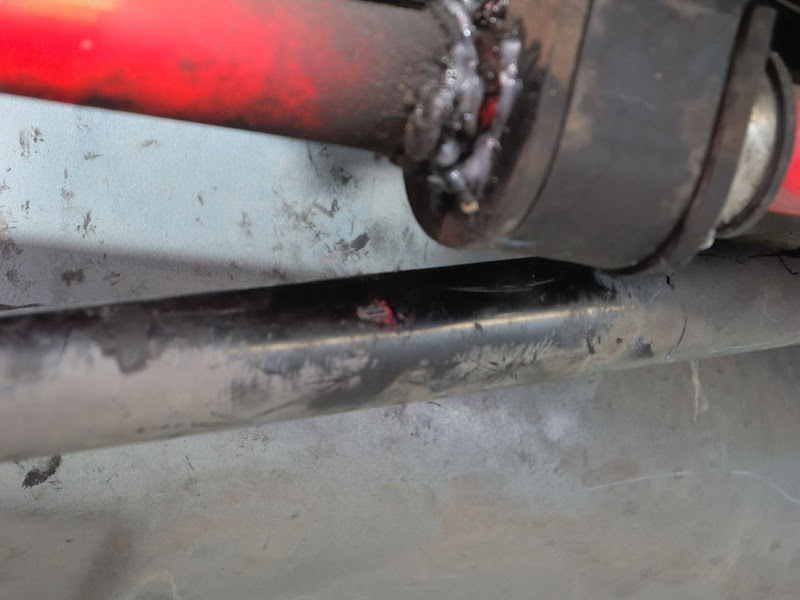
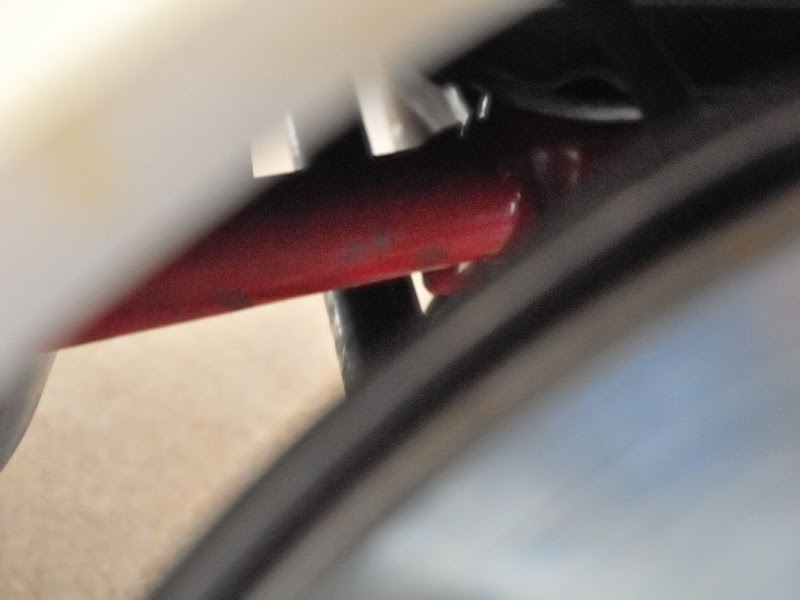
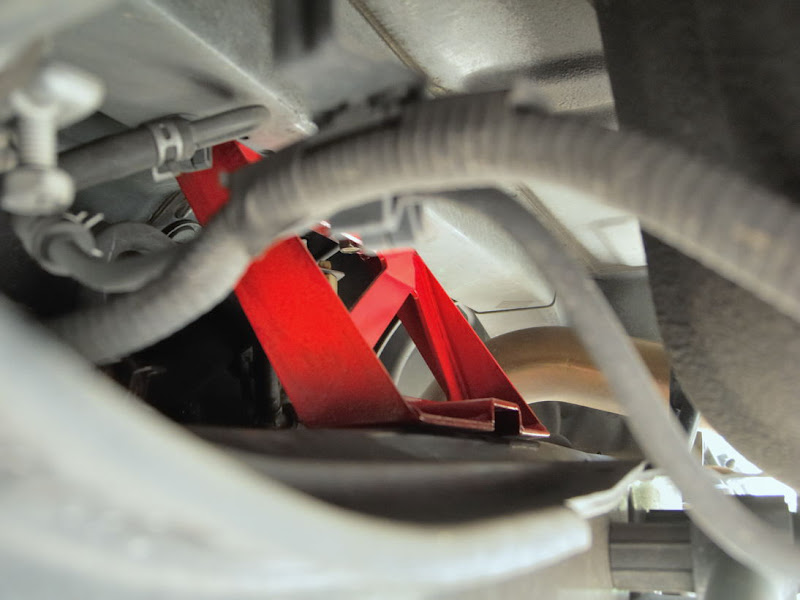
There's those two "L" braces that ties the rear crossmember to the frame. It attaches to one of the sway bar bracket mounting holes, one of the rear crossmember mounting holes, then finally it ties to the frame which requires drilling holes into the frame to allow it to bolt in. The "L" braces stabilizes the rear crossmember to prevent it from shifting during hard cornering or over uneven pavement.
Normally this isn't an issue if you have a regular non-Mazdaspeed rear crossmember, but it is with the MazdaSpeed crossmember because the rear sway bar mounts a little differently. The MazdaSpeed rear crossmember has reinforced steel around the mounting holes and it uses 2 bolts to mount the sway bar bracket instead of 1 bolt/1 nut combination on the regular crossmember. This really means the "L" brace mounting hole won't line up to the MazdaSpeed rear crossmember's sway bar mounting holes!

As you can see, the difference is very slight... 3-4mm at the most. No problem, I just got my Dremel out and grinded the hole bigger! This was very time consuming as I didn't want to make the hole too big, so back and forth to the car to test fit it!
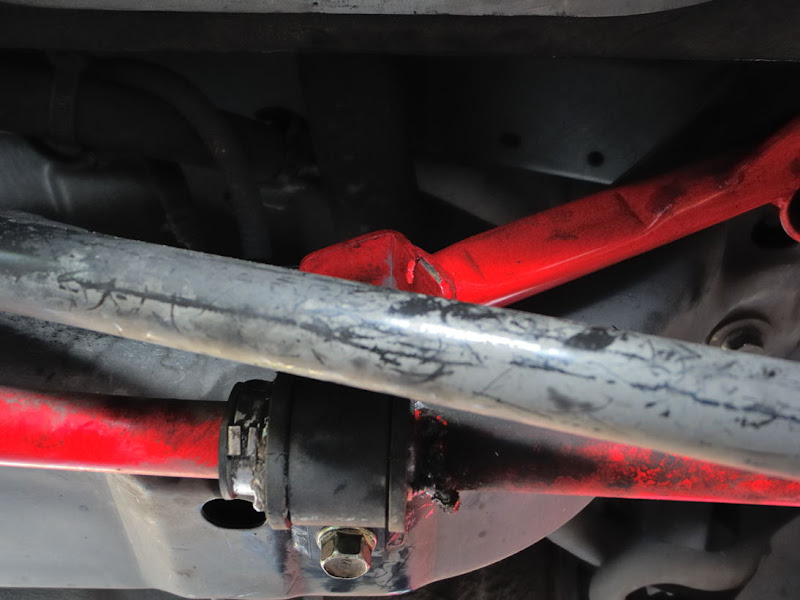
After I verified it worked, I touched up paint on those braces and set out to find longer M10x1.25x35 flange head class 8 bolts to replace 2 of the stock sway bar mounting bolts. The stock bolts will become too short once the brace is in place since it sits over the sway bar brackets. I went over to my friend's shop and found some I needed in his bucket of bolts.
Of course most importantly, now that I was able to bolt 2 of the 3 points on, I finally could accurately mark the drilling location on the frame. The instructions said to drill the mounting hole to 9mm (about 3/8"), and another hole 44mm away (centre to centre) to slip the mounting bracket plates into the frame to 18mm (about 11/16"). I bought a stepped drill bit from Harbor Freight tools just for this purpose as it it's on sale this week for $5.99 Drilling the frame was NOT fun at all. There's no room to put the drill in while all the suspension parts were in place. I ended up using a drill bit extension to carefully drill the holes (after drilling very small pilot holes of course ). The USDM rear frame is stronger, so it's very hard to drill through. The metal is almost 10mm thick! Anyway, the 11/16" hole didn't let the mounting bracket plates fit through, so I ended up drilling all the way to 3/4" instead and it worked perfectly. After the holes were drilled, I touched up the paint in those holes too to prevent rust. I also had some Wurth rust proofing spray around, so I sprayed some inside the frame rails too.
continued in next post...
It's unfortunate that AutoExe discontinued these braces back in May 2006. I always wanted them because I knew they had engineers that tested and designed these braces, unlike other companies that just copies from others or just make parts without much thought. When I finally had money to buy these 6 years ago, they were discontinued 2 weeks before! :mad:
So that opportunity a couple of months ago was something I didn't want to miss. The auction was expensive but I wasn't going to miss out on these again.
This is a 5 piece "member brace set" that is meant to be combined with the AutoExe lower arm bar. They are meant for the regular Protege/Familia/323s only and not for the MazdaSpeed Familia, MP3, or MazdaSpeed Protege because the rear crossmember is different. I have the MazdaSpeed sway bar set, which mean I have the MazdaSpeed rear crossmember. But this didn't stop me. I managed to make it work!
I will explain each piece of the braces as I go along with each pic to make things understandable.
First off, I installed the rear crossmember centre support brace. It is thick gauge steel that's welded together into a box frame, unlike the stock support brace that's only thin stamped steel. This stronger support brace prevents the "U" shaped rear crossmember from deforming in the middle during high suspension loads/stresses.
Installing this brace involves lowering the rear crossmember. It could be done without taking the crossmember out of the car. There isn't as much space to do as taking all the lateral links and crossmember out, but it's worth it because you don't really have to align the suspension again afterwards
You may have noticed earlier that the stock brace uses 3 bolts to the chassis with 2 to the crossmember. The AutoExe brace doesn't use the extra bolt because the better brace doesn't need it
Anyway, here is it all bolted back up to the car... no interference issues with the USDM evaporative emissions system either
Then came the very painful part... took a lot of expletives to get this done!
There's those two "L" braces that ties the rear crossmember to the frame. It attaches to one of the sway bar bracket mounting holes, one of the rear crossmember mounting holes, then finally it ties to the frame which requires drilling holes into the frame to allow it to bolt in. The "L" braces stabilizes the rear crossmember to prevent it from shifting during hard cornering or over uneven pavement.
Normally this isn't an issue if you have a regular non-Mazdaspeed rear crossmember, but it is with the MazdaSpeed crossmember because the rear sway bar mounts a little differently. The MazdaSpeed rear crossmember has reinforced steel around the mounting holes and it uses 2 bolts to mount the sway bar bracket instead of 1 bolt/1 nut combination on the regular crossmember. This really means the "L" brace mounting hole won't line up to the MazdaSpeed rear crossmember's sway bar mounting holes!
As you can see, the difference is very slight... 3-4mm at the most. No problem, I just got my Dremel out and grinded the hole bigger! This was very time consuming as I didn't want to make the hole too big, so back and forth to the car to test fit it!
After I verified it worked, I touched up paint on those braces and set out to find longer M10x1.25x35 flange head class 8 bolts to replace 2 of the stock sway bar mounting bolts. The stock bolts will become too short once the brace is in place since it sits over the sway bar brackets. I went over to my friend's shop and found some I needed in his bucket of bolts.
Of course most importantly, now that I was able to bolt 2 of the 3 points on, I finally could accurately mark the drilling location on the frame. The instructions said to drill the mounting hole to 9mm (about 3/8"), and another hole 44mm away (centre to centre) to slip the mounting bracket plates into the frame to 18mm (about 11/16"). I bought a stepped drill bit from Harbor Freight tools just for this purpose as it it's on sale this week for $5.99
Drilling the frame was NOT fun at all. There's no room to put the drill in while all the suspension parts were in place. I ended up using a drill bit extension to carefully drill the holes (after drilling very small pilot holes of course ). The USDM rear frame is stronger, so it's very hard to drill through. The metal is almost 10mm thick! Anyway, the 11/16" hole didn't let the mounting bracket plates fit through, so I ended up drilling all the way to 3/4" instead and it worked perfectly. After the holes were drilled, I touched up the paint in those holes too to prevent rust. I also had some Wurth rust proofing spray around, so I sprayed some inside the frame rails too.continued in next post...