There are several excellent posts about the non-fouler trick here on these forums. However, they require a basic knowledge of exhaust systems that I didn't have until I had to do it. While I was able to figure it out, I would have liked to have a much simpler guide available. This post is for people like me:
See this post for some reference pictures:
http://mazdas247.com/vbb222/showthread.php?t=123634664
First off, I have a stock 2002 Mazda P5. Other P5s might be different.
P0421 is caused by the catalytic converter (cat) not cleaning the exhaust well enough. The proper way to fix it is to replace the cat, at a cost of hundreds of dollars. However, we're going to cheat and trick the sensors into thinking that the cat is working correctly, at a cost of less than $20.
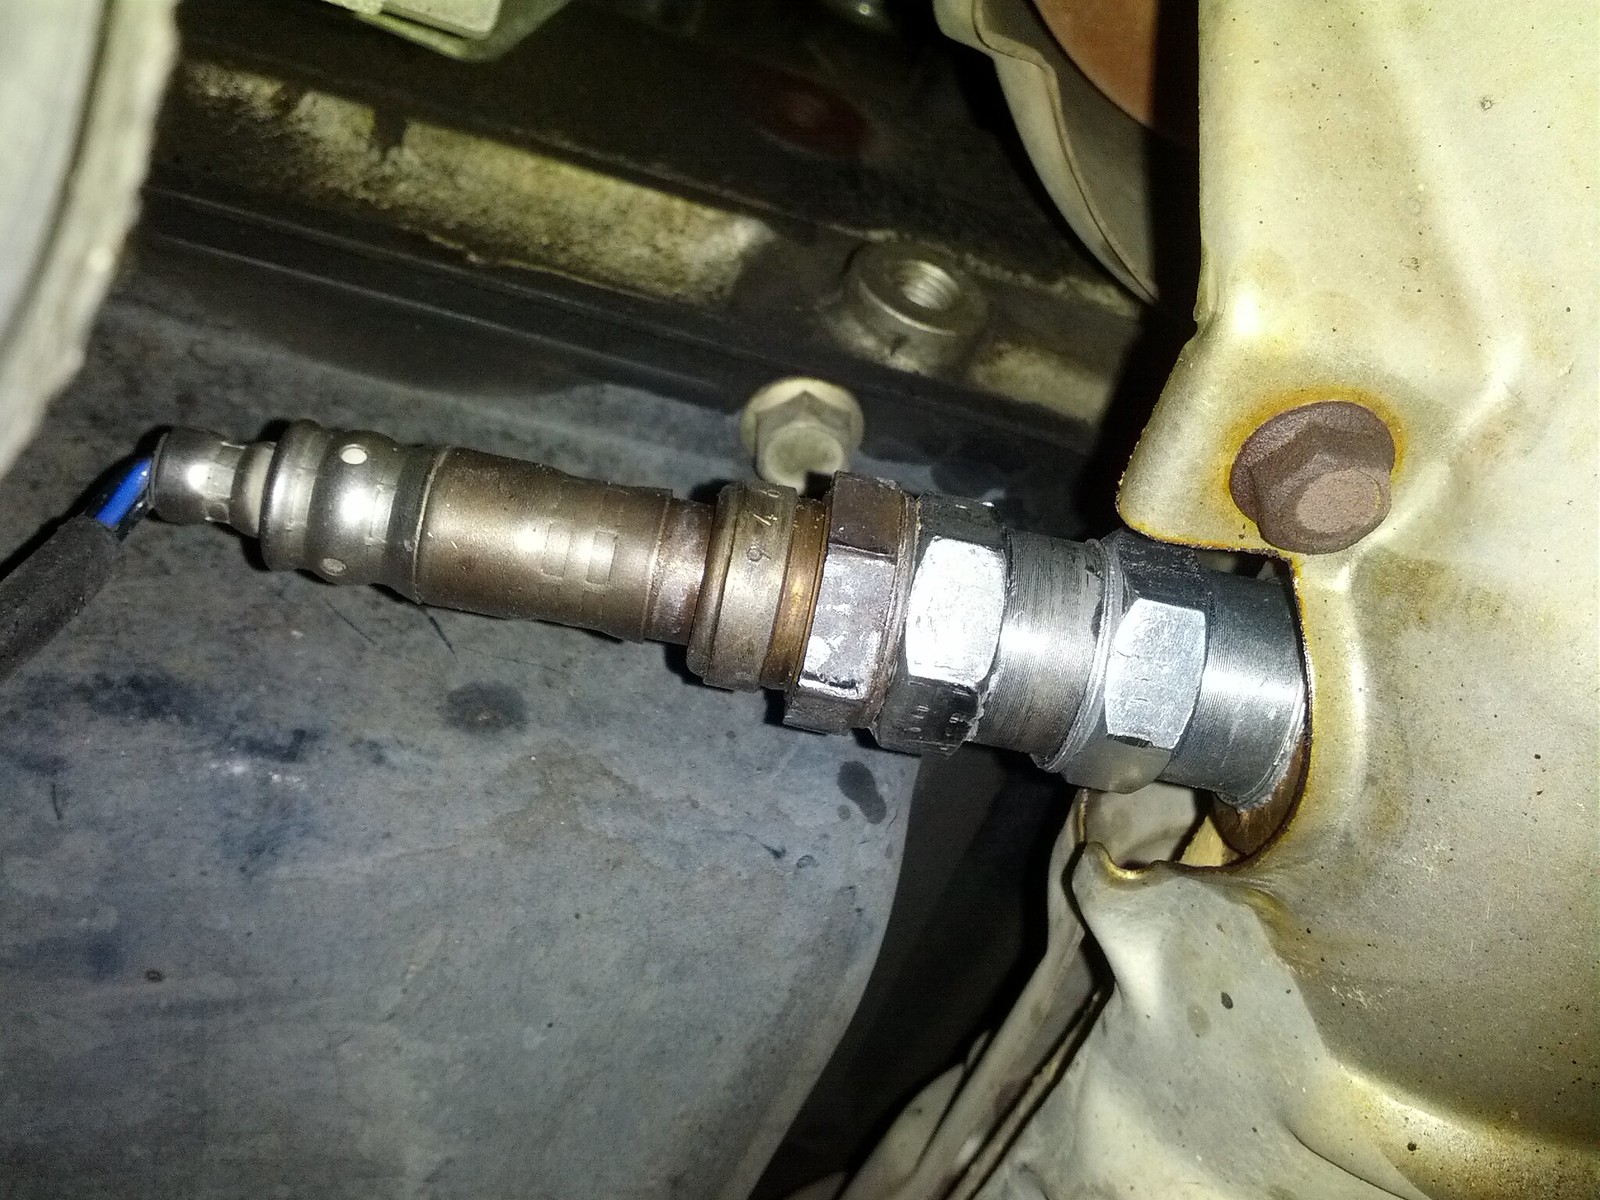
The problematic sensor is the second oxygen sensor. There are two oxygen sensors in your car. Here is a picture of one of them, one taken from further away to help you find it:

This is the top oxygen sensor. It's easily visible, front and center in the engine. Take a good look at it and get an idea of what it looks like. Unfortunately, this is not the one we want to modify. We want the bottom oxygen sensor, which is underneath the car.
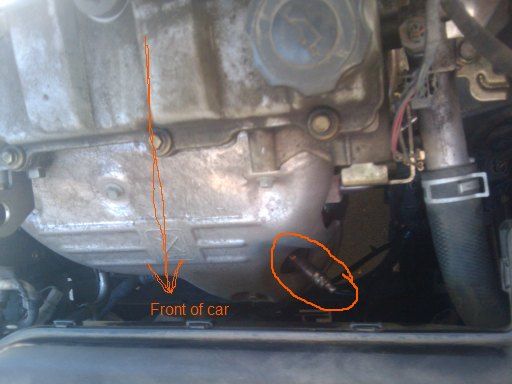
This picture:
...was taken from under the front bumper, looking towards the back of the car. The oxygen sensor is between the wheels, close to the center. In that picture, I've already attached the non-foulers.
While doing so will make this job easier, you don't need to lift your car for this repair. The sensor is close enough to the front of the car that it is possible to do everything from the front while the car is parked on a flat surface.
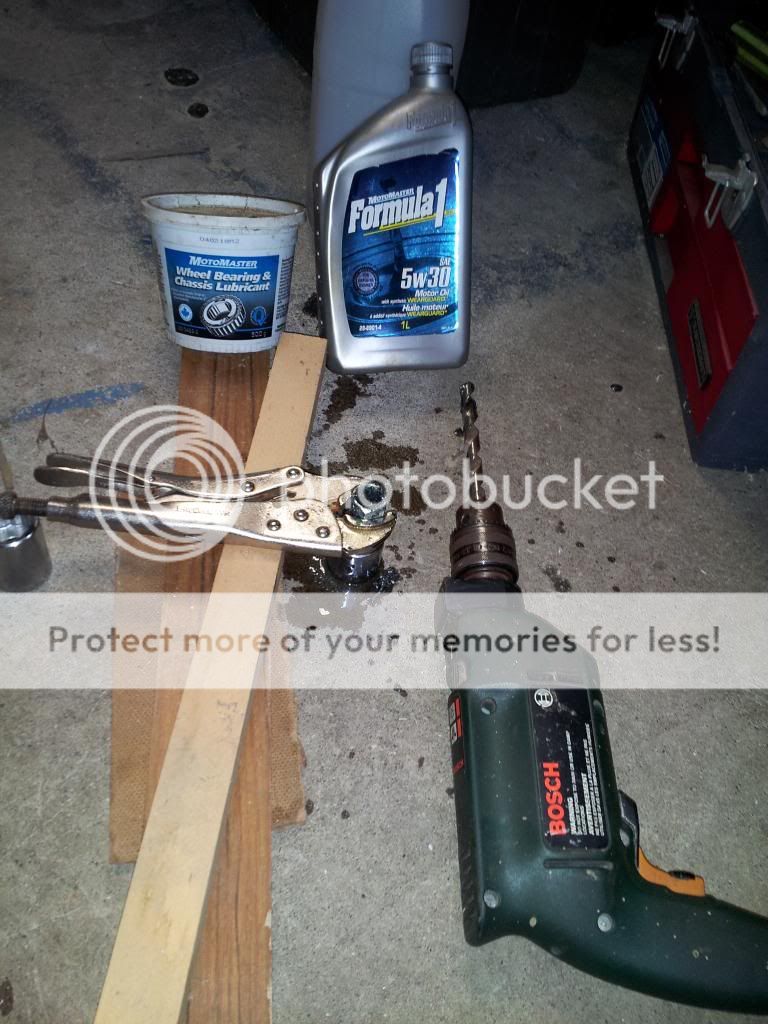
The first thing to do is to prepare the non-foulers. Drill out one of them as per the directions in Rac3rX's post.
He doesn't make this clear, so I will: when you're done drilling, the piece will be VERY FREAKING HOT. You might say to yourself, "I'll just pick it up gingerly; as long as I don't hold it too tightly or for too long, I should be OK." WRONG. Once you're finished drilling, just leave it be for about 10 minutes while it cools off.
On that note, you'll be working around the engine and exhaust of your car, so you should only do this repair after your car has been sitting undriven for at least two hours, otherwise you'll be touching very hot engine parts.
Put the non-foulers together into a single piece as per the instructions in Rac3rX's post. Once you've put your non-foulers together, the next step is to gain access the oxygen sensor:
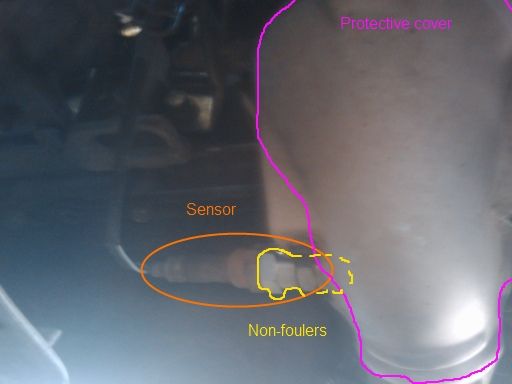
There are two protective covers underneath the car that we need to move out of the way. The first one is plasticy rubber and is held in place by a few screws. You won't be able to easily remove it completely, but you will be able to remove a few of the screws and bend it out of the way.
The second one is metal and is held in place by three screws. It's marked on the picture of the lower O2 sensor. It's a simple protective cover for the actual exhaust pipe.
At this point, you should have full access to the oxygen sensor behind the metal cover that you just removed. Put some penetrating oil on it so that you can unscrew it later.
Next, we need to unplug the oxygen sensor and prepare it for removal:
Use this picture as a reference:
From the bottom, move your hand up the cable. There are two little coils of wire holding it in place. (Careful, they're sharp!) You can remove the cable from the coils without special tools, just twirl it through the coil. Both of these can be done one-handed from under the car, or you can do the upper coil from above.
When you do that, the oxygen cable should fall down to the ground. You might need to help it. It needs to be loose so that you don't twist the wires while removing and replacing the sensor.
Get a short wrench and remove the sensor. It should screw right out. Make sure the entire cable twists with it as you unscrew it.
Once it's out, attach the non-foulers to the sensor. Finally, screw the whole assembly back into the exhaust pipe, making sure that it's on nice and tight. Again, make sure that the entire cable assembly twists with it, so that you're not twisting the wires. Tighten it completely before moving on to the next step.
Pull the cable back up through the engine. Re-thread it through those wire coils. Plug it back in and reattach the plug to the frame. Replace the clamp holding the two oxygen cables together. Untie the string that you tied to it.
Get back under the car and replace the protective covers.
Reconnect your battery, cross your fingers, and start your engine.
With a little bit of luck, you've just fooled your engine into thinking that your catalytic converter is working normally. Your emissions are higher than normal, and your fuel efficiency is a bit lower than normal, but you will pass your state-mandated emissions. Unless, of course, somebody who knows what they're doing looks under the car and sees the non-foulers.
See this post for some reference pictures:
http://mazdas247.com/vbb222/showthread.php?t=123634664
First off, I have a stock 2002 Mazda P5. Other P5s might be different.
P0421 is caused by the catalytic converter (cat) not cleaning the exhaust well enough. The proper way to fix it is to replace the cat, at a cost of hundreds of dollars. However, we're going to cheat and trick the sensors into thinking that the cat is working correctly, at a cost of less than $20.
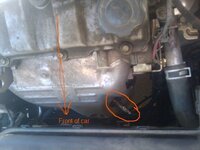
The problematic sensor is the second oxygen sensor. There are two oxygen sensors in your car. Here is a picture of one of them, one taken from further away to help you find it:
This is the top oxygen sensor. It's easily visible, front and center in the engine. Take a good look at it and get an idea of what it looks like. Unfortunately, this is not the one we want to modify. We want the bottom oxygen sensor, which is underneath the car.
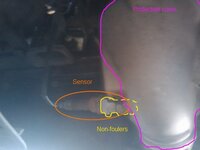
This picture:
...was taken from under the front bumper, looking towards the back of the car. The oxygen sensor is between the wheels, close to the center. In that picture, I've already attached the non-foulers.
While doing so will make this job easier, you don't need to lift your car for this repair. The sensor is close enough to the front of the car that it is possible to do everything from the front while the car is parked on a flat surface.
The first thing to do is to prepare the non-foulers. Drill out one of them as per the directions in Rac3rX's post.
He doesn't make this clear, so I will: when you're done drilling, the piece will be VERY FREAKING HOT. You might say to yourself, "I'll just pick it up gingerly; as long as I don't hold it too tightly or for too long, I should be OK." WRONG. Once you're finished drilling, just leave it be for about 10 minutes while it cools off.
On that note, you'll be working around the engine and exhaust of your car, so you should only do this repair after your car has been sitting undriven for at least two hours, otherwise you'll be touching very hot engine parts.
Put the non-foulers together into a single piece as per the instructions in Rac3rX's post. Once you've put your non-foulers together, the next step is to gain access the oxygen sensor:
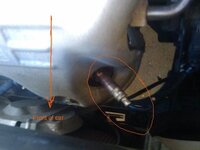
There are two protective covers underneath the car that we need to move out of the way. The first one is plasticy rubber and is held in place by a few screws. You won't be able to easily remove it completely, but you will be able to remove a few of the screws and bend it out of the way.
The second one is metal and is held in place by three screws. It's marked on the picture of the lower O2 sensor. It's a simple protective cover for the actual exhaust pipe.
At this point, you should have full access to the oxygen sensor behind the metal cover that you just removed. Put some penetrating oil on it so that you can unscrew it later.
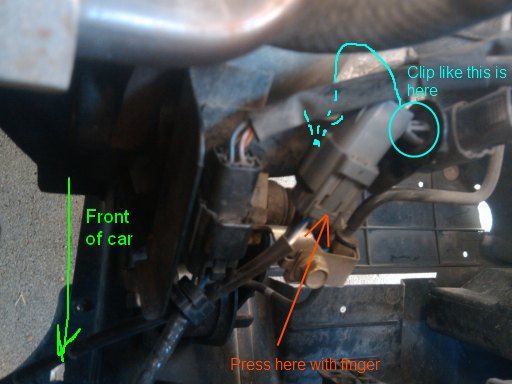
Next, we need to unplug the oxygen sensor and prepare it for removal:
Use this picture as a reference:
- Disconnect the negative battery cable
- Find the plug that the oxygen sensor is plugged in to. It's near the top oxygen sensor. See the picture above. The stuff in that picture is more or less directly in front of the driver, pretty close to the front of the car.
- There are two plugs there, one for each sensor. The one that doesn't go right to the top sensor is the one that goes to the bottom sensor.
- The oxygen sensor plug is attached to the frame. See that little plastic clip near it? There's another one behind it that you'll need to disconnect. Reach behind it and pinch it while jiggling it; you should get it loose fairly easily.
- Press your finger to unclip and pull the pieces apart. They've been stuck together for years, and so won't come apart easily.
- Tie a string around the plug. We're going to be dropping it down through the engine onto the ground, and a string will make it easier to pull this end back up.
- There is a little clamp holding the two sensor cables together. You can open it by pinching it.
From the bottom, move your hand up the cable. There are two little coils of wire holding it in place. (Careful, they're sharp!) You can remove the cable from the coils without special tools, just twirl it through the coil. Both of these can be done one-handed from under the car, or you can do the upper coil from above.
When you do that, the oxygen cable should fall down to the ground. You might need to help it. It needs to be loose so that you don't twist the wires while removing and replacing the sensor.
Get a short wrench and remove the sensor. It should screw right out. Make sure the entire cable twists with it as you unscrew it.
Once it's out, attach the non-foulers to the sensor. Finally, screw the whole assembly back into the exhaust pipe, making sure that it's on nice and tight. Again, make sure that the entire cable assembly twists with it, so that you're not twisting the wires. Tighten it completely before moving on to the next step.
Pull the cable back up through the engine. Re-thread it through those wire coils. Plug it back in and reattach the plug to the frame. Replace the clamp holding the two oxygen cables together. Untie the string that you tied to it.
Get back under the car and replace the protective covers.
Reconnect your battery, cross your fingers, and start your engine.
With a little bit of luck, you've just fooled your engine into thinking that your catalytic converter is working normally. Your emissions are higher than normal, and your fuel efficiency is a bit lower than normal, but you will pass your state-mandated emissions. Unless, of course, somebody who knows what they're doing looks under the car and sees the non-foulers.
Attachments

Last edited: