Got the alignment done. Took a bit of time because with the new control arms, you can also adjust the track width to a certain extent. They're one of those parts that give you enough rope to hang yourself with if you're not careful. I made the rear a little wider and dialed in a little extra camber to help keep 'er steady, and had to adjust the front (the right front had almost a degree too little camber, not sure how that happened, the left front about a half degree too much), then buttoned her down for a bit of a shake down event this weekend.

You are using an out of date browser. It may not display this or other websites correctly.
You should upgrade or use an alternative browser.
You should upgrade or use an alternative browser.
What have you done to your Miata today?
- Thread starter Antoine
- Start date
- :
- 2016 GT ST 47A
Back and forth to work collecting bugs on the front bumper. My new tires came in along with some 949racing grey valve stem caps to give the wheels a little bling factor.
Took advantage of DTDs Labor Day sale and bought a set of Hankook Ventos evo2s. They are the same tires that were on the car when I bought it and I liked them. Upsized a bit from 205/45 to 215/45 though. After the rebates they were $197 landed.") Was considering wheels also but think I'll use that money towards suspension bits, of the non-racy type. haha
Was considering wheels also but think I'll use that money towards suspension bits, of the non-racy type. haha
Anyone else get an email from Mazda in regards to purchasing the RF LE? I found one in my mailbox this morning.
I know it was meant in jest. Sorry that you couldn't be home to attend the event.
I hear ya. Guessing it's not worth the grief? Any luck on getting the trunklid picked up?
Those should be real fun on a rainy day.
Hey when did you snap a shot of my NC (the first pic)? bwahahahahahahahahaha
Looks good man! Done proper!
Took advantage of DTDs Labor Day sale and bought a set of Hankook Ventos evo2s. They are the same tires that were on the car when I bought it and I liked them. Upsized a bit from 205/45 to 215/45 though. After the rebates they were $197 landed.
Was considering wheels also but think I'll use that money towards suspension bits, of the non-racy type. hahaAnyone else get an email from Mazda in regards to purchasing the RF LE? I found one in my mailbox this morning.
You have nothing to be sorry for. I was just venting my jealousy at not being able to attend myself (and it was meant in jest). I'm happy you and Mark got to do that and that Mazda gave you those nice commemorative plaques. One of these years I'll get to go to something myself.
Yeah, no to the paint match without me there. It's bad enough I bought a trunklid with no holes and didn't notice they would only ship to a commercial address. Now someone is going to have to pick it up from the shipper's terminal.
I know it was meant in jest. Sorry that you couldn't be home to attend the event.
I hear ya. Guessing it's not worth the grief? Any luck on getting the trunklid picked up?
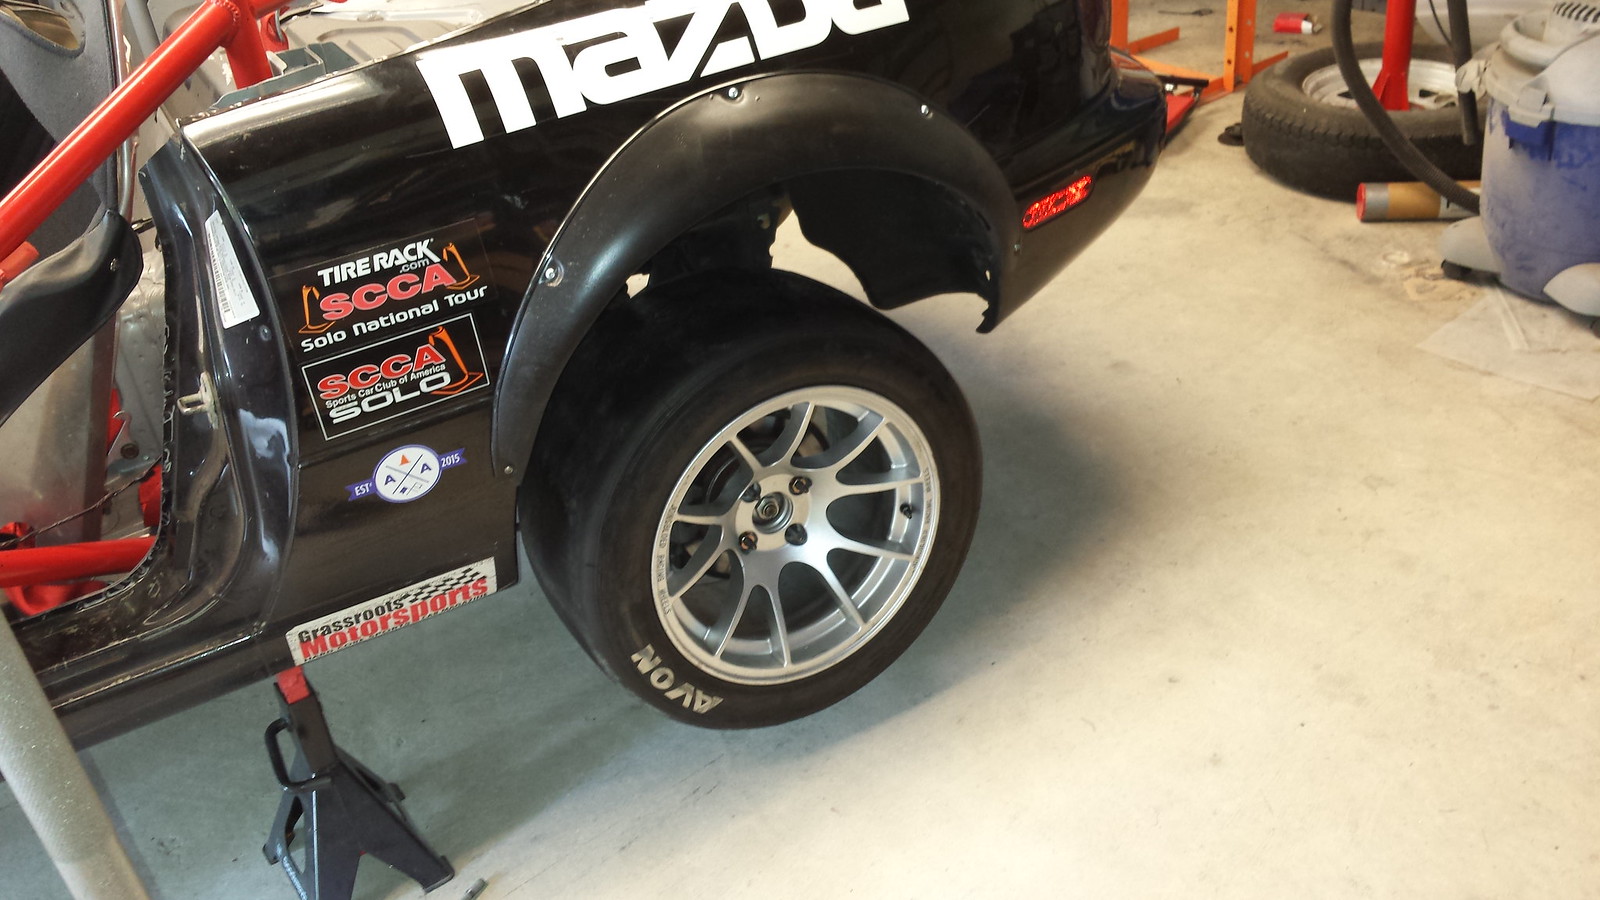
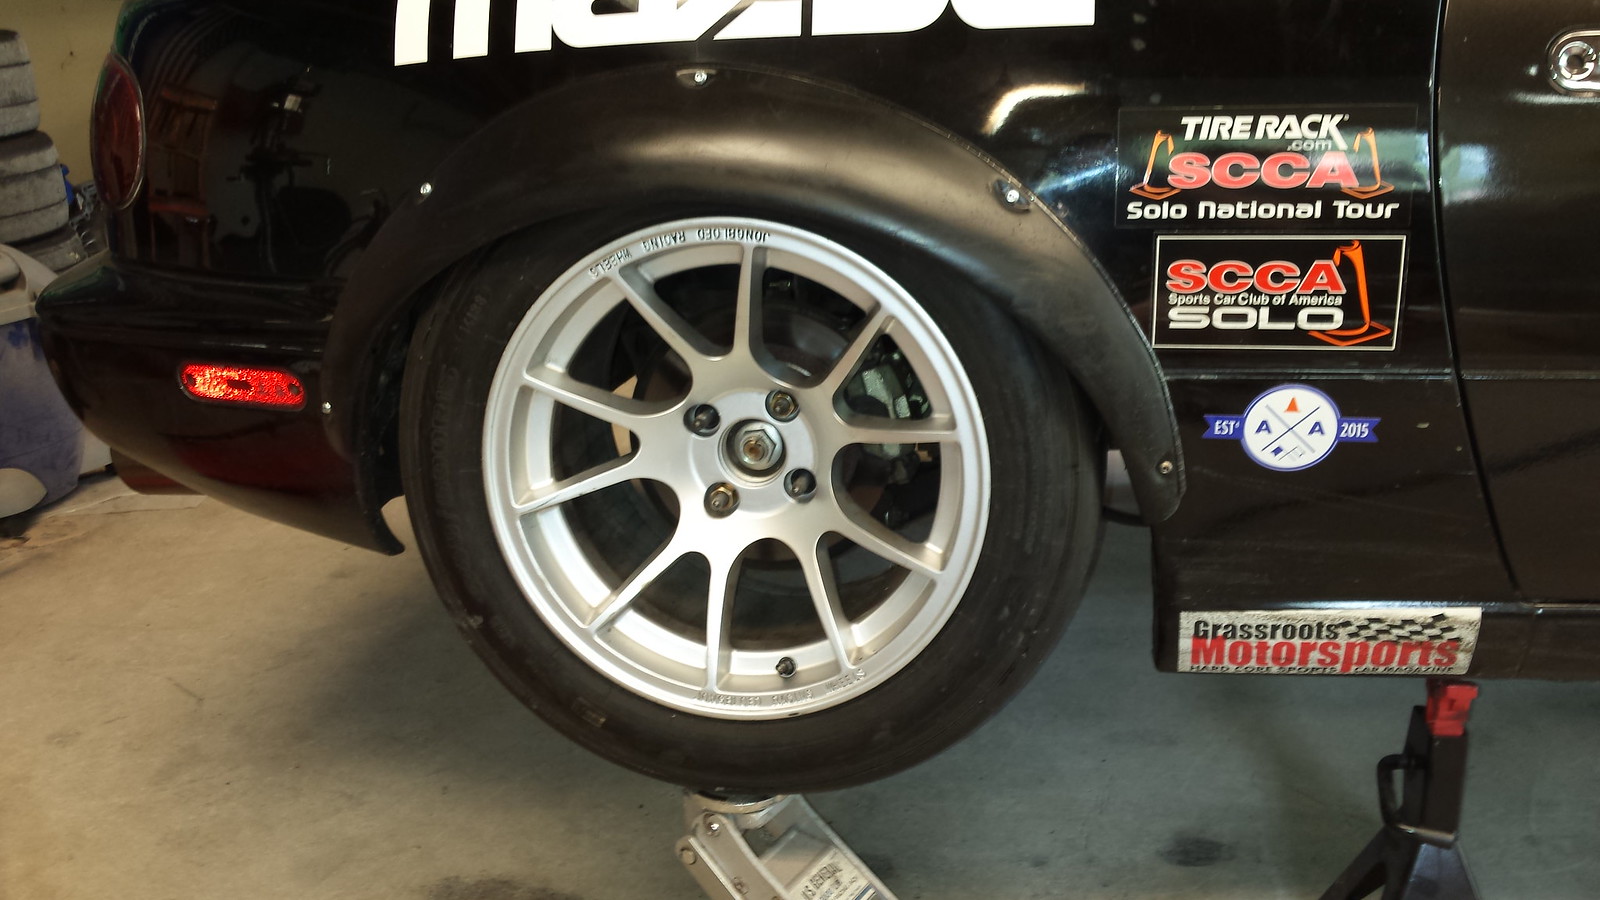
Got the new rubbers mounted:
And found out that some racy suspension bits I ordered ages ago should be here Saturday
Those should be real fun on a rainy day.
Dakar Rally Miata:
Slamm3d lyf3 y0!
Interference check done. it doesn't look like it will be an issue, but we won't know for sure until the weight of the car is on the tire and it's under load going around a corner.
Hey when did you snap a shot of my NC (the first pic)? bwahahahahahahahahaha
Looks good man! Done proper!
Those should be real fun on a rainy day.
One of my favorite pictures of my car ever
Slicks in pouring rain... the front tires acted more like rudders than tires (rlaugh)

I know it was meant in jest. Sorry that you couldn't be home to attend the event.
I hear ya. Guessing it's not worth the grief? Any luck on getting the trunklid picked up?
Yeah, my buddy said he'd help with that. Just got into San Juan, waiting to see if he has it or not.
- :
- 92 & 16 Meyatas
One of my favorite pictures of my car ever
Slicks in pouring rain... the front tires acted more like rudders than tires (rlaugh)
Nice!
Sent from my iPhone using Tapatalk
- :
- 92 & 16 Meyatas
So as the Miata season starts to wind down, the MSM will be going in the garage to replace the crank seal, I'll be doing the water pump and belt while I'm in there. What about cam seals? Should I be concerned about them, the engine has 120k miles?
Sent from my iPhone using Tapatalk
Sent from my iPhone using Tapatalk
Definitely change them while you're there, they are really straight forward to do.
Before you touch it, make sure you have this tool though:
https://www.flyinmiata.com/flyin-miata-cam-gear-ninja-tool.html
Could probably use a good crank holder tool too if you don't have one.
https://www.flyinmiata.com/flyin-miata-crank-bolt-tool.html
Or if you want to go for the Super Pimp Ultra Fun Pack:
https://www.flyinmiata.com/flyin-miata-tool-kit.html
Though, for all of the seals, I went to Home Depot Racing Supply and found PVC pipe caps that were the correct size to push the seals in. Way cheaper, but not nearly as pimptastic as the FM stuff.
Last edited:
You minimalist, you.
My friend picked the trunk lid up for me yesterday. The freight company were idiots but at least it was well packed and in good condition. Earlier this week I bought a set of 949 valve stems since they finally got silver back in stock. Things are looking good for my return home next week. Some pictures will follow.
My friend picked the trunk lid up for me yesterday. The freight company were idiots but at least it was well packed and in good condition. Earlier this week I bought a set of 949 valve stems since they finally got silver back in stock. Things are looking good for my return home next week. Some pictures will follow.
- :
- 2016 GT ST 47A
One more vote to swap em out Mahk!
You fail at being an FM spokesperson Andrew. It was going great until you threw in the Home Depot alternative. Lol
Awesome Mike! Good to hear someone was able to pick it up for you.
Ive got some grey 949 stems I was/am going to use on the OEM wheels. Might be buying another set or two sets of black? Found out a couple of days ago that the 6UL in Beryllium does come in an NC fitment, but 17x9. Not a great selection of dd tires in a 235/40 though so contemplating a 225/45. Of course Id have to sell the brand new 215/45s I just bought. Lol
Sent from my Galaxy S7 Edge using Tapatalk
You fail at being an FM spokesperson Andrew. It was going great until you threw in the Home Depot alternative. Lol
They don't pay me nearly enough to do it properly. But seriously, the $2 solution works. I have a nested set of PVC pipe caps in various sizes that cost less than one of the FM seal tools.
Made it home (no thanks to American Airlines, they suck). That rear spoiler is pretty light, I was surprised given its size. I have to wait on something else to arrive before taking it all to the painter. I'm also going to have them repaint the front lip since I scuffed it when I misjudged my approach to a parking spot a while back. Going to also see if they have a good paintless dent removal guy to take care of a few dings.
BTW the 949 valve stems are beautiful pieces. Very lightweight and a quality crafted piece. Would have saved myself some headache if I had gotten these in the first place (although they were out of stock for a bit).
Trunk lid is in my possession. It is a lot worse off than the pictures showed, so either there was some creative photography or it's been sitting around with crap stacked on top/dragged off. If I weren't already planning on having it painted, I would be now.
Yeah, I have 2 sets of those valve stems (well...it was 1 set for my old set of 6ULs). For me, I just like that they're solid. When you're constantly messing with tire pressures over the course of a day or 2, having something that isn't all flexy is awesome. That they look nice is an added bonus. Heck, I'm pretty sure I've got black valvestems on my silver wheels
EDIT: Yup.
EDIT: Yup.
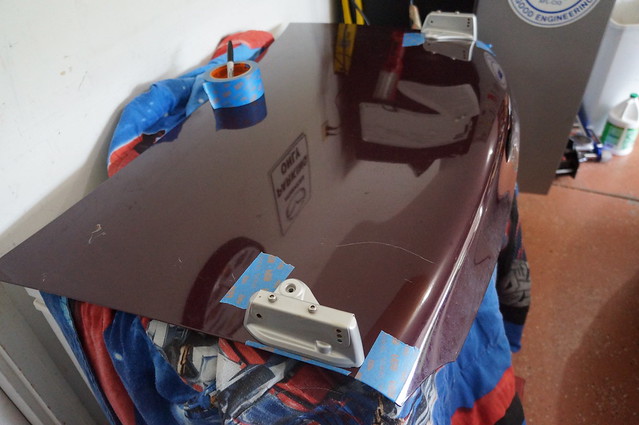
Started digging into mounting the wing. First I stripped everything off the trunk lid in preparation for painting. It was very hard getting the third brake light out, when it finally pulled free I found the foam gasket around it was badly deteriorated and was causing it to stick to the lid. Removed the license plate lights, Mazda emblem and striker. Took some acetone to remove the markings the junkyard had written on it (not sure why it had to be marked up so much, seems one spot would suffice). Then it was on to the always nerve-wracking drilling of holes in the bodywork.
First thing was to place the wing on the lid and get it in the proper position. There is a slight curve at the bottom which makes it easier to get it set in the right place fore and aft. I measured the distance side to side from the edge, that ended up being about 4 mm. I had to adjust slightly to get the same distance from the front edge of the lid (I measured to the nearest part of the bracket, that distance for me was 377 mm). Once I had that all laid out I used painter's tape to give me some reference points when I removed the assembly.
I went ahead and marked the hole for the forward fastener, it's a through hole so that was easy. Went ahead, center punched the marks and then drilled them out. I used a 3 mm for my starter hole, I didn't have any metric drill bits the right size so went to my standard drill index. In order to figure out which bit was the best match I drilled into a piece of scrap 2X4 and then tested the fit with a bolt. I ended up using 13/64" for my final size.
Next I took the brackets off the bottom of the wing:
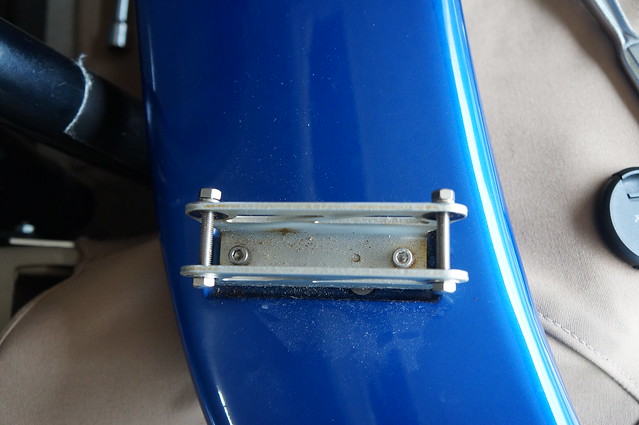
There are two small Allen-head screws holding the bracket into the bottom of the wing. Those attached to the trunk mounts with two through-bolts. The after bolt is the one used to adjust the angle of attack of the wing:

You can see the paint on the mounts isn't the greatest so I'll have to get those sprayed up.
Once I had the trunk mounts separate I made a couple of templates from them on thin cardboard. I used these to locate the other hole needed to mount them. Pretty basic so no pictures of that (hard to take a picture when you are drilling anyway). If you have done this correctly the front hole lines up with a hole on the inner stiffening frame of the trunk for access to the nut, and the rear one will be close to the outside edge. It would be a lot easier if you had the templates, but if you take your time it is possible without it.
First thing was to place the wing on the lid and get it in the proper position. There is a slight curve at the bottom which makes it easier to get it set in the right place fore and aft. I measured the distance side to side from the edge, that ended up being about 4 mm. I had to adjust slightly to get the same distance from the front edge of the lid (I measured to the nearest part of the bracket, that distance for me was 377 mm). Once I had that all laid out I used painter's tape to give me some reference points when I removed the assembly.
I went ahead and marked the hole for the forward fastener, it's a through hole so that was easy. Went ahead, center punched the marks and then drilled them out. I used a 3 mm for my starter hole, I didn't have any metric drill bits the right size so went to my standard drill index. In order to figure out which bit was the best match I drilled into a piece of scrap 2X4 and then tested the fit with a bolt. I ended up using 13/64" for my final size.
Next I took the brackets off the bottom of the wing:
There are two small Allen-head screws holding the bracket into the bottom of the wing. Those attached to the trunk mounts with two through-bolts. The after bolt is the one used to adjust the angle of attack of the wing:
You can see the paint on the mounts isn't the greatest so I'll have to get those sprayed up.
Once I had the trunk mounts separate I made a couple of templates from them on thin cardboard. I used these to locate the other hole needed to mount them. Pretty basic so no pictures of that (hard to take a picture when you are drilling anyway). If you have done this correctly the front hole lines up with a hole on the inner stiffening frame of the trunk for access to the nut, and the rear one will be close to the outside edge. It would be a lot easier if you had the templates, but if you take your time it is possible without it.
My wife told me today I should have the whole car painted the blue of the one I got, I love her dearly but she doesn't really understand about car stuff. Or my fixation with colors in the red spectrum (well she does, but she likes different things).
Right before I went back to work any readers may recall I had a leaking valve stem. Yesterday I found out I had another one. I tried replacing it today (I have a set of tire irons for motorcycles) but the sidewall is too stiff and I couldn't get access. I went and got my special wheels since I was going to change them out anyway, those are back on and the silver ones are sitting waiting for Monday when I can drop them off and get the 949 stems installed. Installed the driver's side rear sway bar link too that I took off for the last autocross. Since I'm posting in here already, I also renewed the tag today.
I was reading about people having issues running rich in boost similar to mine and someone said their IAT sensor had failed. I figured why not look at it and see if anything presented itself. I pulled that earlier, there was some discoloration on the upstream side of the plastic protector. I don't know how it was new, but the wire element inside was offset from center. I tried cleaning it with some MAF cleaner but it didn't really do anything. Just to be on the safe side I went ahead and ordered a replacement from DIY Autotune.
- :
- 2016 GT ST 47A
Its been a bad weather weekend so i havent fired the car up since Thursday night. We did need the rain though.
What color are you looking at Bruce? I like the Beryllium which only come in a 17x9 in the 5 bolt pattern. Just stuck on tire size. I feel a 245 is too much for a dd plus the rolling involved, 235 doesnt offer a big selection and 225 would be stretched.
Nice work on the trunk/spoiler Mike. I had th3 949 stems on my Konigs too and like them. Ordered some grey ones for my OEam wheels a few weeks ago. They match the finish quite well.
Sent from my Galaxy S7 Edge using Tapatalk
- :
- 92 & 16 Meyatas
Nothing, haven't driven it in 5 days [emoji30]
It's been in the shop getting a new 7500$ top and windshield
Sent from my iPhone using Tapatalk
It's been in the shop getting a new 7500$ top and windshield
Sent from my iPhone using Tapatalk
Similar threads
- Replies
- 5
- Views
- 754