
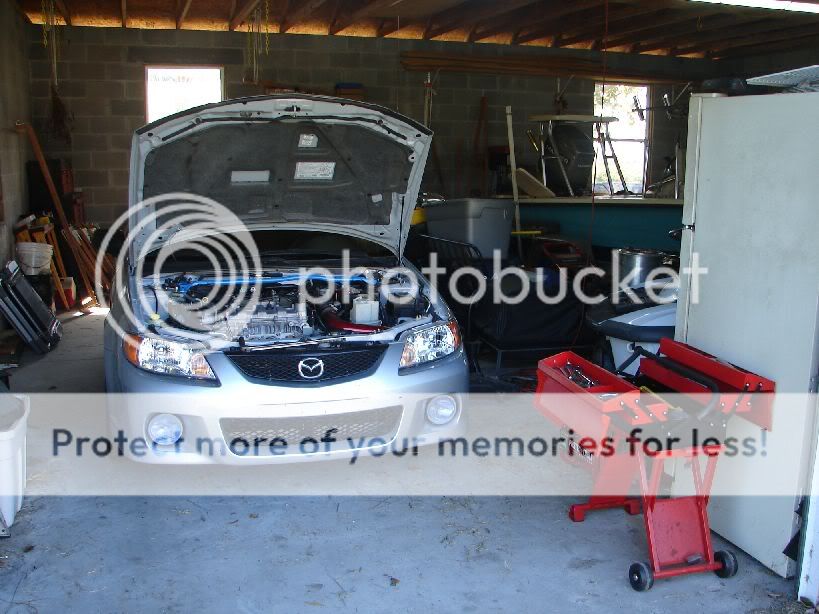
I spent a long time installing my set of goldline springs that I thought it would save others time by doing a full and in-depth write up on how to install lowering springs on a 3rd gen Protg, I have a DX so I have rear drums, but the same can be applied to rear calipers. I didnt make a note of what size sockets you need for each application but you will need a full set of metric sockets, a ratchet, adjustable wrench, breaker bar, coil strut spring compressors, pb blaster (WD40), jack, and two jack stands at the very least. A garage is also helpful.

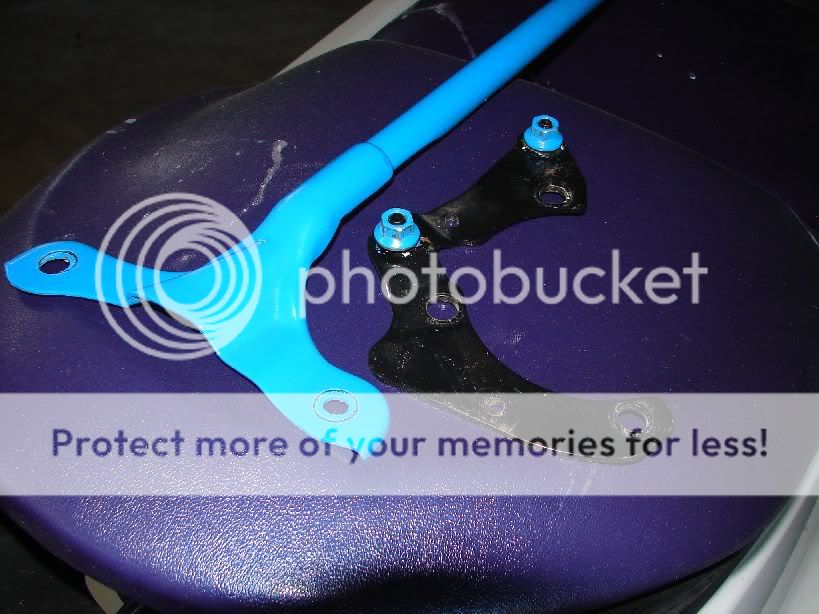
Before anything happens you will need to remove the front strut bar and brackets if you have one. Remove the two nuts on each end of the strut bar and remove the bar. Remove the 3 outer nuts holding down the brackets, remove the bracket and replace nuts by hand, they dont need to be tight, they just need to be on the threads to hold the strut in place until its time to drop them out. With the breaker bar break loose the center nut on the top of the strut, only about half a turn at the mostyou will be glad you did later.
I only have 2 jack stands so I am doing the fronts first then the rears. Use breaker bar to break free the lug nuts on both front tires. Place the jack behind the front left tire at the jack point, jack up until the jack stand fits under and place behind the jack as close to possible to the jack point. Slowly lower the car onto the jack stand and repeat on the right front.
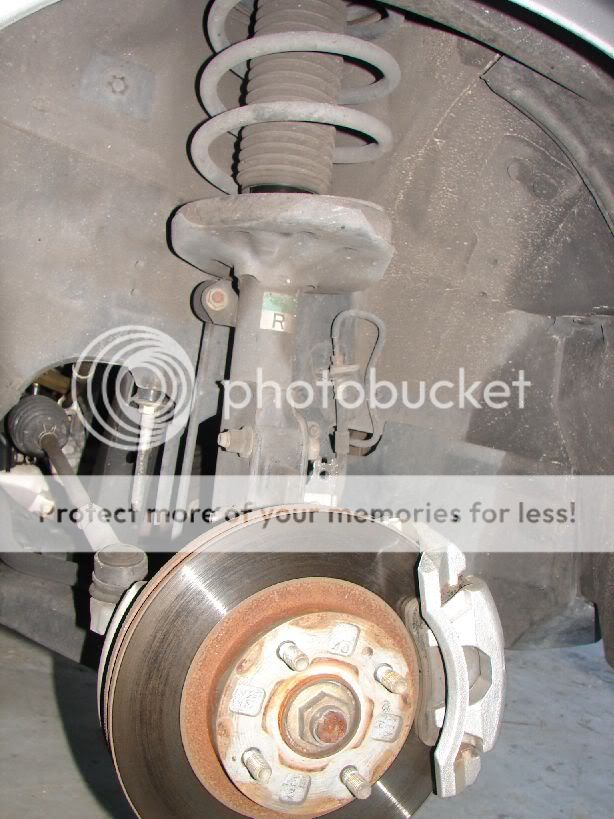
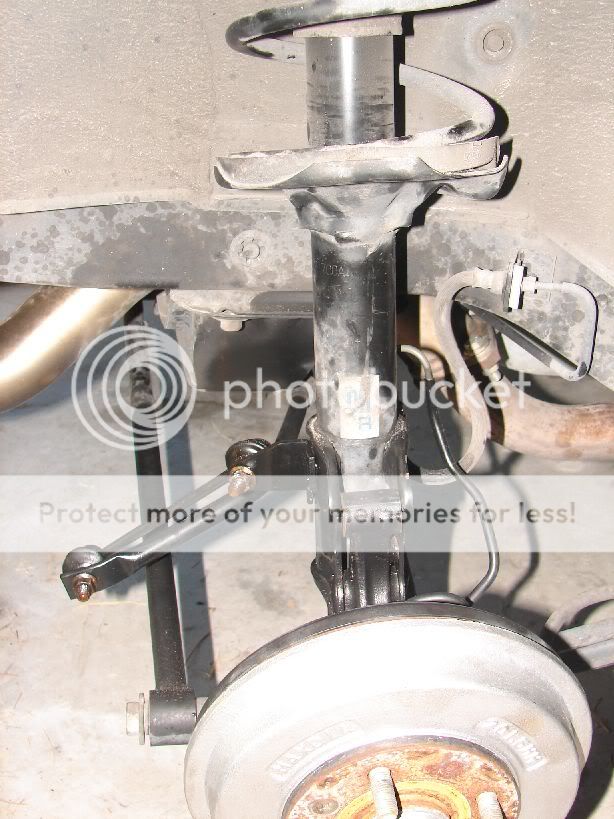
With the tires up in the air you can now remove the lugs and wheels. Set aside and make note of which side they came off of, extra important with directional tires. Once the wheels are removed it will look like this.
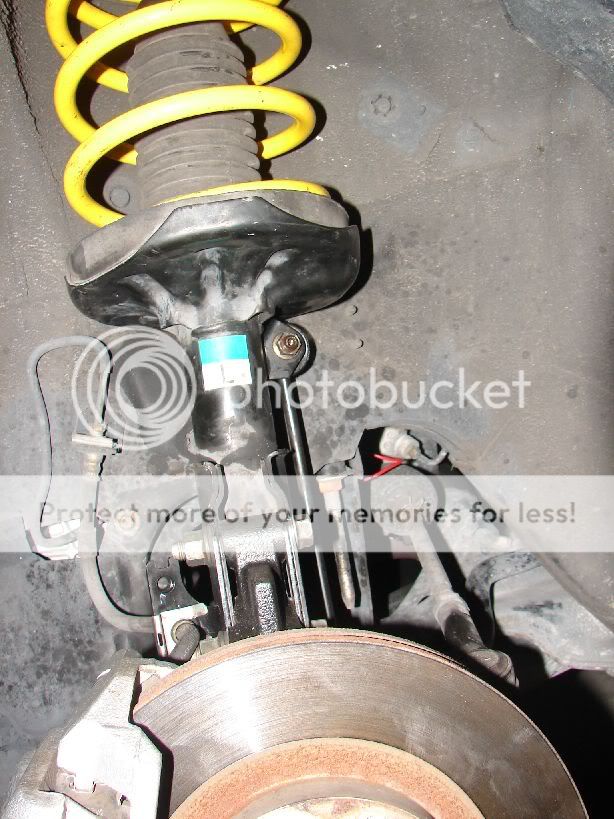
Remove the clip holding the break line to the strut and remove the line from the strut.
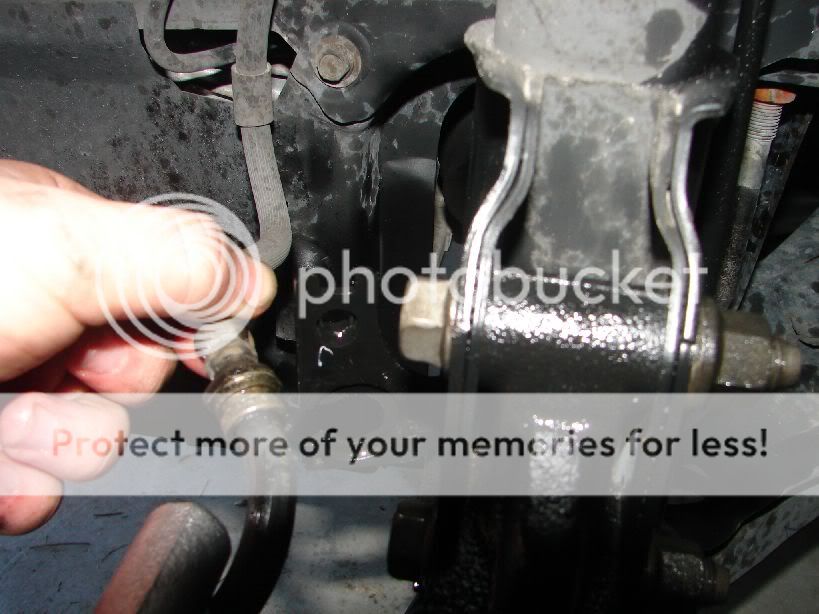
Spray the top end link nut with pb blaster or WD40 to help remove rust and hopefully loosen up the nut, let soak for at least 30 mins. Remove the top end link nut connected to the front side of the strut. Pull end link back and move up out of the way from the strut. Remove the two blots holding the hub to the outside of the strut. If need be lightly tap the bolts with a screwdriver and hammer to help remove them once the nut and washer is removed. At this point the only thing holding the strut up is the top 4 nuts you left where the strut bar bracket was. While holding onto the strut reach up and remove the 4 nuts, the strut assembly will fall out and be able to be removed from the wheel well.
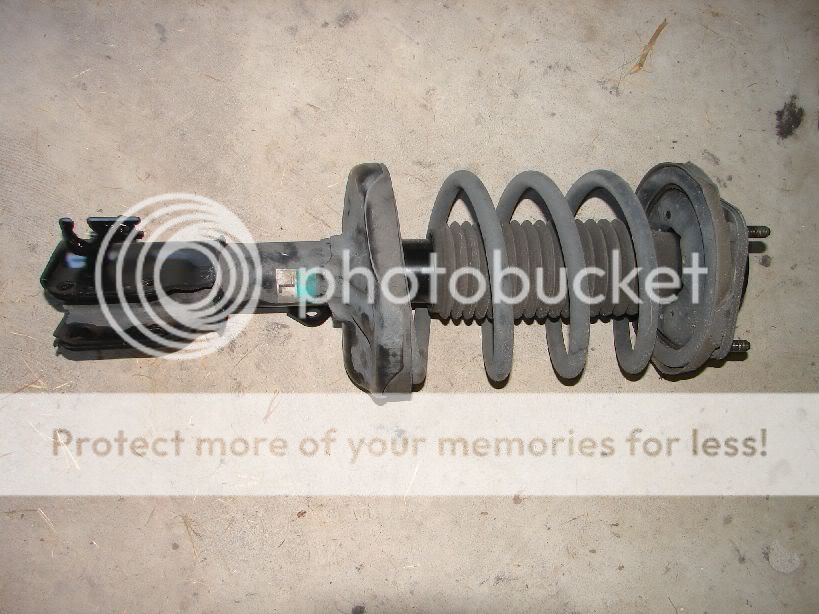
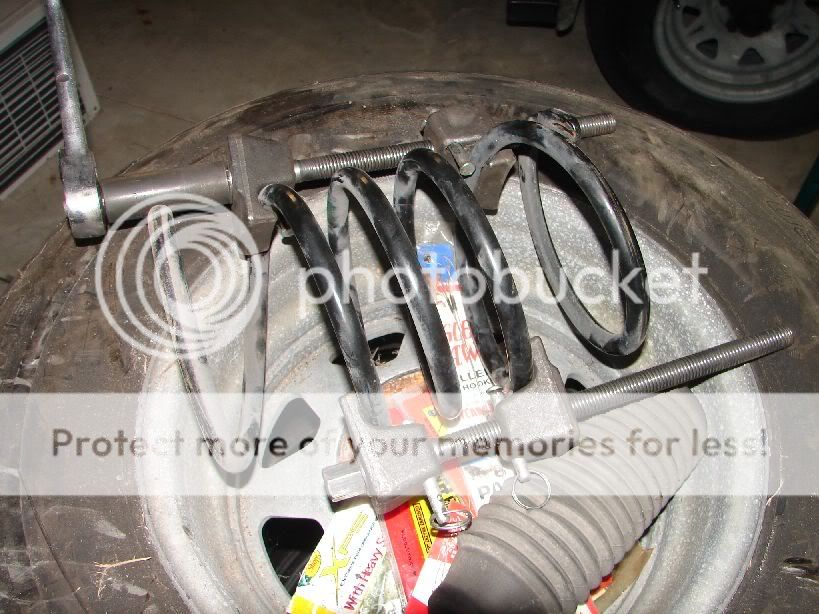
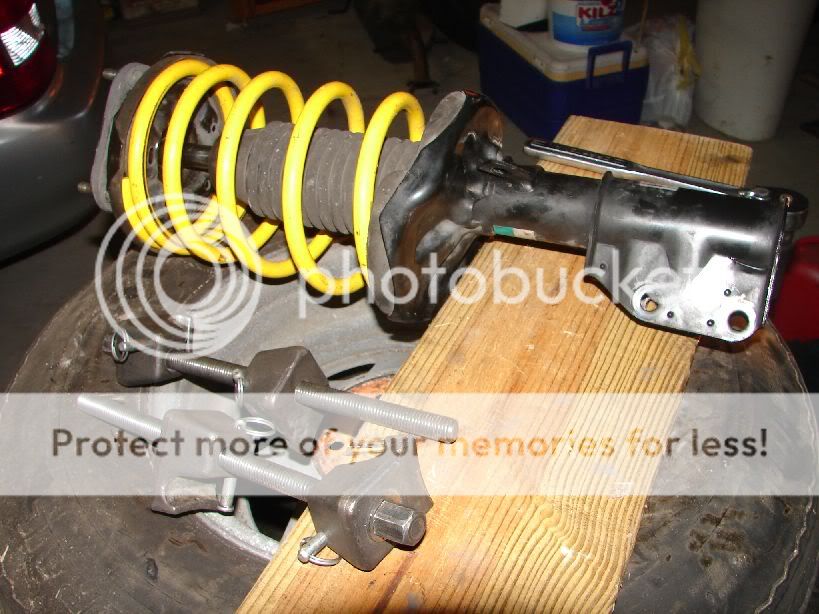
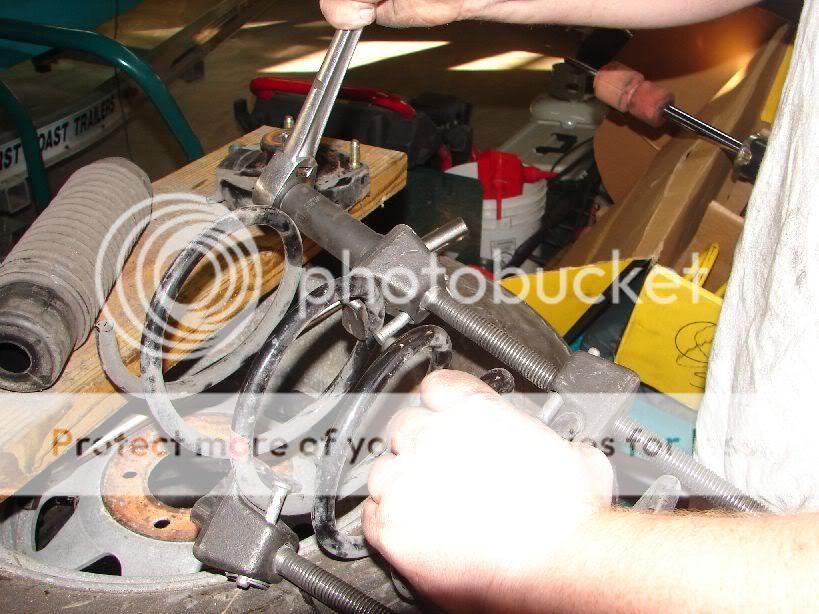
With the strut assembly fully removed from the wheel well take it to a workbench (or in my case a stack of tires lol) so it will be easier to work with. Attach the spring compressors to opposite sides of the springs and follow the specific compressors instructions on how to compress the spring. Once the tension is off of the top of the strut you are ready to remove the nut at the very top of the strut. Remove the top plate and the spring. Remove the spring compressors in the opposite manner in which they were compressed.
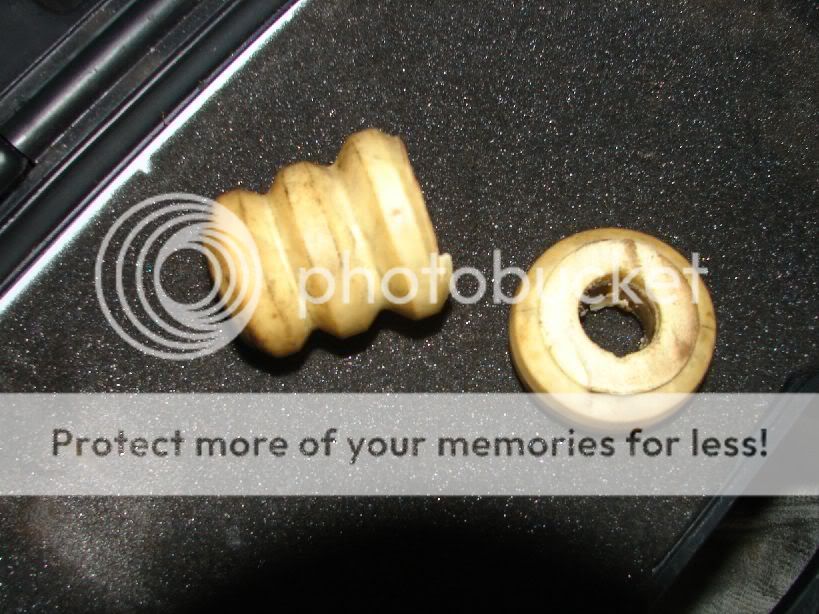
Remove the strut accordion piece to get to the bump stop, remove the bump stop and cut off one notch on the large end.
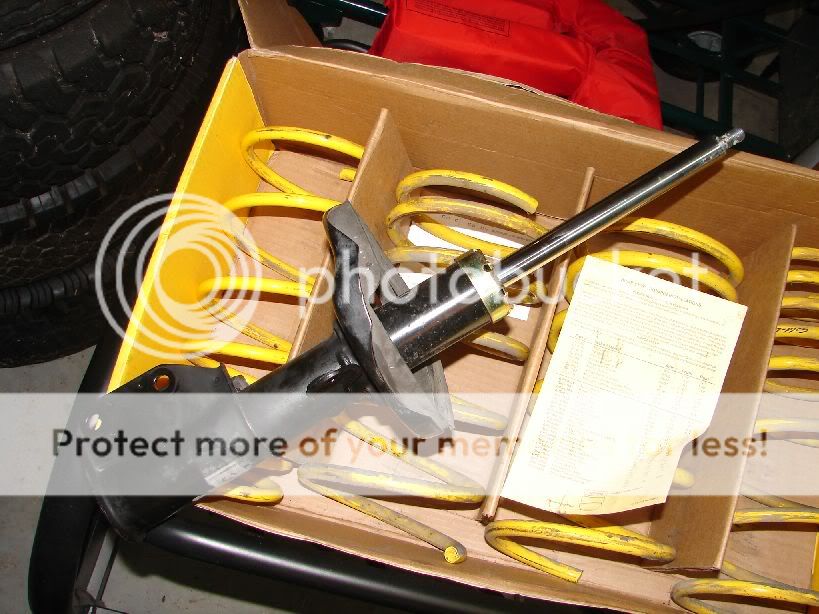
Compress the new front springs just enough to get clearance to replace the strut top. Replace the cut bump stop and accordion piece onto the strut. Position the new spring onto the strut. The side with the larger gap in the end should be at the bottom. Place strut cap back in place and replace the top strut nut. Uncompress the new spring and your ready to reinstall the strut!
Turn the top plate so the white dot on the strut cap is facing the outside rear top strut mount hole, for those with the strut bar it should be facing the one hole that the bracket doesnt cover. Slide strut assembly back up into place and replace the four strut tower nuts. Replace the break line and clip, the two blots for the hub and the one for the end link.
Repeat process on the opposite side, once you are to this point on both fronts you can reinstall the strut bar brackets and the strut bar, making sure all nuts are tight, including the center strut nut. Reinstall both front wheels and tighten the lugs by hand. Remove jack stands one at a time in reverse order in which you put them in. Use the breaker bar and completely tighten the lugs on both wheels.
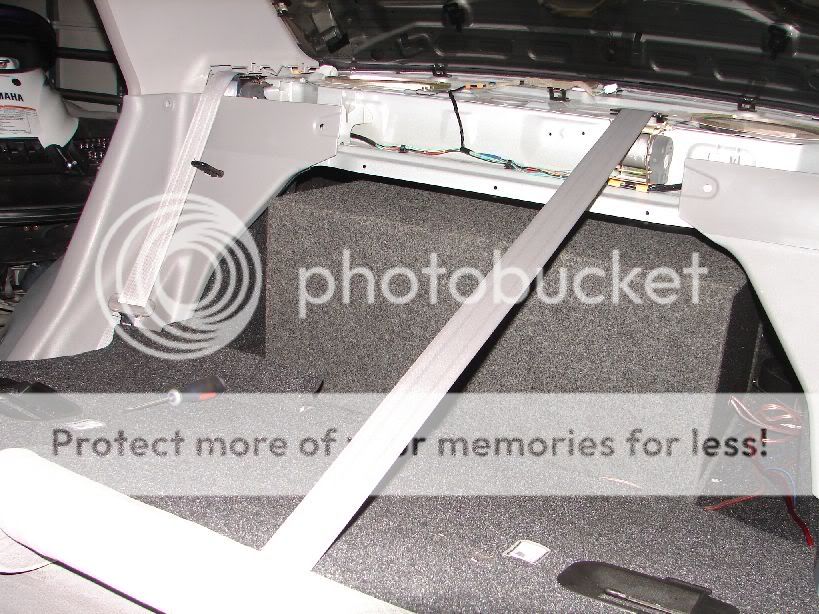
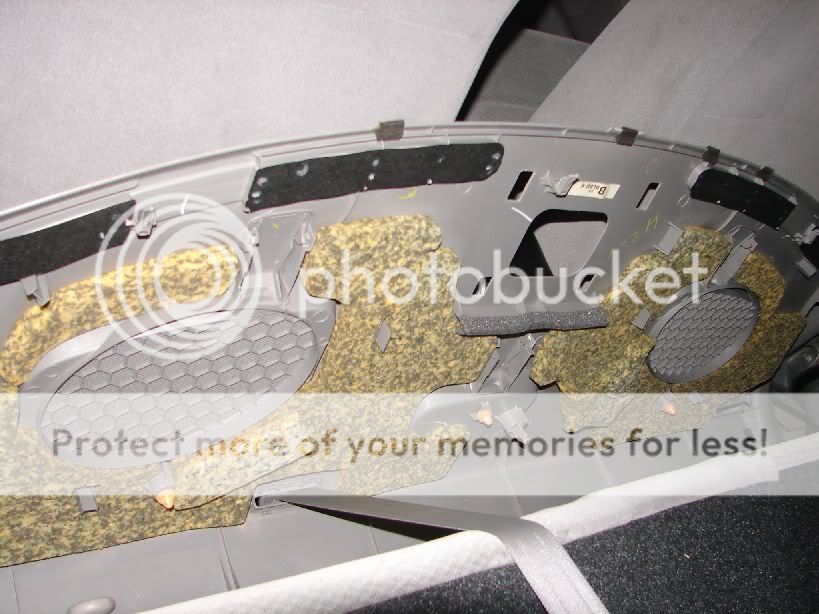
Front are done! But we are only half way done with this project, this may be a good time to go pick up lunch or take the rest of the day off and finish tomorrow. Oktime for the rears. You are going to have to get inside the car and fold foreword the back seats. There will be a few clips holding down the plastic panel above the rear speakers, pop them out as well as remove the third tail light from behind the window and disconnect it. Pull up with your hand in the hole you just found when taking the tail light off and give it a few pulls from the front, it should come right up. The two side seat belts can be slid out the sides of the panel, the center one may be left where it is. I took the panel and placed it in front of the seats so it was out of the way.
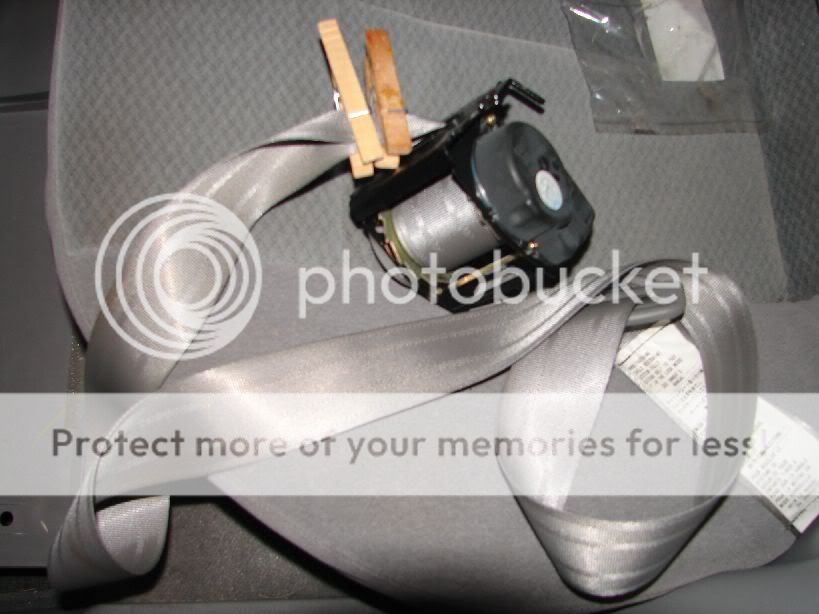
You will need to remove the seatbelt assembly to access the top of the rear strut fully, just remove the one bolt and it will be loose. Be sure to pull out about 5 feet of the belt and place clothe hanger clips or the such on the belt to stop if from retracting. Set detached belts aside.
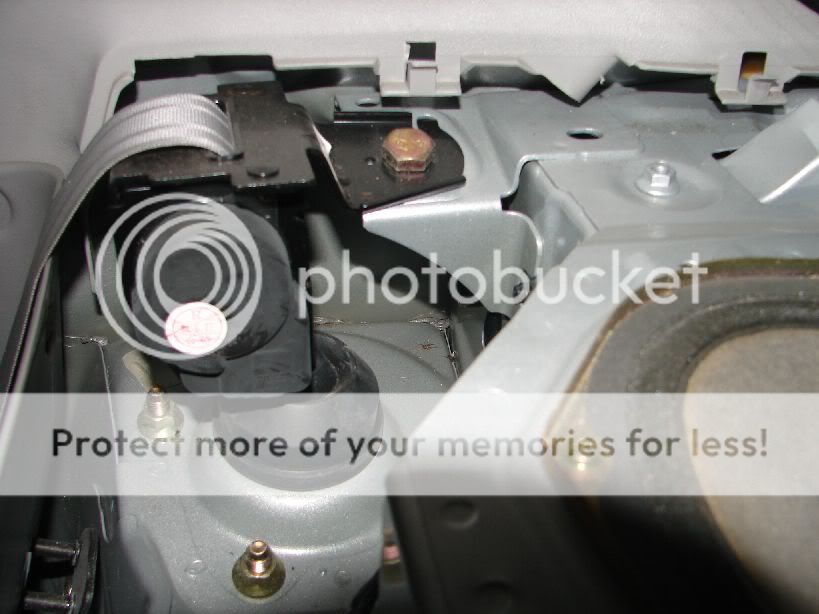
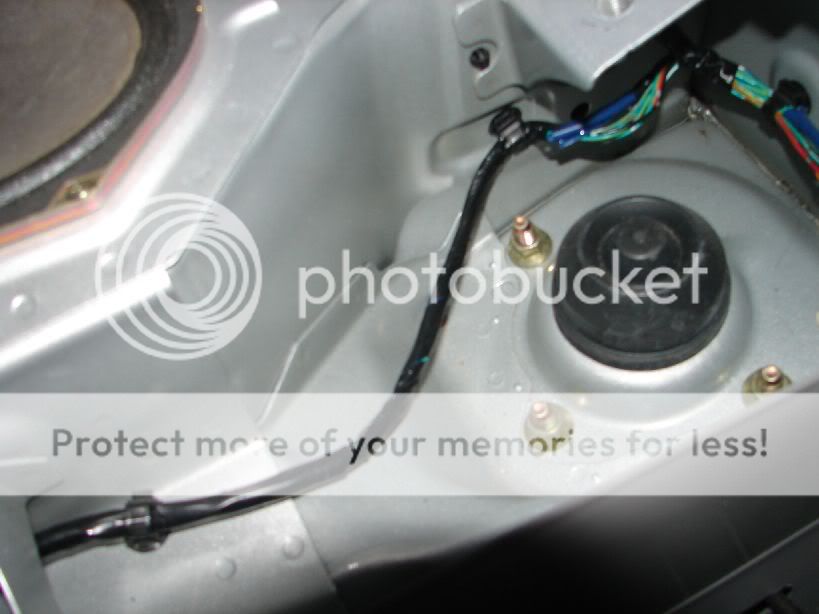
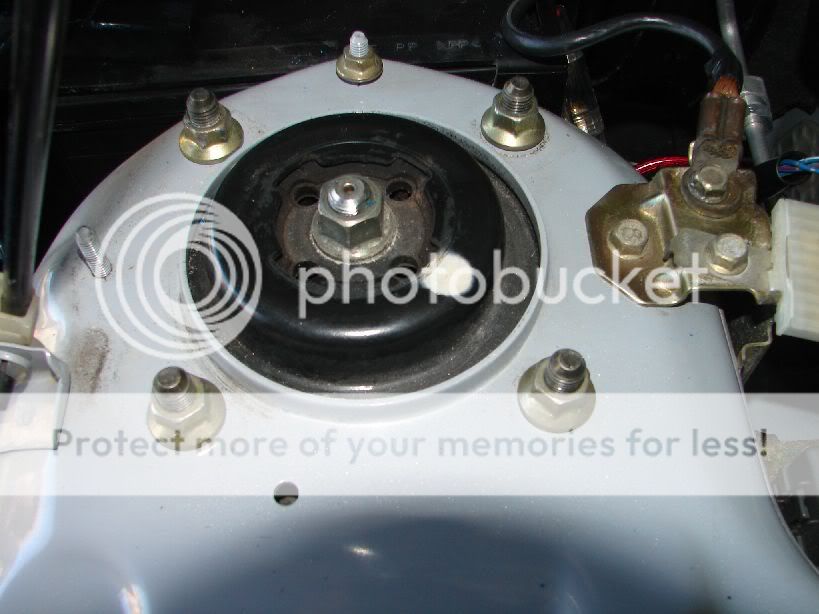
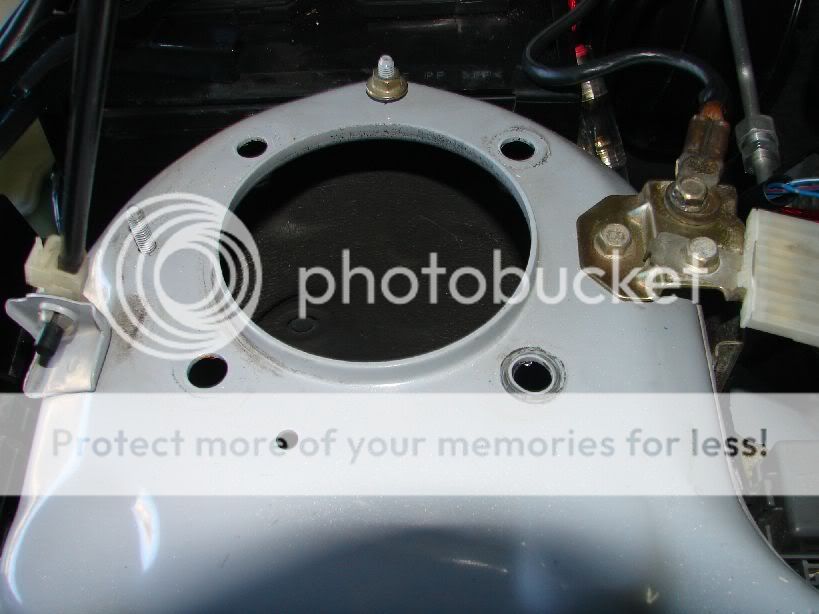
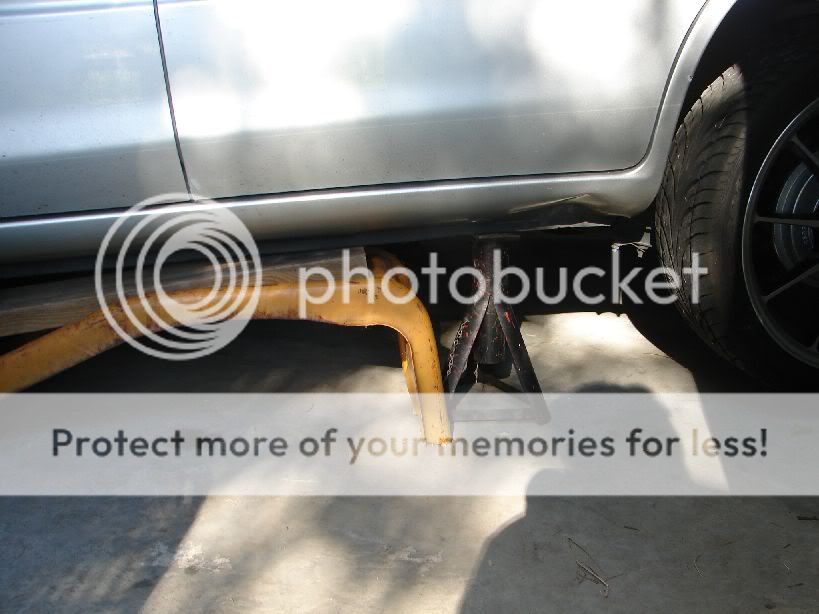
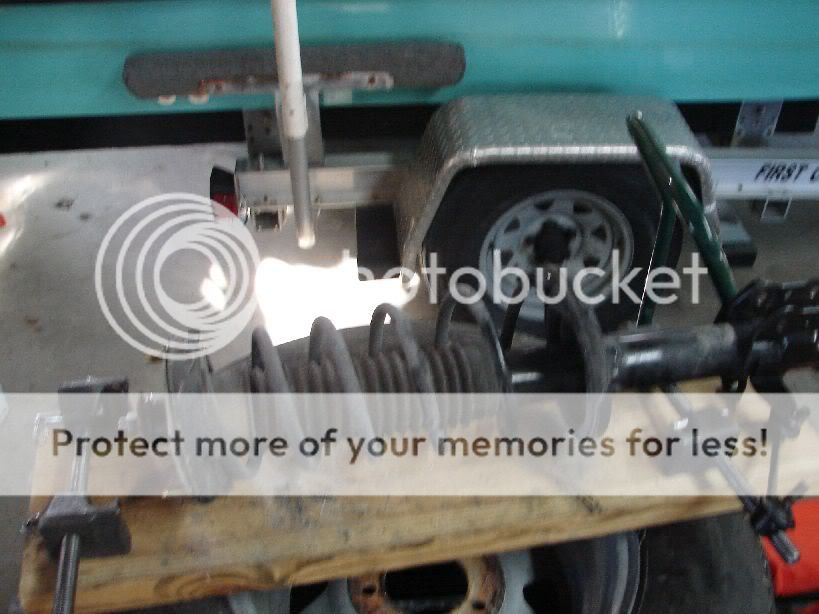
Remove rubber cover in above pic and set aside so you will have access to the top strut nut. Break loose the center nut just as you did in the front, it makes it a lot easier to remove later, trust me! Loosen the three strut nuts as well just as you had on the front. Now its time to jack up the rear of the car, break loose the lugs and follow the same procedure as the fronts for placing the jack stands, placement pic below. (any extra safety that can prevent the car from falling off the jack stands wont hurt one bit)
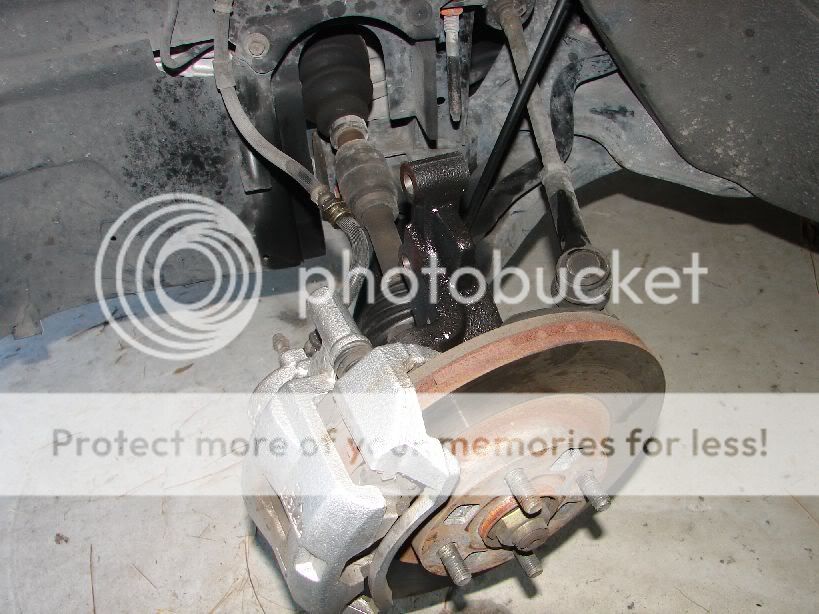
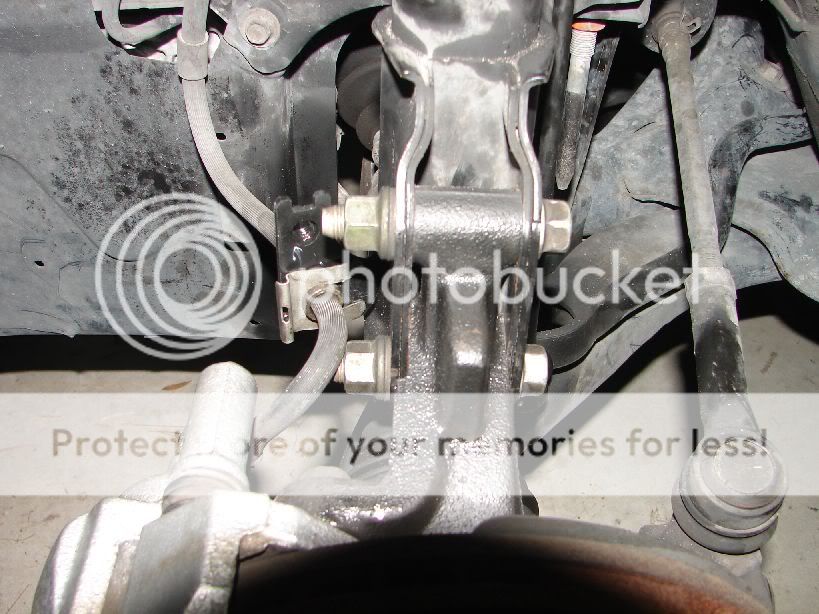
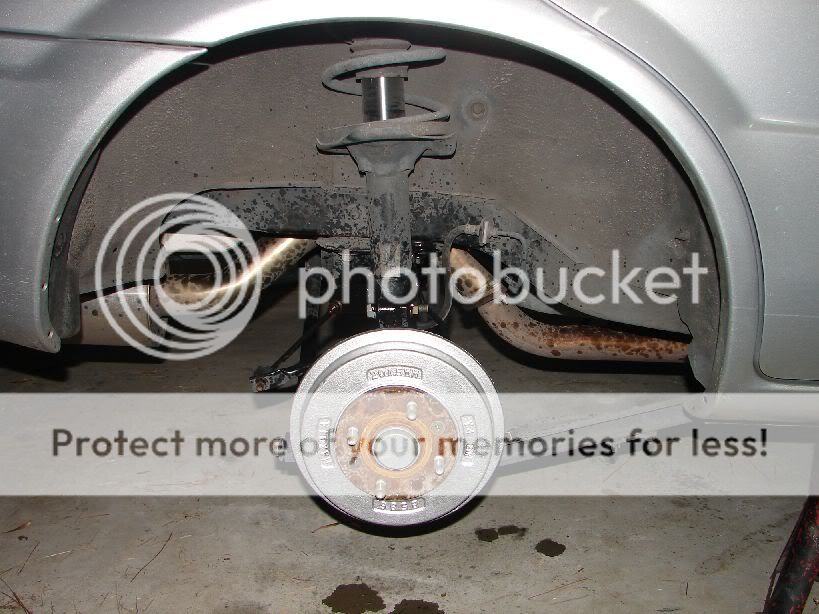
Remove the wheel and if you have a DX like me this is what you should see. (obviously someone went crazy with the WD40 lol)
Soak the end link nuts as you did on the fronts. I didnt have any problems with them on the front, but on the rear they couldnt have possibly given me any more problems than they did. Try and do your best not to strip the nuts like I did.

Remove the remaining hub bolts as on the fronts. The brake line and clip also need to be removed but they are on the inside of the strut this time.
Once you have everything below removed remove the three bolts inside the car at the top of the strut to drop it loose. Once removed you should have this
The rear is a bit different than the fronts, a few extra things and a different looking bump stop. Compress the spring just as you did with the fronts, the rears dont have to be compressed as much to be taken off though. Once the springs appears to be loose start to remove the top nutnow arent you glad you broke it loose before? If the center shaft of the strut starts to rotate with the nut grab some pliers and get a grip on the medal plate right under the nut. It should stop it from spinning, allowing the nut to be removed, if that doesnt help just grab the strut shaft and remove the nut. Pull off the strut cap and spring. Uncompress the spring.
Damn the rears were dirty! Now the interesting part, the new springs may not need to be compressed to be able to replace the cap, mine did not need compressed. Put the strut assembly back together with the new spring. Make sure you line up the top threads correct because they dont spin with the top strut bolt all the way tight so leave it loose a bit. For the right side the center of the 3 threads should be positioned at 1 oclock to the outside of the car, it will be 11 oclock for the left side. Replace the strut assembly into the wheel well and place the top strut nuts in place to help hold it up. Replace brake line and clip, end link nut, and the two blots holding the hub. Lift up on the strut and tighten the top three nuts inside the car at the top of the strut, then tighten the center strut nut as well. You may need someone to help hold the center strut rod so it doesnt rotate as you try to tighten the nut fully.
Repeat process for rears on the other side.
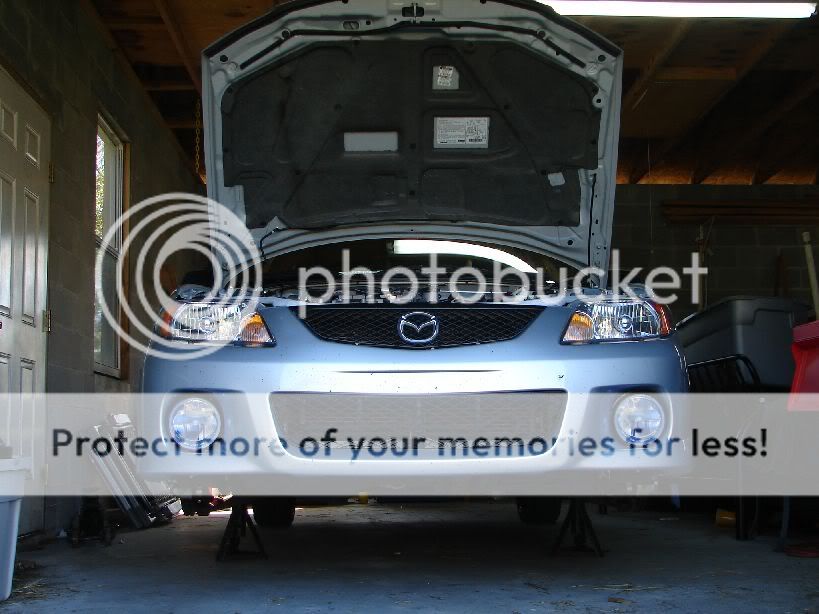
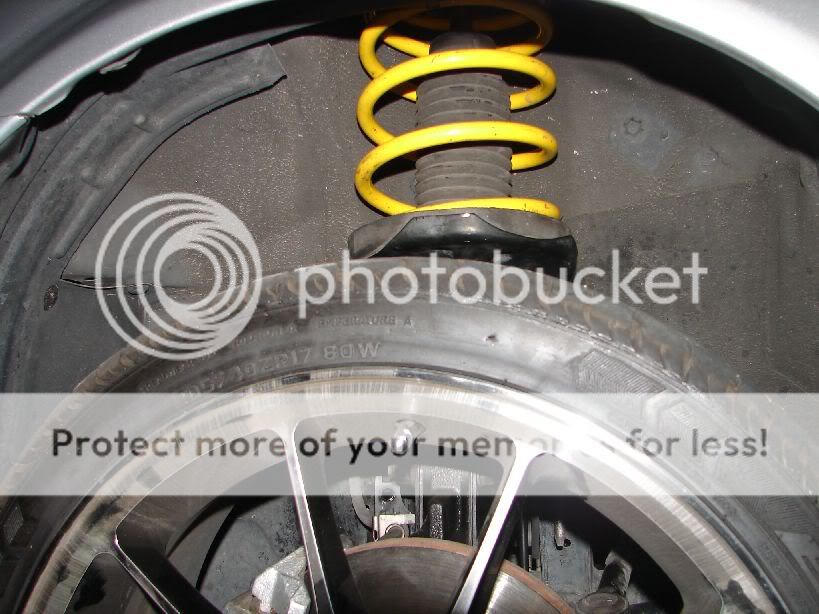
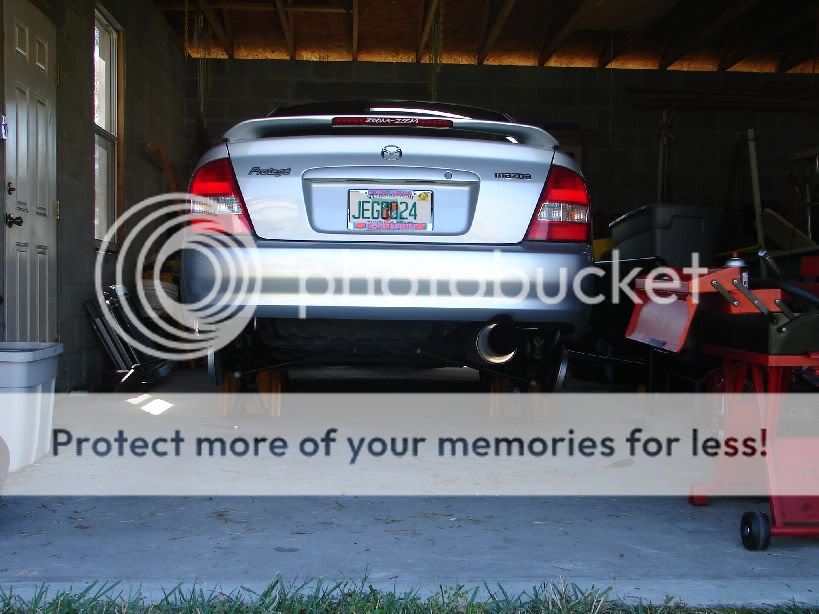
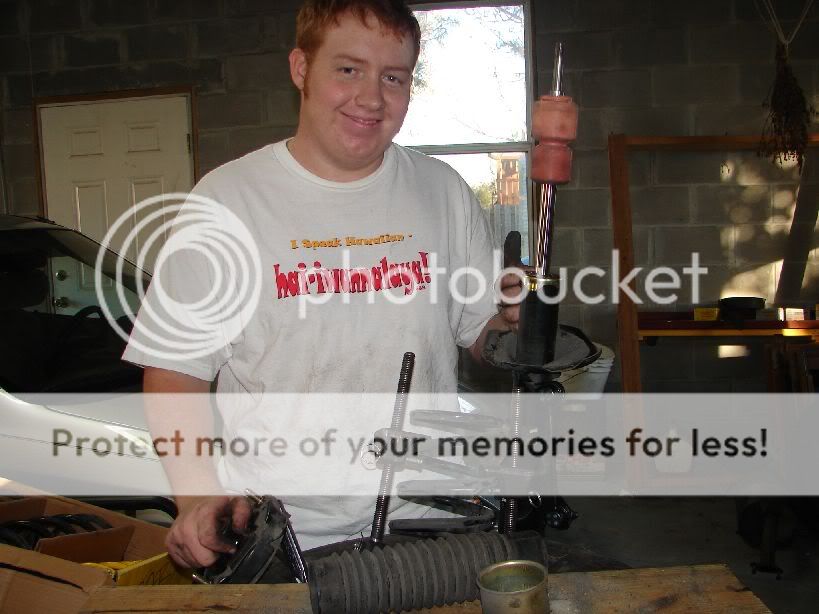
Once everything is nice and tight replace the wheels and remove the car from the jack stands in the same manner as the fronts. Dont forget to fully tighten the lugs once the car is on the ground again. Once this is done its time to put the interior back together, its rather simple as long as you make note of how you removed everything. Now drive straight to a tire shop and get an alignment, no test drive or any of that, your test drive will be to the tire shop! Now I guess I owe you pics of my lowered ride? Well it was almost past dusk when I was finished but here are a few teaser pics until I get her washed and aligned in the morning.


I will have daytime pics posted up tomorrow, hope this helps anyone wanting to do this project them selves. If anyone has any questions about the install or if you think I missed anything let me know. Enjoy!
Before anything happens you will need to remove the front strut bar and brackets if you have one. Remove the two nuts on each end of the strut bar and remove the bar. Remove the 3 outer nuts holding down the brackets, remove the bracket and replace nuts by hand, they dont need to be tight, they just need to be on the threads to hold the strut in place until its time to drop them out. With the breaker bar break loose the center nut on the top of the strut, only about half a turn at the mostyou will be glad you did later.
I only have 2 jack stands so I am doing the fronts first then the rears. Use breaker bar to break free the lug nuts on both front tires. Place the jack behind the front left tire at the jack point, jack up until the jack stand fits under and place behind the jack as close to possible to the jack point. Slowly lower the car onto the jack stand and repeat on the right front.
With the tires up in the air you can now remove the lugs and wheels. Set aside and make note of which side they came off of, extra important with directional tires. Once the wheels are removed it will look like this.
Remove the clip holding the break line to the strut and remove the line from the strut.
Spray the top end link nut with pb blaster or WD40 to help remove rust and hopefully loosen up the nut, let soak for at least 30 mins. Remove the top end link nut connected to the front side of the strut. Pull end link back and move up out of the way from the strut. Remove the two blots holding the hub to the outside of the strut. If need be lightly tap the bolts with a screwdriver and hammer to help remove them once the nut and washer is removed. At this point the only thing holding the strut up is the top 4 nuts you left where the strut bar bracket was. While holding onto the strut reach up and remove the 4 nuts, the strut assembly will fall out and be able to be removed from the wheel well.
With the strut assembly fully removed from the wheel well take it to a workbench (or in my case a stack of tires lol) so it will be easier to work with. Attach the spring compressors to opposite sides of the springs and follow the specific compressors instructions on how to compress the spring. Once the tension is off of the top of the strut you are ready to remove the nut at the very top of the strut. Remove the top plate and the spring. Remove the spring compressors in the opposite manner in which they were compressed.
Remove the strut accordion piece to get to the bump stop, remove the bump stop and cut off one notch on the large end.
Compress the new front springs just enough to get clearance to replace the strut top. Replace the cut bump stop and accordion piece onto the strut. Position the new spring onto the strut. The side with the larger gap in the end should be at the bottom. Place strut cap back in place and replace the top strut nut. Uncompress the new spring and your ready to reinstall the strut!
Turn the top plate so the white dot on the strut cap is facing the outside rear top strut mount hole, for those with the strut bar it should be facing the one hole that the bracket doesnt cover. Slide strut assembly back up into place and replace the four strut tower nuts. Replace the break line and clip, the two blots for the hub and the one for the end link.
Repeat process on the opposite side, once you are to this point on both fronts you can reinstall the strut bar brackets and the strut bar, making sure all nuts are tight, including the center strut nut. Reinstall both front wheels and tighten the lugs by hand. Remove jack stands one at a time in reverse order in which you put them in. Use the breaker bar and completely tighten the lugs on both wheels.
Front are done! But we are only half way done with this project, this may be a good time to go pick up lunch or take the rest of the day off and finish tomorrow. Oktime for the rears. You are going to have to get inside the car and fold foreword the back seats. There will be a few clips holding down the plastic panel above the rear speakers, pop them out as well as remove the third tail light from behind the window and disconnect it. Pull up with your hand in the hole you just found when taking the tail light off and give it a few pulls from the front, it should come right up. The two side seat belts can be slid out the sides of the panel, the center one may be left where it is. I took the panel and placed it in front of the seats so it was out of the way.
You will need to remove the seatbelt assembly to access the top of the rear strut fully, just remove the one bolt and it will be loose. Be sure to pull out about 5 feet of the belt and place clothe hanger clips or the such on the belt to stop if from retracting. Set detached belts aside.
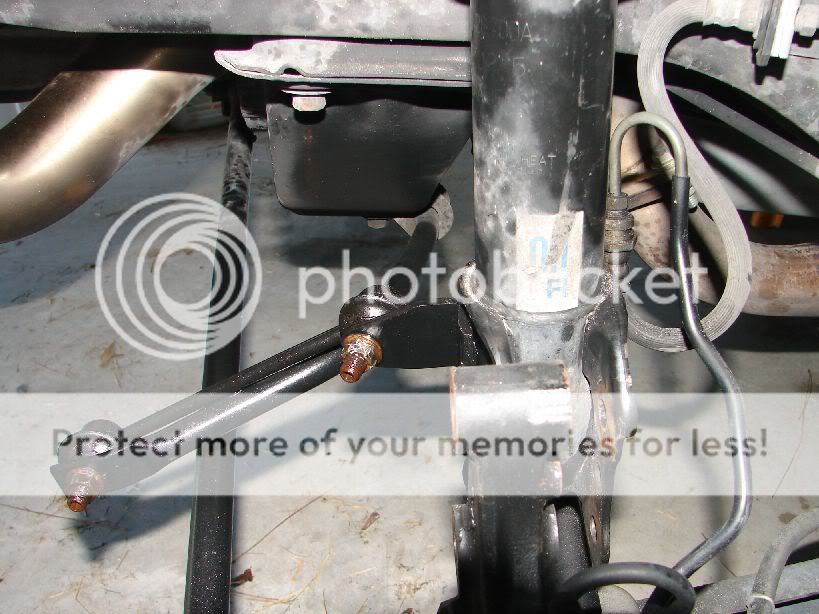
Remove rubber cover in above pic and set aside so you will have access to the top strut nut. Break loose the center nut just as you did in the front, it makes it a lot easier to remove later, trust me! Loosen the three strut nuts as well just as you had on the front. Now its time to jack up the rear of the car, break loose the lugs and follow the same procedure as the fronts for placing the jack stands, placement pic below. (any extra safety that can prevent the car from falling off the jack stands wont hurt one bit)
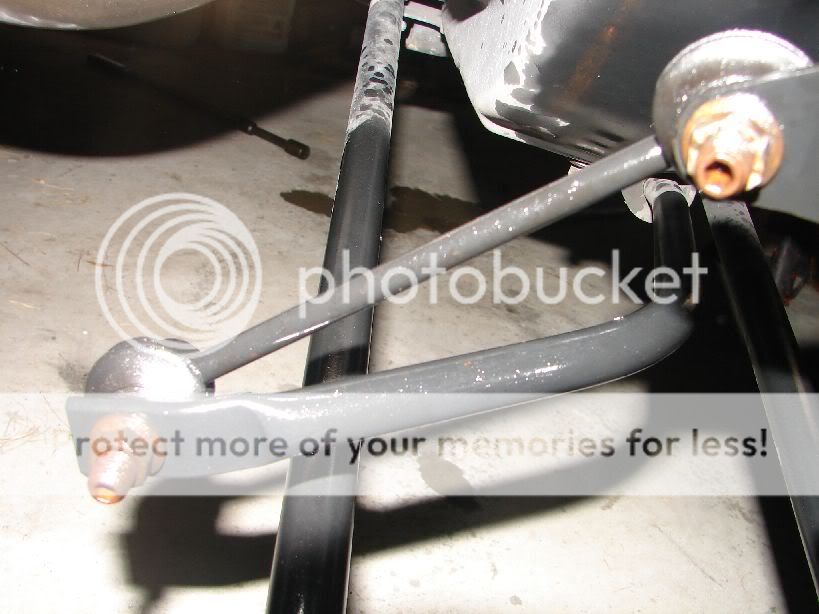
Remove the wheel and if you have a DX like me this is what you should see. (obviously someone went crazy with the WD40 lol)
Soak the end link nuts as you did on the fronts. I didnt have any problems with them on the front, but on the rear they couldnt have possibly given me any more problems than they did. Try and do your best not to strip the nuts like I did.
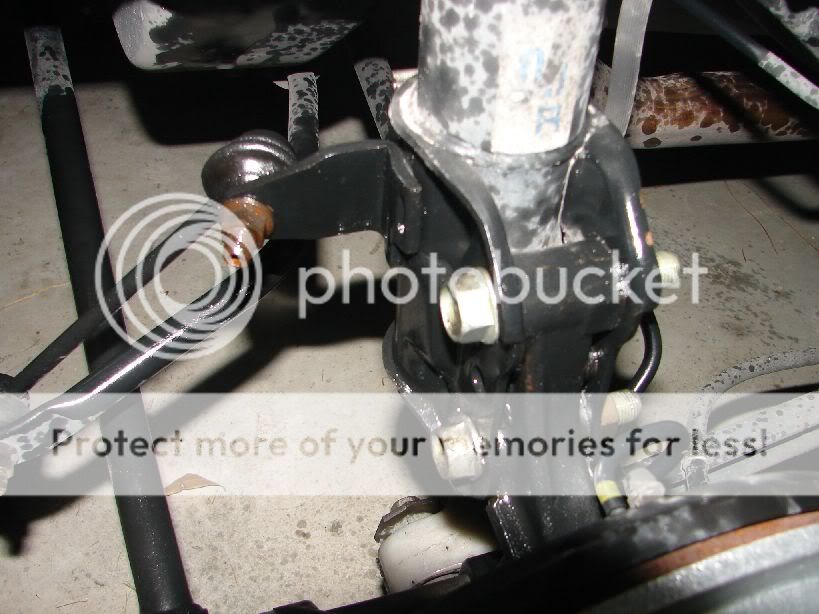
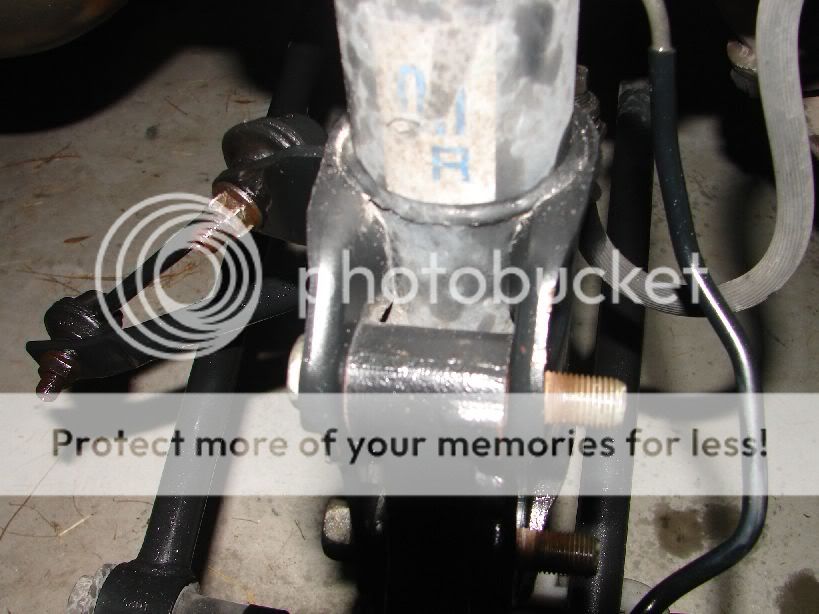
Remove the remaining hub bolts as on the fronts. The brake line and clip also need to be removed but they are on the inside of the strut this time.
Once you have everything below removed remove the three bolts inside the car at the top of the strut to drop it loose. Once removed you should have this
The rear is a bit different than the fronts, a few extra things and a different looking bump stop. Compress the spring just as you did with the fronts, the rears dont have to be compressed as much to be taken off though. Once the springs appears to be loose start to remove the top nutnow arent you glad you broke it loose before? If the center shaft of the strut starts to rotate with the nut grab some pliers and get a grip on the medal plate right under the nut. It should stop it from spinning, allowing the nut to be removed, if that doesnt help just grab the strut shaft and remove the nut. Pull off the strut cap and spring. Uncompress the spring.
Damn the rears were dirty! Now the interesting part, the new springs may not need to be compressed to be able to replace the cap, mine did not need compressed. Put the strut assembly back together with the new spring. Make sure you line up the top threads correct because they dont spin with the top strut bolt all the way tight so leave it loose a bit. For the right side the center of the 3 threads should be positioned at 1 oclock to the outside of the car, it will be 11 oclock for the left side. Replace the strut assembly into the wheel well and place the top strut nuts in place to help hold it up. Replace brake line and clip, end link nut, and the two blots holding the hub. Lift up on the strut and tighten the top three nuts inside the car at the top of the strut, then tighten the center strut nut as well. You may need someone to help hold the center strut rod so it doesnt rotate as you try to tighten the nut fully.
Repeat process for rears on the other side.
Once everything is nice and tight replace the wheels and remove the car from the jack stands in the same manner as the fronts. Dont forget to fully tighten the lugs once the car is on the ground again. Once this is done its time to put the interior back together, its rather simple as long as you make note of how you removed everything. Now drive straight to a tire shop and get an alignment, no test drive or any of that, your test drive will be to the tire shop! Now I guess I owe you pics of my lowered ride? Well it was almost past dusk when I was finished but here are a few teaser pics until I get her washed and aligned in the morning.
I will have daytime pics posted up tomorrow, hope this helps anyone wanting to do this project them selves. If anyone has any questions about the install or if you think I missed anything let me know. Enjoy!
Last edited:
") Anything to help out my fellow protege owners!
Anything to help out my fellow protege owners!